How to Plant Potatoes: A Complete Guide for Home Gardeners
Growing your own potatoes can be incredibly rewarding. Whether you have a small container garden on your patio, a dedicated garden bed, or a larger plot of land, potatoes are versatile crops that thrive in various conditions. This comprehensive guide will walk you through everything you need to know about planting potatoes in the United States, from preparation to harvest.
Why Grow Your Own Potatoes?
Before diving into the planting process, let’s understand why growing potatoes at home is worth your time:
- Fresh, homegrown potatoes have superior flavor compared to store-bought varieties
- You can grow specialty varieties not commonly found in supermarkets
- Growing your own reduces grocery costs, especially important with rising food prices
- Complete control over pesticide use and growing methods
- According to the USDA Agricultural Marketing Service, the U.S. potato market value exceeds $4 billion annually, showing the crop’s importance in American agriculture
When to Plant Potatoes in the US
Timing is crucial when planting potatoes. The ideal planting time varies across different U.S. regions:
| U.S. Region | Recommended Planting Time | Average First Harvest | Popular Varieties |
|---|---|---|---|
| Northeast | 2-3 weeks before last frost | Late June – July | Kennebec, Red Norland |
| Southeast | January – March | May – June | Yukon Gold, Red Pontiac |
| Midwest | April – early May | July – August | Russet, Superior |
| Southwest | February – March | May – June | Fingerling, Yellow Finn |
| Northwest | March – April | July – August | German Butterball, Purple Majesty |
For specific frost dates in your area, the USDA Plant Hardiness Zone Map is an excellent reference tool.
Selecting Seed Potatoes
The foundation of a successful potato crop begins with high-quality seed potatoes. Here’s what you need to know:

What Are Seed Potatoes?
Seed potatoes aren’t actually seeds but rather small potatoes certified to be disease-free and suitable for planting. Using proper seed potatoes rather than grocery store potatoes is crucial because:
- They’re certified disease-free, reducing the risk of introducing pathogens into your soil
- They haven’t been treated with sprout inhibitors (common in store-bought potatoes)
- They’re selected for their vigor and productivity
You can purchase seed potatoes from garden centers, agricultural supply stores, or online retailers. The USDA’s National Organic Program recommends using certified organic seed potatoes if you’re aiming for organic production.
How to Plant Potatoes at Home (Container Growing)
Even with limited space, you can still enjoy homegrown potatoes. Container growing is perfect for patios, balconies, or small yards.
Materials Needed:
- Large containers (at least 5 gallons)
- Seed potatoes
- Quality potting soil mixed with compost
- Organic fertilizer
- Container with drainage holes
Step-by-Step Process:
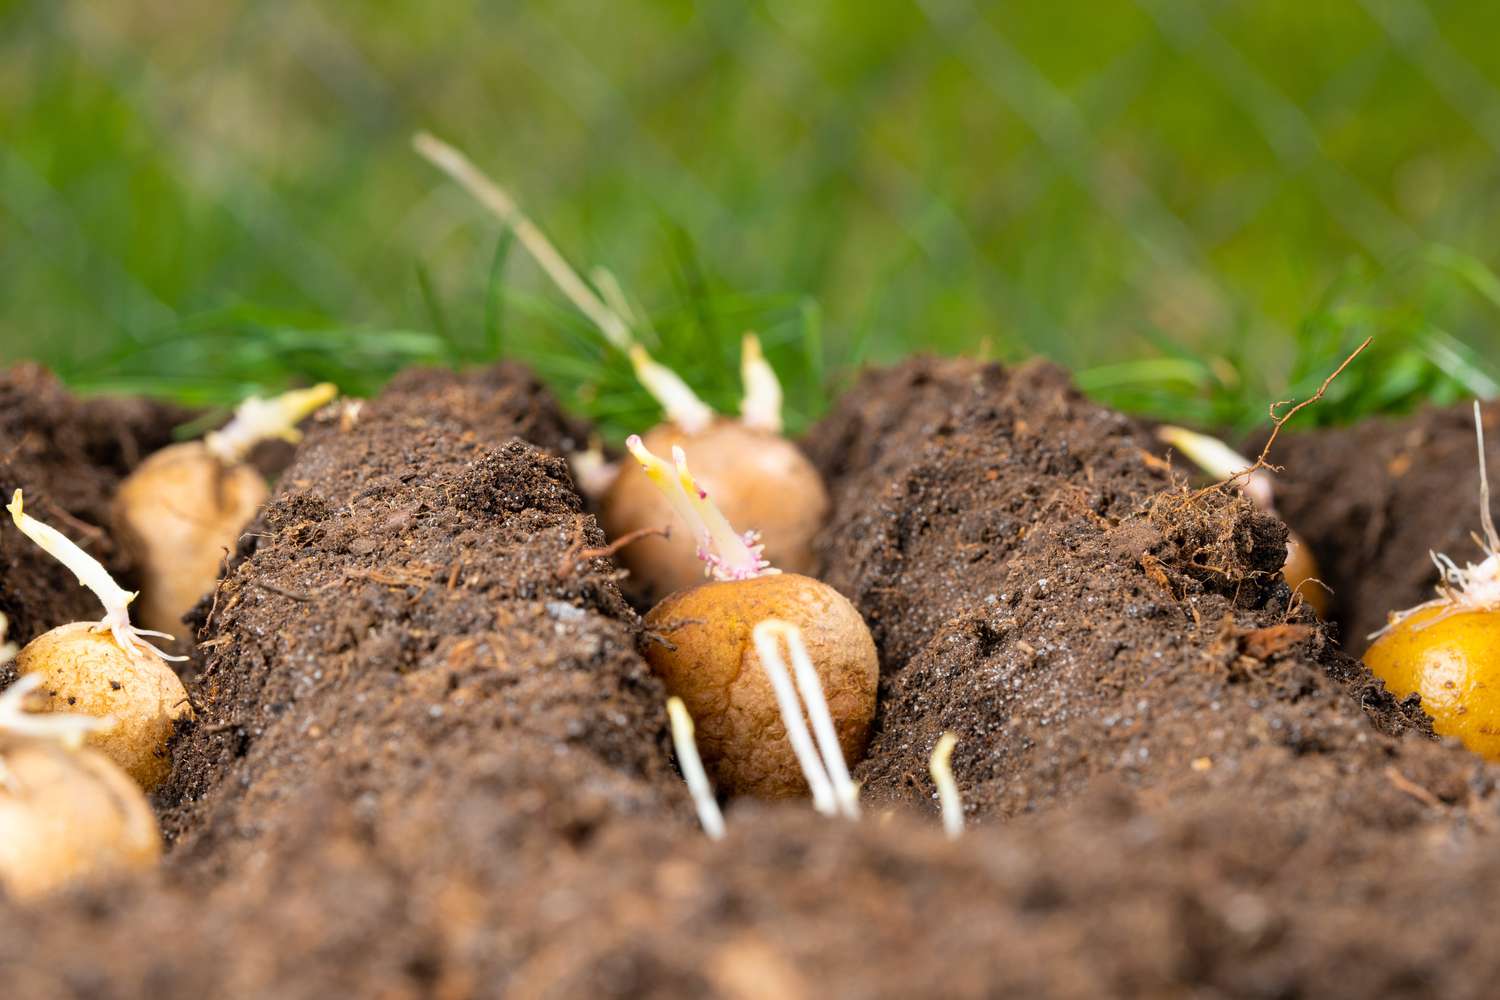
- Prepare your seed potatoes: Cut larger seed potatoes into pieces, ensuring each piece has 1-2 “eyes” (sprouts). Allow cut pieces to cure for 24 hours before planting.
- Prepare your container: Fill the bottom third of your container with potting soil mixed with compost.
- Plant the potatoes: Place seed potatoes about 6 inches apart, with the eyes facing upward.
- Cover with soil: Add 3-4 inches of soil mix over the seed potatoes.
- Water thoroughly: Keep the soil moist but not waterlogged.
- Add more soil as plants grow: As potato plants grow, continue adding soil to cover the stems, leaving the top few inches of foliage exposed. This technique, called “hilling,” encourages more potato production.
- Fertilize moderately: Once plants reach 6 inches tall, apply a balanced organic fertilizer.
How to Plant Potatoes in a Garden Bed
Garden beds offer more space for potato plants to spread out and produce larger yields.
Materials Needed:
- Garden space with full sun
- Seed potatoes
- Garden fork or tiller
- Compost or aged manure
- Basic garden tools (shovel, hoe)
Step-by-Step Process:
- Prepare your garden bed: Till or fork the soil to a depth of 8-12 inches. Remove rocks and break up clumps. Work in compost or aged manure to improve soil quality.
- Create trenches: Dig trenches 6 inches deep and 24-36 inches apart.
- Place seed potatoes: Position seed potatoes (prepared as described above) 12 inches apart within the trenches, eyes facing up.
- Cover with soil: Cover with 3-4 inches of soil initially.
- Hill as plants grow: When plants reach 8-10 inches tall, hill soil around them, leaving the top few inches exposed. Repeat this process 2-3 times during the growing season.
- Mulch between rows: Apply straw or other organic mulch between rows to suppress weeds and retain moisture.
The USDA Natural Resources Conservation Service offers regional soil health guides that can help you optimize your garden soil for potato production.
How to Plant Potatoes in a Larger Plot
For those with more space who want to grow potatoes on a larger scale, here’s how to approach planting in a plot:
Materials Needed:
- Larger land area with full sun exposure
- Seed potatoes (in larger quantity)
- Tiller or plow
- Compost or aged manure
- Row markers
- Irrigation system (optional but recommended)
Step-by-Step Process:
- Soil preparation: Till the entire plot to a depth of 8-12 inches. Incorporate compost or well-rotted manure. Test your soil pH – potatoes prefer slightly acidic soil (5.8-6.5 pH).
- Create a planting plan: Map out rows with 36 inches between them for easy access during maintenance and harvest.
- Plant systematically: Dig trenches 6 inches deep along your planned rows. Place seed potatoes 12-15 inches apart within rows.
- Apply fertilizer: Before covering, apply a balanced fertilizer in the trenches according to package directions, avoiding direct contact with seed potatoes.
- Cover and mark rows: Cover seed potatoes with 4-6 inches of soil and mark the rows.
- Implement irrigation: Consider installing a drip irrigation system for efficient watering.
- Hill aggressively: For plot growing, hilling is crucial. As plants grow, hill soil around them at least 2-3 times during the growing season, creating mounds 4-6 inches high.
- Manage pests and diseases: Monitor regularly for common potato pests like Colorado potato beetles and diseases like late blight.
The USDA Agricultural Research Service conducts extensive research on potato cultivation that can provide valuable insights for larger-scale growers.
Caring for Growing Potato Plants
Regardless of where you’re growing potatoes, proper care is essential for a good harvest:
Watering Guidelines
Potatoes need consistent moisture, especially during flowering and tuber formation. Aim for:
- 1-2 inches of water weekly
- Deep, thorough watering rather than frequent light sprinklings
- Reduced watering when foliage begins to yellow (indicating approaching maturity)
Fertilization Schedule
- At planting: Use a balanced fertilizer (10-10-10)
- When plants are 6-8 inches tall: Side-dress with a low-nitrogen, high-phosphorus fertilizer
- Avoid over-fertilizing with nitrogen, which promotes lush foliage at the expense of tuber development
Common Problems and Solutions
- Colorado potato beetles: Hand-pick beetles and larvae, or use organic insecticidal soap
- Late blight: Ensure good air circulation, avoid overhead watering, and consider copper-based fungicides if necessary
- Scab: Maintain consistent soil moisture and avoid adding fresh manure before planting
Harvesting Your Potatoes
The moment you’ve been waiting for! Here’s how to know when and how to harvest:
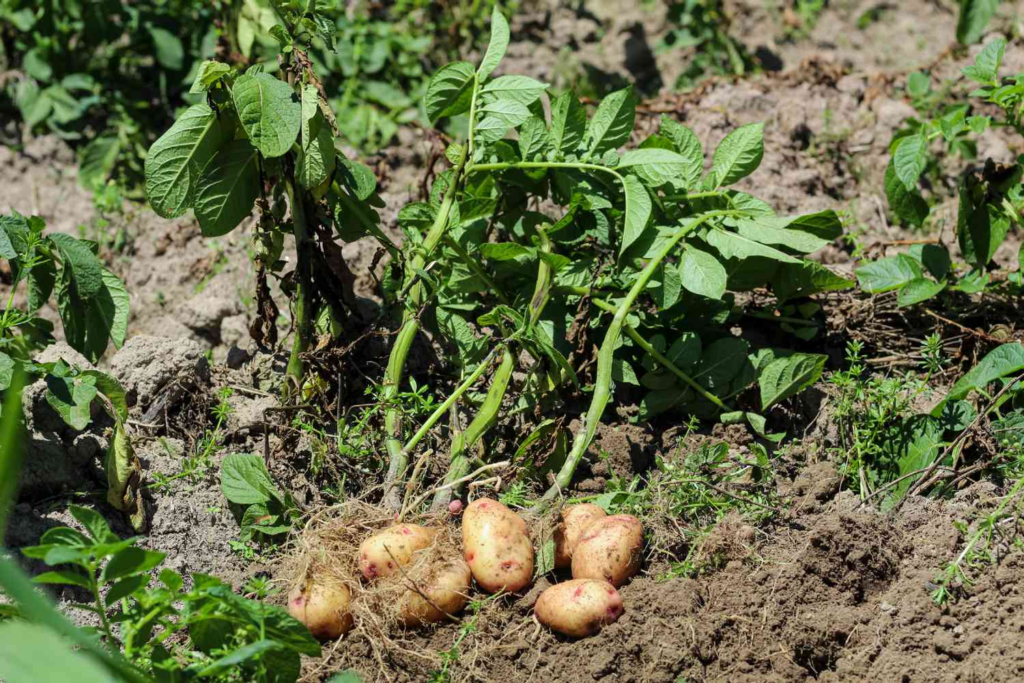
When to Harvest
- New potatoes: Can be harvested 2-3 weeks after plants flower by carefully reaching into the soil without pulling up the entire plant
- Storage potatoes: Harvest 2-3 weeks after the foliage has died back naturally or after you’ve cut it down
Harvesting Technique
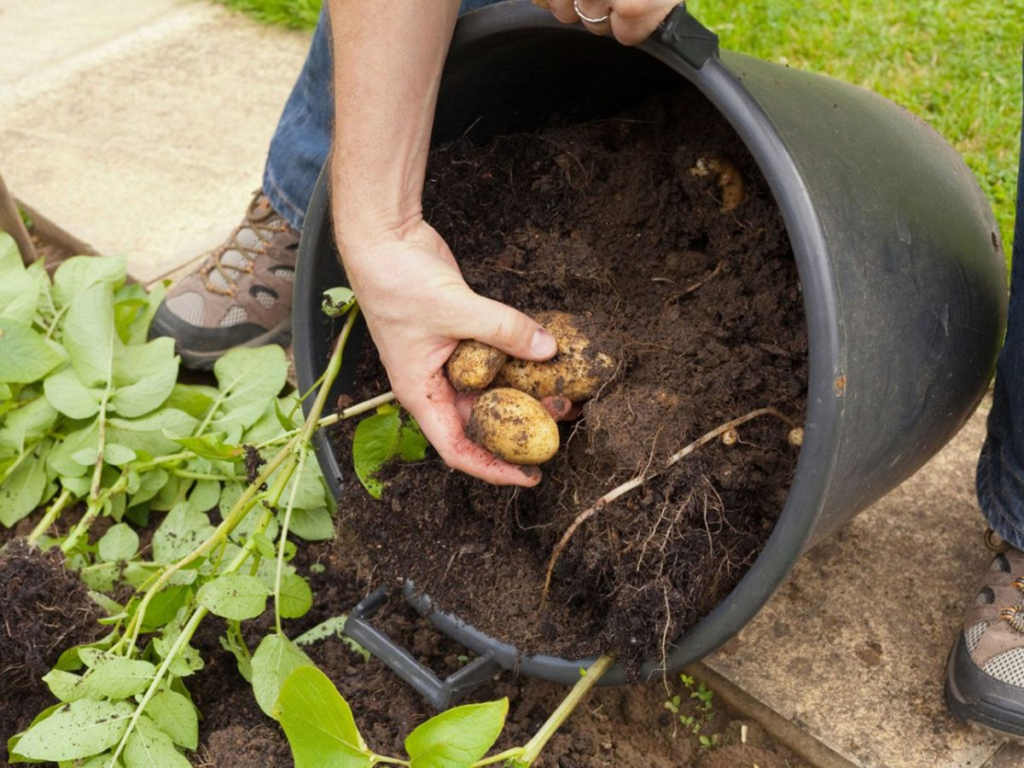
- Choose a dry day to harvest, which helps prevent rot
- Use a garden fork to gently lift the soil around plants
- Dig at least 6 inches away from the plant to avoid damaging tubers
- Lift potatoes carefully and allow them to dry on the soil surface for a few hours
- Brush off excess soil (don’t wash potatoes meant for storage)
Storing Your Harvest
To enjoy your potatoes for months to come:
- Cure storage potatoes in a dark, humid location (85-90% humidity) for 1-2 weeks
- Store cured potatoes in a cool (38-40°F), dark place
- Check regularly and remove any that show signs of sprouting or rot
According to the USDA Food Safety and Inspection Service, properly stored potatoes can last 2-3 months under ideal conditions.
Potato Varieties for the US Market
The US potato market offers remarkable diversity. Here are some varieties to consider for your garden:
Early Season (60-80 days)
- Red Norland: Red-skinned with white flesh, excellent for boiling
- Yukon Gold: Yellow-fleshed, buttery flavor, all-purpose use
Mid-Season (80-90 days)
- Kennebec: White-skinned and white-fleshed, excellent for frying
- Blue/Purple Potatoes: Colorful, antioxidant-rich varieties like “All Blue” or “Purple Majesty”
Late Season (90-110 days)
- Russet Burbank: The classic baking potato
- Fingerling Varieties: Elongated, flavorful potatoes like “Russian Banana” or “Rose Finn Apple”
Conclusion
Growing potatoes at home, whether in containers, garden beds, or larger plots, connects you with one of America’s most important food crops. With proper planning, care, and harvesting techniques, you can enjoy a bountiful harvest of fresh, delicious potatoes that far surpass store-bought options in both flavor and satisfaction.
Remember that successful potato growing is often a process of experimentation. Keep notes on what works best in your specific growing conditions, and don’t be afraid to try different varieties and techniques. Happy growing!