How to Grow Celery: Complete Guide for Home Gardeners
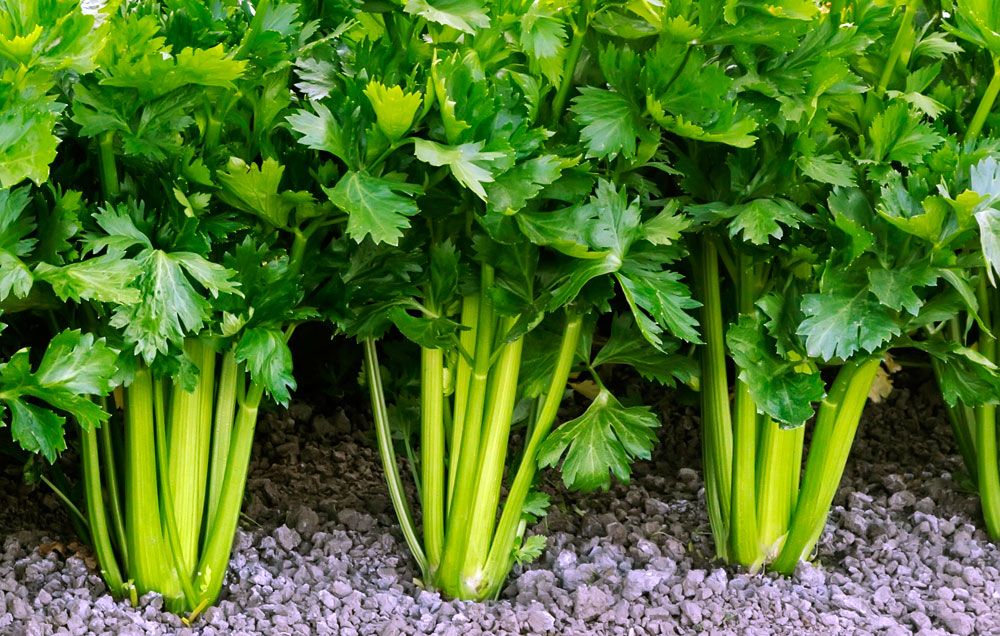
Celery (Apium graveolens) is a crisp, flavorful vegetable that adds crunch to salads, depth to soups, and serves as the perfect vessel for peanut butter or cream cheese. While many Americans purchase their celery from grocery stores, growing this nutritious vegetable at home can be a rewarding experience that guarantees the freshest produce for your kitchen.
In this comprehensive guide, you’ll learn how to successfully grow celery in your garden, in containers, and even indoors. Whether you’re an experienced gardener or just starting your food-growing journey, you’ll discover all the tips and techniques needed to cultivate this versatile crop.
Understanding Celery Growing Requirements
Before diving into specific growing methods, it’s important to understand what celery needs to thrive. Celery can be challenging for beginners, as it has specific requirements, but with proper care and attention, you can successfully grow this nutritious vegetable.
Climate and Growing Seasons
Celery is a cool-season crop that prefers temperatures between 60°F and 70°F (15°C to 21°C). According to the USDA Plant Hardiness Zone Map, celery grows best in zones 2-10, but timing is crucial:
- Northern US states: Start seeds indoors in March for a summer harvest
- Southern US states: Plant in fall for a winter harvest
- Mid-Atlantic and Pacific Northwest: Can potentially grow spring and fall crops
Soil Requirements
Celery requires specific soil conditions to develop properly:
- Soil type: Rich, moisture-retentive soil with plenty of organic matter
- pH level: 6.0-7.0 (slightly acidic to neutral)
- Drainage: Well-draining but consistently moist soil
- Fertility: High nitrogen content to support leafy growth
Sunlight and Water Requirements
- Sunlight: 6+ hours of sun daily, with partial shade in hotter regions
- Water: Consistent moisture is critical; never let celery dry out completely
- Humidity: Prefers higher humidity environments
Growing Celery from Seeds
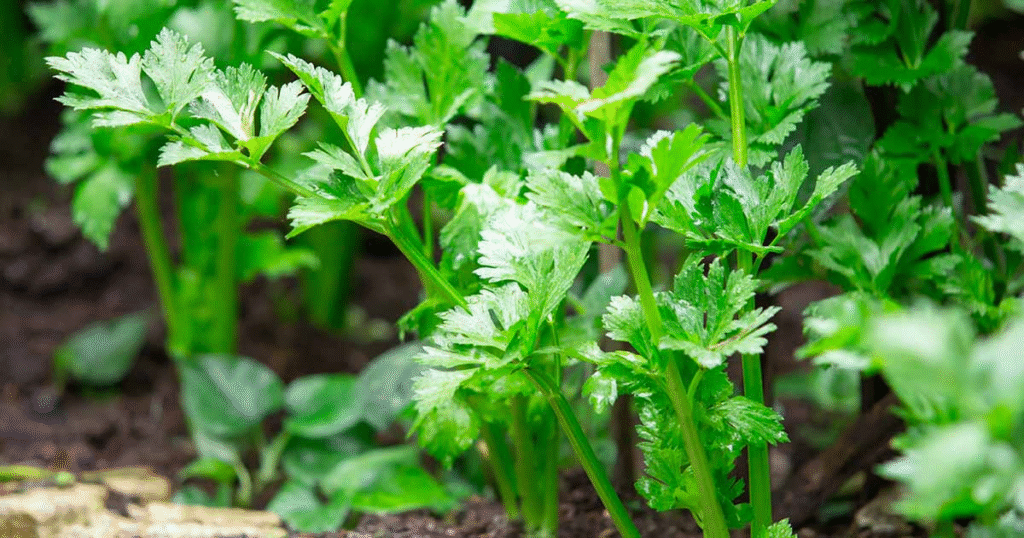
Starting celery from seeds requires patience, as germination can take up to three weeks, and the plants grow relatively slowly. However, growing from seed gives you access to more varieties than you’ll find as seedlings at garden centers.
Step-by-Step Seed Starting Process
- Start seeds indoors: Begin 10-12 weeks before the last expected frost date
- Seed preparation: Soak seeds in warm water for 24 hours before planting to improve germination
- Planting depth: Sow seeds 1/8 inch deep in seed-starting mix
- Temperature: Maintain soil temperature between 70-75°F (21-24°C) for optimal germination
- Light: Provide 14-16 hours of light daily once seedlings emerge
- Humidity: Cover seed trays with plastic domes or plastic wrap to maintain humidity
- Thinning: When seedlings develop their first true leaves, thin to one plant per cell
- Transplanting: Move to larger containers when seedlings reach 3 inches tall
Varieties Best Suited for Home Growing
When selecting celery varieties, consider your growing conditions and intended use:
| Variety | Days to Maturity | Height | Special Features | Best Use |
|---|---|---|---|---|
| Utah 52-70 | 100-125 days | 18-24″ | Heat-tolerant, crisp stalks | Fresh eating, cooking |
| Tall Utah 52-70R Improved | 110 days | 24-30″ | Stringless, dark green | Classic celery flavor |
| Tango | 80-85 days | 16-18″ | Compact, bolt-resistant | Containers, smaller gardens |
| Conquistador | 80 days | 25-30″ | Heat and disease resistant | Southern gardens |
| Golden Self-Blanching | 105 days | 20-24″ | Yellow-gold stalks, self-blanching | Milder flavor |
| Redventure | 112 days | 18-20″ | Red stalks, green leaves | Visual appeal, stronger flavor |
| Cutting Celery | 85-95 days | 12-18″ | Leafier, stronger flavor | Herb-like use, soups |
The US market favors varieties like Utah 52-70 and Tall Utah, which produce the classic large, thick stalks Americans expect. However, for home gardeners, varieties like Tango or Cutting Celery may be easier to grow.
Growing Celery in Your Garden
Successfully growing celery in your garden requires proper planning and care throughout the growing season.
Site Selection and Preparation
- Choose a location: Select a spot with morning sun and afternoon shade in warmer regions, or full sun in cooler climates
- Prepare the soil: Work in 4-6 inches of compost or well-rotted manure to improve soil structure and fertility
- Raised beds: Consider using raised beds to ensure good drainage while maintaining moisture
- Row spacing: Plan for 18-24 inches between rows
Transplanting Seedlings Outdoors
- Hardening off: Gradually acclimate seedlings to outdoor conditions over 7-10 days
- Timing: Transplant after danger of frost has passed and nights stay consistently above 40°F (4°C)
- Spacing: Place plants 6-10 inches apart
- Planting depth: Set seedlings at the same depth they were growing in their containers
- Water thoroughly: Immediately after planting, water deeply to establish good root contact with soil
Ongoing Garden Care
- Mulching: Apply 2-3 inches of organic mulch to retain moisture and suppress weeds
- Consistent watering: Provide 1-2 inches of water weekly; more during hot periods
- Fertilizing: Side-dress with compost tea or balanced fertilizer every 3-4 weeks
- Blanching (optional): When plants are 12 inches tall, wrap lower stalks with paper, cardboard, or dedicated plant blanchers to reduce bitterness
- Pest management: Monitor for aphids, slugs, and celery leaf miners; use row covers if necessary
Growing Celery in Containers
Don’t have garden space? Container-grown celery can be just as successful with proper care.
Choosing the Right Container
- Size: Select containers at least 12 inches deep and 12 inches in diameter
- Material: Plastic or ceramic containers retain moisture better than terracotta
- Drainage: Ensure adequate drainage holes
- Self-watering containers: Consider self-watering planters to maintain consistent moisture
Container Soil Mix
Create a nutrient-rich, moisture-retentive mix:
- 60% high-quality potting soil
- 20% compost or well-rotted manure
- 10% perlite for drainage
- 10% coco coir or peat moss for water retention
Container Growing Tips
- Plant spacing: 1-2 plants per 12-inch container
- Watering: Check moisture daily; containers dry out faster than garden soil
- Fertilizing: Apply liquid fertilizer every 2 weeks
- Location: Place containers where they receive morning sun but are protected from intense afternoon heat
- Winter protection: In cold regions, move containers to protected areas during freezes
Growing Celery Indoors
Growing celery indoors allows you to enjoy fresh stalks year-round, regardless of climate.
Indoor Growing Setup
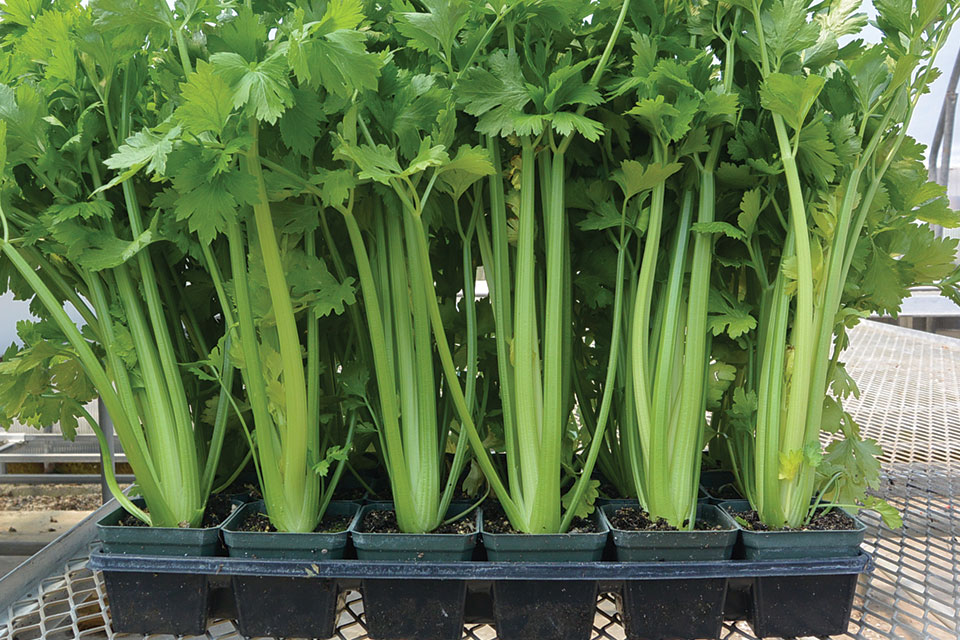
- Containers: Deep pots with good drainage, at least 8 inches deep
- Growing medium: Use high-quality potting mix amended with compost
- Light: Place near a south-facing window, or use LED grow lights providing 14-16 hours of light daily
- Temperature: Maintain room temperature between 60-70°F (15-21°C)
- Humidity: Use a humidifier or humidity tray if indoor air is dry
Dwarf Varieties for Indoor Growing
For indoor cultivation, compact varieties perform best:
- Tango
- Par-Cel (cutting celery)
- Conquistador
- Golden Pascal
Indoor Celery Maintenance
- Watering: Keep soil consistently moist but not waterlogged
- Fertilizing: Apply half-strength liquid fertilizer every 2-3 weeks
- Air circulation: Use a small fan to strengthen stalks and prevent disease
- Harvesting: Begin harvesting outer stalks when plants reach 8 inches tall
Common Celery Growing Challenges
Even experienced gardeners face challenges when growing celery. Here’s how to address common issues:
Pest Management
- Aphids: Spray with insecticidal soap or neem oil
- Slugs and snails: Use copper tape, diatomaceous earth, or beer traps
- Celery leaf miners: Remove and destroy affected leaves; use floating row covers
- Rabbits and deer: Install physical barriers or fencing
Disease Prevention
According to the USDA Agricultural Research Service, celery is susceptible to several diseases:
- Early blight: Ensure good air circulation; avoid overhead watering
- Fusarium yellows: Use resistant varieties; practice crop rotation
- Bacterial leaf spot: Avoid working with plants when wet; rotate crops
- Root rot: Ensure proper drainage; don’t overwater
Environmental Issues
- Bolting: Caused by temperature fluctuations; provide shade during heat waves
- Bitterness: Often results from moisture stress; maintain consistent watering
- Hollow stalks: Usually indicates insufficient water or nutrients
- Stunted growth: May indicate nutrient deficiency; side-dress with balanced fertilizer
Harvesting and Storing Your Celery
Proper harvesting and storage maximize your celery yield and extend its usability.
Harvesting Methods
You have several options when harvesting celery:
- Whole plant harvest: Cut the entire plant at soil level when stalks are 8+ inches tall (typically 80-120 days after transplanting)
- Cut-and-come-again: Harvest outer stalks as needed, allowing the center to continue growing
- Individual stalk harvest: Cut stalks 1-2 inches above soil level
- Leaf harvest: Snip outer leaves for flavoring soups and stocks
Optimal Storage Techniques
To keep your harvested celery fresh:
- Refrigeration: Wrap unwashed stalks in aluminum foil and refrigerate; celery can last 2-4 weeks
- Root cellar: Store with roots attached in moist sand at 32-40°F (0-4°C)
- Freezing: Blanch chopped celery for 3 minutes, cool in ice water, drain, and freeze
- Dehydrating: Dry thin slices at 135°F (57°C) until crisp, then store in airtight containers
- Vacuum sealing: Extends refrigerated storage life to 4-6 weeks
Regrowing Celery from Kitchen Scraps
One of the most sustainable ways to grow celery is by regrowing from store-bought stalks.
Step-by-Step Regrowing Process
- Prepare the base: Cut off the bottom 2-3 inches of a celery bunch
- Initial rooting: Place the cut end in a shallow dish with 1/2 inch of water
- Light exposure: Set on a sunny windowsill and change water daily
- Root development: Watch for new growth from the center and root development along the base (5-7 days)
- Transplanting: When roots are 1/2 inch long and new leaves appear in the center, plant in soil with the growing point just above soil level
- Growing on: Keep soil consistently moist; harvest outer stalks as needed
Success Rate and Expectations
Be realistic about regrowing celery:
- Regrown celery typically produces thinner stalks than seed-grown plants
- Yields will be smaller but perfect for flavoring dishes
- The process works best with organic celery that hasn’t been treated with growth inhibitors
Cooking with Home-Grown Celery
Home-grown celery often has a stronger flavor and sometimes tougher texture than store-bought varieties. Here’s how to make the most of your harvest:
Cooking Tips for Garden Celery
- Stronger flavor: Use about 25% less in recipes than called for with store-bought celery
- Tougher stalks: Peel fibrous outer strings or chop finely for soups and stews
- Leaves: Don’t discard the leaves! They contain the most flavor and nutrients
- Blanching: Briefly blanch tougher stalks before using in fresh recipes
Preserving and Using Celery Leaves
Celery leaves are often overlooked but are packed with flavor:
- Dry for celery salt
- Freeze in olive oil in ice cube trays for instant soup flavoring
- Blend into pestos and chimichurri sauces
- Use fresh as an herb similar to parsley
Conclusion
Growing your own celery might require more attention than some other vegetables, but the reward is worth the effort. The enhanced flavor and satisfaction of harvesting this versatile vegetable from your own garden, containers, or indoor growing space makes the process worthwhile.
By following the guidelines in this article, you can successfully grow celery no matter your gardening experience level or available space. Remember that consistent moisture, rich soil, and proper temperature management are key to celery growing success.
Whether you’re growing traditional stalk celery for fresh eating, smaller varieties for container gardens, or culinary celery for its aromatic leaves, you’ll enjoy both the process and the delicious results of your home-grown celery crop.
For more detailed information on vegetable growing practices, visit the USDA National Agricultural Library for research-based guidance and resources.
