How to Grow Green Peas: A Complete Guide for Home Gardeners
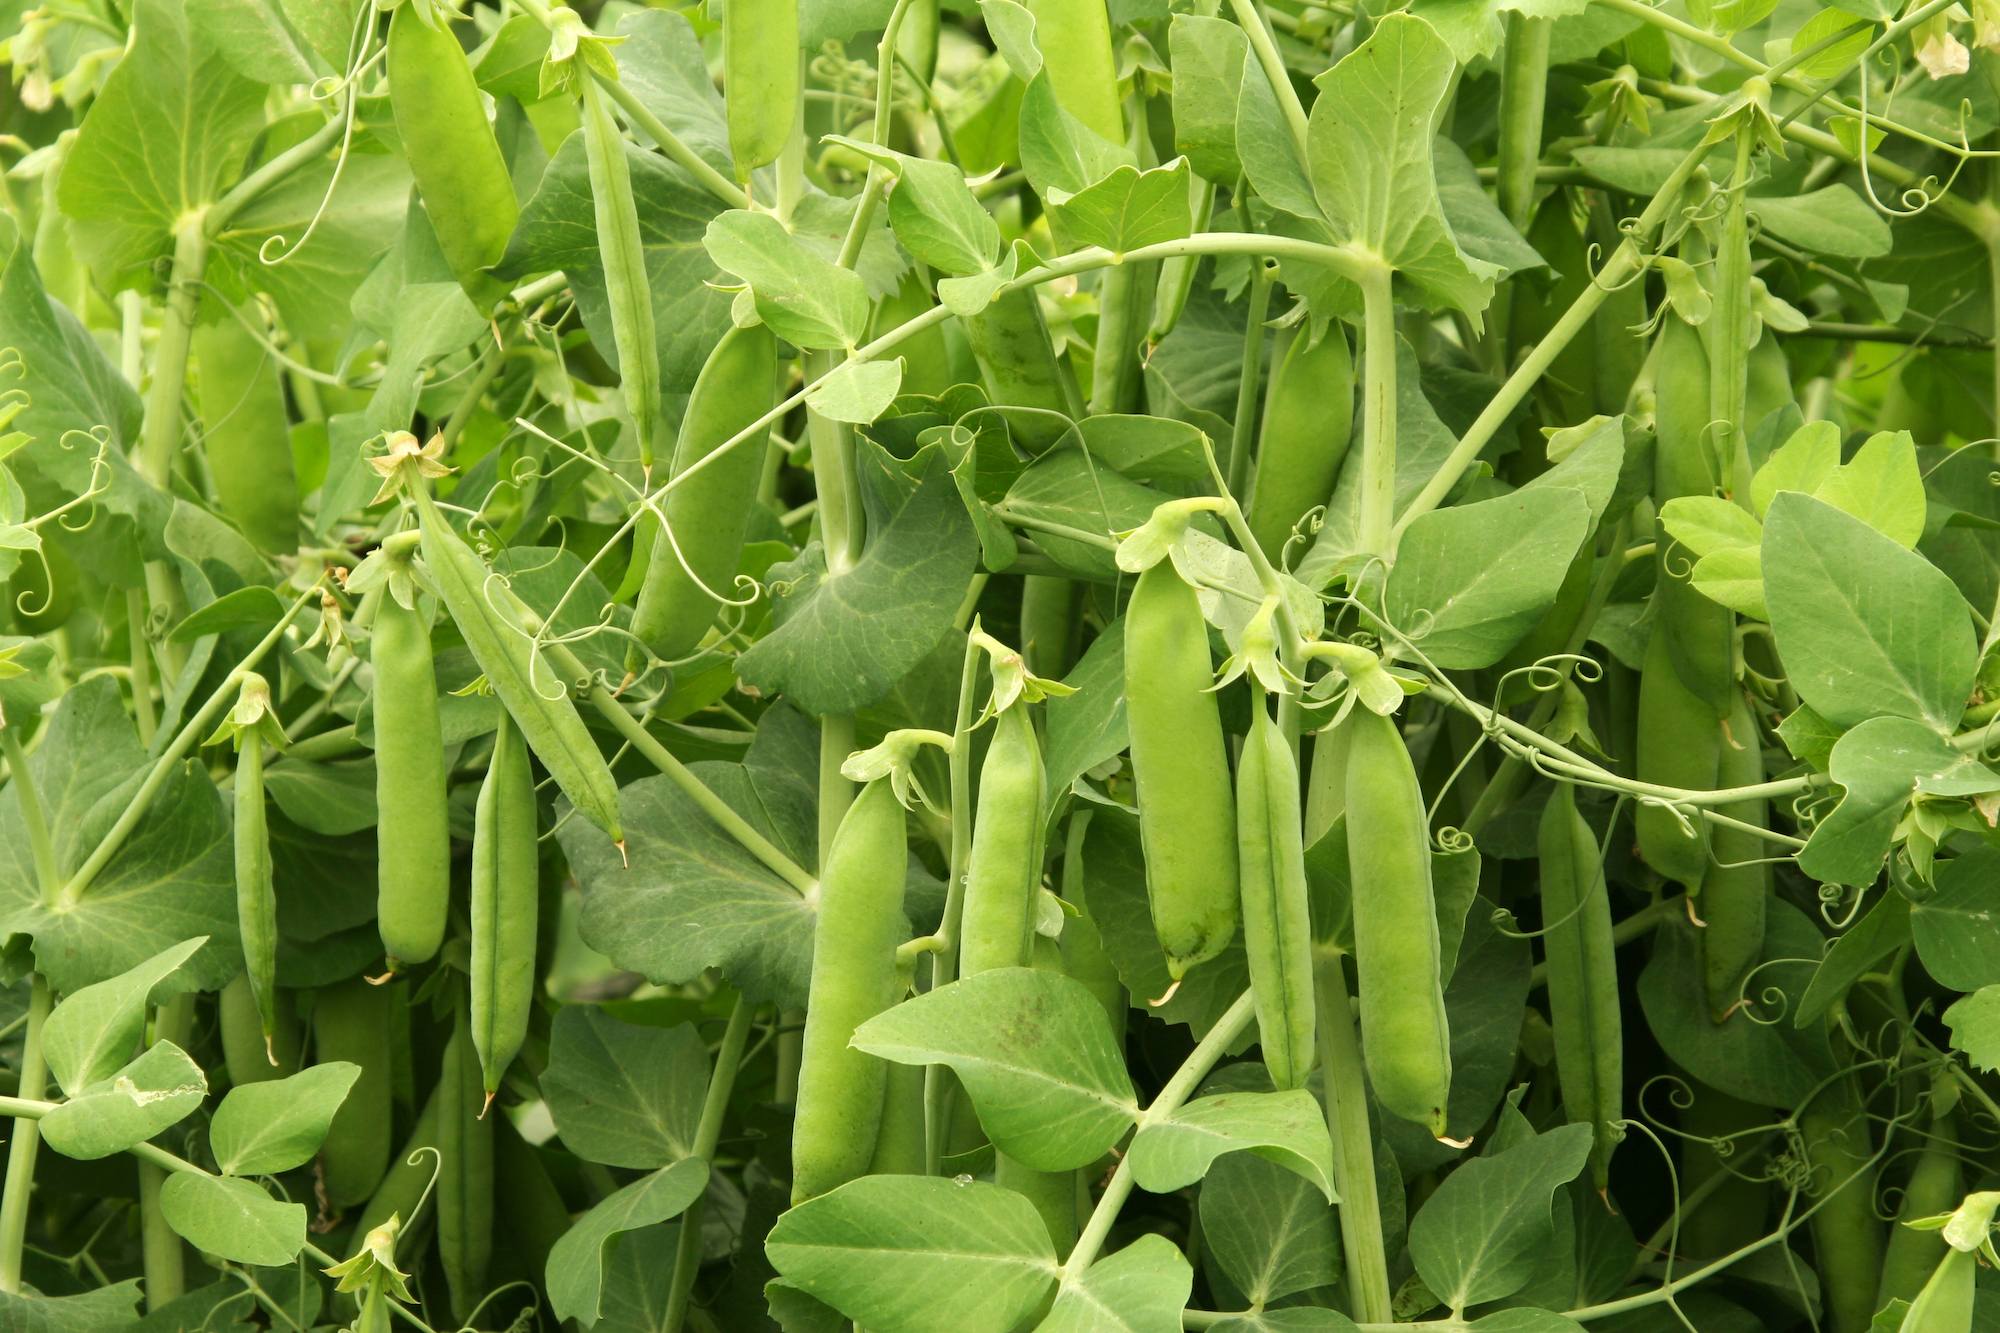
Green peas (Pisum sativum) are one of the most rewarding vegetables you can grow at home. These cool-season crops not only provide delicious, nutritious harvests but are also relatively easy to cultivate, making them perfect for both beginner and experienced gardeners. Whether you have a spacious garden, a small balcony with containers, or just a sunny windowsill indoors, you can successfully grow these emerald gems and enjoy their sweet flavor straight from the vine.
In this comprehensive guide, you’ll learn everything you need to know about growing green peas at home—from selecting the right varieties to harvesting and storing your bounty. We’ll cover specific techniques for garden planting, container growing, and even indoor cultivation, so you can enjoy homegrown peas regardless of your living situation.
Understanding Green Peas
Before diving into the growing process, it’s helpful to understand the different types of peas available and their growing requirements.
Types of Green Peas
There are three main types of green peas commonly grown in home gardens:
- Shell or English Peas: These traditional peas have non-edible pods that need to be shelled to access the sweet peas inside. Varieties like ‘Green Arrow’ and ‘Alderman’ are popular choices.
- Snow Peas: These have flat, edible pods with small peas inside. They’re harvested when the peas are still tiny and the entire pod is consumed. ‘Oregon Sugar Pod II’ and ‘Mammoth Melting Sugar’ are excellent varieties.
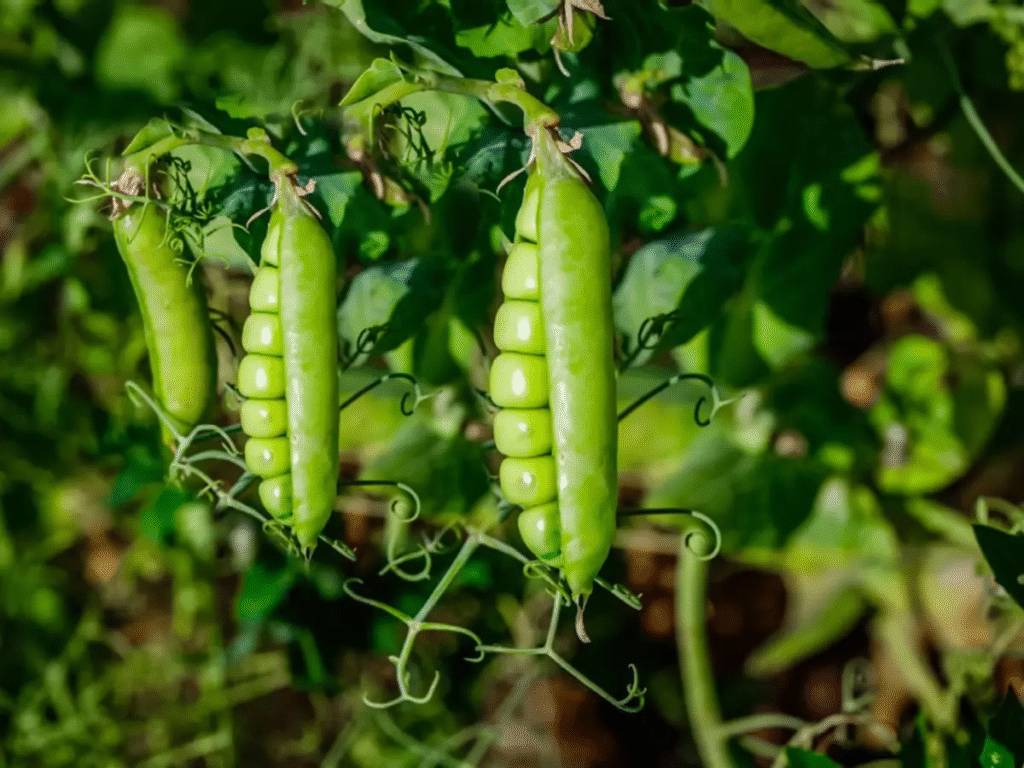
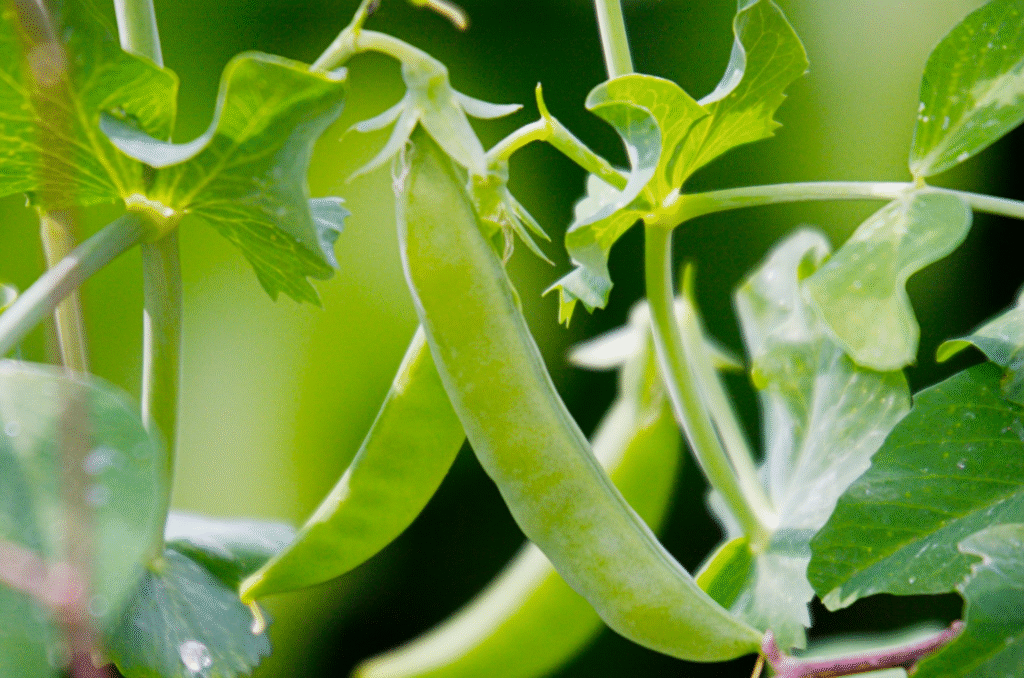
- Snap Peas: A cross between shell and snow peas, these have edible pods with full-sized peas inside. ‘Sugar Snap’ and ‘Super Sugar Snap’ are beloved for their sweetness.
Growth Habits
Peas also vary in their growth habits:
- Bush varieties: Compact plants that grow 2-3 feet tall and require minimal support.
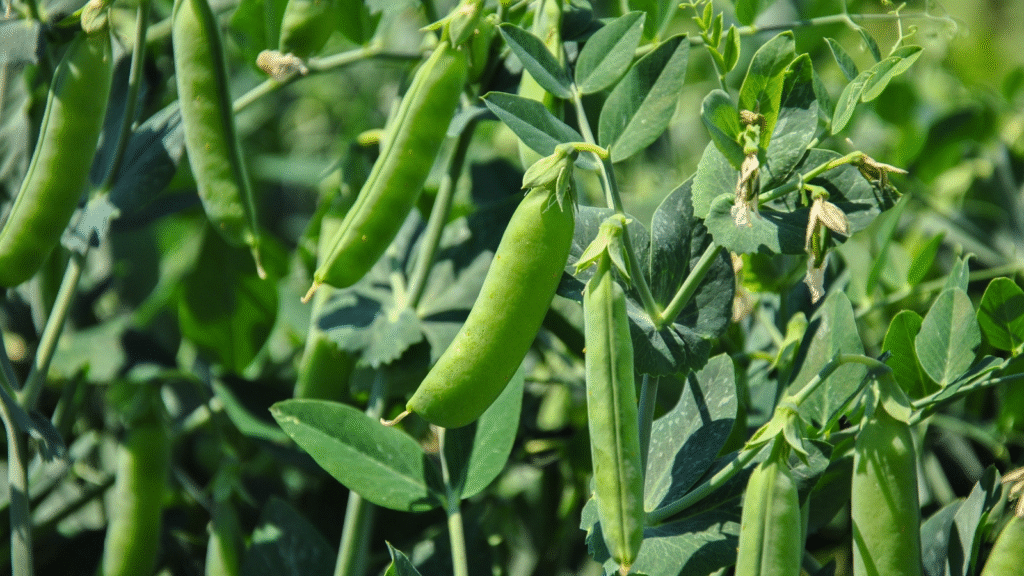
- Vine varieties: Can grow 6-8 feet tall and need trellises or other support structures.
According to the USDA Plant Hardiness Zone Map, green peas thrive in zones 2-9 across the United States, making them suitable for most American gardeners.
Getting Started: Seeds and Timing
Selecting Quality Seeds
The US garden seed market offers numerous options for quality pea seeds. Look for:
- Seeds from reputable companies
- Organic certification if desired
- Disease-resistant varieties
- Types suited to your growing zone
Many experienced gardeners recommend varieties like ‘Wando’ for heat tolerance, ‘Lincoln’ for flavor, and ‘Progress #9’ for reliability in the US market.
When to Plant Green Peas
Timing is crucial for successful pea cultivation. As cool-season crops, peas prefer temperatures between 55-70°F (13-21°C).
| Planting Zone | Spring Planting | Fall Planting |
|---|---|---|
| Zones 2-4 | April to May | Not recommended |
| Zones 5-6 | March to April | August to September |
| Zones 7-8 | February to March | September to October |
| Zones 9-10 | January to February | October to November |
For spring planting, a good rule of thumb is to sow seeds as soon as the soil is workable, typically 4-6 weeks before the last expected frost. According to the National Gardening Association, planting peas on St. Patrick’s Day (March 17) is a traditional guideline for many regions in the US.
Growing Green Peas in Your Garden
Garden cultivation is the most traditional approach to growing peas and often yields the most abundant harvests.
Soil Preparation
Peas prefer well-draining soil with a pH between 6.0-7.5. Here’s how to prepare your garden bed:
- Clear the area of weeds and debris
- Work in 2-3 inches of compost to improve soil structure
- Avoid high-nitrogen fertilizers as peas can fix their own nitrogen
- Consider adding a light application of bone meal to provide phosphorus
Direct Sowing Technique
Follow these steps for successful direct sowing:
- Create furrows about 1-2 inches deep
- Space rows 18-24 inches apart (for bush varieties) or 3-4 feet apart (for vining types)
- Sow seeds 1-2 inches apart
- Cover with soil and water gently but thoroughly
- For successive harvests, plant new batches every 2-3 weeks
Supporting Your Pea Plants
Most pea varieties benefit from some form of support:
- For bush varieties, simple brush supports or short trellises (2-3 feet) work well
- For vining types, install 6-8 foot trellises, netting, or other climbing structures
- Install supports at planting time to avoid disturbing roots later
The Cooperative Extension Service recommends using biodegradable twine or netting for environmental sustainability.
Watering and Maintenance
Consistent moisture is crucial for pea development:
- Water deeply once or twice weekly, providing about 1 inch of water
- Increase watering during flowering and pod formation
- Apply mulch to retain moisture and suppress weeds
- Monitor for pests like aphids and powdery mildew
Growing Green Peas in Containers
Don’t have garden space? Container growing is an excellent alternative that can yield impressive results.
Choosing the Right Containers
For successful container cultivation:
- Select containers at least 12 inches deep and wide
- Ensure adequate drainage holes
- Consider self-watering containers for consistent moisture
- Use fabric pots for better aeration
Container Soil Mix
Create an optimal growing medium:
- Combine 60% quality potting soil, 20% compost, and 20% perlite
- Avoid garden soil, which can compact in containers
- Consider adding a small amount of slow-release fertilizer formulated for vegetables
Planting and Care for Container Peas
The process is similar to garden planting with a few adjustments:
- Fill containers to within 1 inch of the top with soil mix
- Sow seeds 1 inch deep and 1-2 inches apart
- Water thoroughly after planting
- Place containers where they’ll receive 6-8 hours of sunlight
- Install appropriate-sized supports at planting time
- Water more frequently than garden peas, as containers dry out faster
Bush varieties like ‘Tom Thumb’ or ‘Patio Pride’ are particularly well-suited for container growing due to their compact size.
Growing Green Peas Indoors
Yes, you can grow peas indoors! While yields might be smaller, the satisfaction of growing peas year-round is well worth the effort.
Light Requirements
Peas need significant light to thrive indoors:
- Place near a south-facing window that receives at least 6 hours of direct sunlight
- If natural light is insufficient, supplement with grow lights
- Position LED or fluorescent grow lights 6-12 inches above plants for 12-14 hours daily
Indoor Container Setup
For successful indoor growing:
- Choose containers at least 8-10 inches deep with good drainage
- Use a high-quality potting mix with added perlite for drainage
- Consider dwarf varieties like ‘Little Marvel’ for indoor growing
- Maintain indoor temperatures between 55-70°F (13-21°C)
Pollination and Air Circulation
Unlike some vegetables, peas are self-pollinating and don’t require assistance indoors. However, good air circulation is essential:
- Use a small fan on low setting to gently move air around your plants
- This helps prevent fungal diseases and strengthens stems
- Avoid placing plants in drafty areas or near heating/cooling vents
Starting Green Peas from Seeds
Whether you’re growing in a garden, containers, or indoors, starting with quality seeds is essential for success.
Seed Preparation Techniques
To improve germination rates:
- Soak seeds in room temperature water for 12-24 hours before planting
- Pat dry to prevent sticking
- For challenging soil conditions, consider using a legume inoculant (Rhizobium bacteria)
According to the USDA Agricultural Research Service, inoculants can increase nitrogen fixation and improve yields by up to 30%.
Germination Process
Under optimal conditions, pea seeds germinate within 7-10 days. You can expect:
- First true leaves within 14 days of germination
- Growth of 1-2 inches per week in good conditions
- Flowering approximately 4-6 weeks after germination
Thinning and Transplanting
If you’ve started seeds indoors for later transplanting:
- Thin seedlings when they reach 2-3 inches tall, leaving the strongest plants
- Harden off seedlings by gradually exposing them to outdoor conditions over 7-10 days
- Transplant carefully to avoid root disturbance, ideally in the late afternoon or on a cloudy day
Note that peas generally prefer direct sowing, as their delicate root systems can be damaged during transplanting.
Caring for Growing Pea Plants
Proper care throughout the growing season will ensure healthy plants and abundant harvests.
Fertilizing Guidelines
Peas are light feeders that can create their own nitrogen:
- Apply a low-nitrogen, phosphorus-rich fertilizer (like 5-10-10) at planting time
- Avoid high-nitrogen fertilizers, which promote leafy growth at the expense of pod production
- Consider a mid-season application of compost tea for micronutrients
Common Pests and Diseases
Be vigilant about these common issues:
Pests:
- Aphids: Treat with strong water spray or insecticidal soap
- Pea moths: Use floating row covers during egg-laying periods
- Slugs and snails: Apply diatomaceous earth around plants
Diseases:
- Powdery mildew: Improve air circulation and avoid overhead watering
- Root rot: Ensure proper drainage and avoid overwatering
- Pea enation virus: Choose resistant varieties and control aphids
The USDA Integrated Pest Management Program recommends cultural practices like crop rotation and resistant varieties as first-line defenses against pests and diseases.
Supporting Growth and Development
As your peas grow:
- Gently train vining varieties onto supports
- Remove any weeds that compete for resources
- Apply mulch to maintain soil moisture and temperature
- Consider side-dressing with compost when plants begin flowering
Harvesting and Using Your Green Peas
The moment you’ve been waiting for—harvest time!
When and How to Harvest
Timing is essential for the best flavor and texture:
- Shell peas: Harvest when pods are plump but still bright green, typically 18-21 days after flowering
- Snow peas: Pick when pods reach full length but before peas inside start swelling
- Snap peas: Harvest when pods are plump and peas have developed, but before they become starchy
To harvest properly:
- Use two hands—one to hold the vine, one to pull the pod
- Harvest frequently to encourage continued production
- Pick in the cool morning hours for the sweetest flavor
Storing Your Harvest
Fresh peas are best enjoyed immediately, but you can extend their life:
- Refrigerate unwashed peas in a perforated plastic bag for 5-7 days
- Blanch and freeze for long-term storage (up to 8 months)
- Dehydrate shelled peas for use in soups and stews
Saving Seeds for Next Season
To maintain your favorite varieties:
- Allow some pods to mature fully and dry on the vine
- Harvest when pods are brown and seeds rattle inside
- Remove seeds and dry for an additional week in a cool, dry place
- Store in airtight containers in a cool location
- Properly saved pea seeds remain viable for 2-3 years
Seasonal Growing Calendar
Here’s a comprehensive growing calendar for green peas in various US climate zones:
| Month | Cold Climate (Zones 2-5) | Moderate Climate (Zones 6-7) | Warm Climate (Zones 8-10) |
|---|---|---|---|
| January | Order seeds | Order seeds | Direct sow |
| February | Prepare soil | Prepare soil, Direct sow late month | Direct sow, First harvest |
| March | Direct sow late month | Direct sow | Continuing harvest |
| April | Direct sow | Care for growing plants | Final harvest, Prepare for fall |
| May | Care for growing plants | First harvest | Too hot for peas |
| June | First harvest | Continuing harvest | Too hot for peas |
| July | Final harvest | Final harvest | Too hot for peas |
| August | Prepare for fall | Prepare for fall | Prepare for fall |
| September | Direct sow for fall | Direct sow for fall | Direct sow for fall |
| October | Care for fall crop | Care for fall crop | Care for fall crop |
| November | Final harvest | Continuing harvest | Continuing harvest |
| December | Plan for spring | Final harvest | Continuing harvest |
Companion Planting for Green Peas
Strategic companion planting can enhance growth and deter pests:
Good Companions:
- Carrots: Grow at different soil depths, maximizing space
- Radishes: Mark pea rows and harvest before peas mature
- Mint: Deters pea moths and aphids
- Cucumbers: Will use the same trellis after peas finish
Poor Companions:
- Onions and garlic: Can stunt pea growth
- Tomatoes: Compete for nutrients and can transmit diseases
- Potatoes: May increase susceptibility to disease
Troubleshooting Common Problems
Even experienced gardeners encounter challenges. Here’s how to address common issues:
Poor Germination
If seeds fail to sprout:
- Check soil temperature (45-75°F is ideal)
- Ensure adequate soil moisture
- Verify seed quality and age
- Consider pre-soaking seeds before planting
Yellowing Leaves
Yellow leaves may indicate:
- Overwatering or poor drainage
- Nutrient deficiency (often iron)
- Root damage from cultivation
- Natural aging of lower leaves
Low Yield
If harvests are disappointing:
- Verify pollination conditions (temperatures between 55-75°F are ideal)
- Check for adequate sunlight (minimum 6 hours daily)
- Ensure consistent watering, especially during flowering
- Consider soil nutrient levels
Conclusion: Enjoying the Fruits of Your Labor
Growing green peas at home connects you to the timeless cycle of gardening while providing nutritious, delicious food for your table. Whether you’re cultivating a garden plot, tending containers on a patio, or growing indoors under lights, the satisfaction of harvesting your own peas is unmatched.
Remember that each growing season brings new lessons and opportunities for improvement. Keep notes on what works in your specific conditions, and don’t be afraid to experiment with different varieties and techniques. With attention to the principles outlined in this guide, you’ll be well on your way to growing abundant green peas that surpass anything available in stores.
As you enjoy your homegrown peas in fresh salads, stir-fries, or simply steamed with a touch of butter, you’ll understand why generations of gardeners have dedicated space to this remarkable vegetable.
