Homemade Pallet Garden Designs: Transform Discarded Wood Into Stunning Landscape Features
In an era of sustainable gardening and creative repurposing, wooden pallets have emerged as the unexpected hero of DIY landscape design. These humble wooden structures—often discarded after delivering merchandise—offer incredible versatility for outdoor spaces of all sizes. From vertical gardens that maximize small spaces to elaborate backyard structures that become the centerpiece of your landscape, pallet projects combine eco-friendly practices with budget-conscious design.
This guide explores how to transform these utilitarian wooden frames into beautiful, functional garden elements that enhance your outdoor living spaces while reducing waste. Whether you’re working with a tiny balcony or a sprawling backyard, these pallet garden designs provide innovative solutions for growing plants, creating outdoor living areas, and adding unique character to your landscape.
Why Choose Pallets for Your Garden Projects?
Before diving into specific designs, let’s understand why pallets have become so popular for garden transformations:
- Sustainability: Repurposing pallets keeps usable wood out of landfills, giving new life to materials that would otherwise be discarded.
- Affordability: Many pallets can be acquired for free from businesses that would otherwise pay for disposal, making them one of the most budget-friendly building materials available.
- Versatility: The modular structure of pallets allows for countless configurations and applications, from simple plant stands to complex garden structures.
- Rustic Aesthetic: The weathered wood brings natural texture and character to garden spaces, creating a warm, organic feel that complements outdoor environments.
- Customization: Pallets can be left natural, stained, painted, or modified to suit any garden style from modern to cottage to industrial.
Sourcing Safe Pallets for Garden Projects
Not all pallets are created equal, and selecting the right ones is crucial for garden safety:
Understanding Pallet Markings
Look for these stamps to ensure your pallets are safe for garden use:
- HT (Heat Treated): These pallets have been kiln-dried to eliminate pests and are generally safe for garden projects.
- MB (Methyl Bromide): AVOID these pallets, as they’ve been treated with a potentially harmful pesticide not suitable for growing edibles or close contact.
- EPAL/EUR: European pallets that are typically heat-treated and high quality.
- Plain Pallets: Those without markings may or may not be safe—when in doubt, use these for ornamental rather than edible gardens.
Best Sources for Garden Pallets

- Local Businesses: Garden centers, hardware stores, and small retailers often have pallets they’re willing to give away.
- Furniture Stores: These pallets are typically larger and sturdier than average.
- Online Marketplaces: Check Facebook Marketplace, Craigslist, or Freecycle for free or low-cost pallets.
- Construction Sites: With permission, you may find usable pallets that would otherwise be discarded.
Important Note: Always ask before taking pallets, even if they appear to be discarded. Some businesses pay deposits on pallets or have return arrangements with suppliers.
Preparing Pallets for Garden Use
Before transforming pallets into garden features, proper preparation ensures safety and longevity:
Basic Preparation Steps
- Inspection: Check for protruding nails, splinters, or damaged boards that need repair.
- Cleaning: Scrub with a stiff brush and mild soapy water to remove dirt, debris, and potential contaminants.
- Sanding: Smooth rough edges and surfaces to prevent splinters and improve appearance.
- Weatherproofing: For outdoor applications, consider applying a non-toxic sealant or outdoor paint to extend lifespan.
- Reinforcement: Add additional screws or brackets to loose components for stability.
Tools You’ll Need for Pallet Projects
- Pry Bar: For disassembling pallets when needed
- Hammer: For removing and repositioning nails
- Cordless Drill: Essential for most pallet projects
- Saw: Circular, jigsaw, or hand saw for cutting pallets to size
- Sandpaper: Various grits for smoothing surfaces
- Screws: Weather-resistant deck screws work best
- Safety Gear: Gloves, eye protection, and closed-toe shoes
10 Innovative Wooden Pallet Ideas for Outside Spaces
Now, let’s explore specific pallet garden designs that can transform your outdoor areas:
1. Vertical Pallet Garden Wall

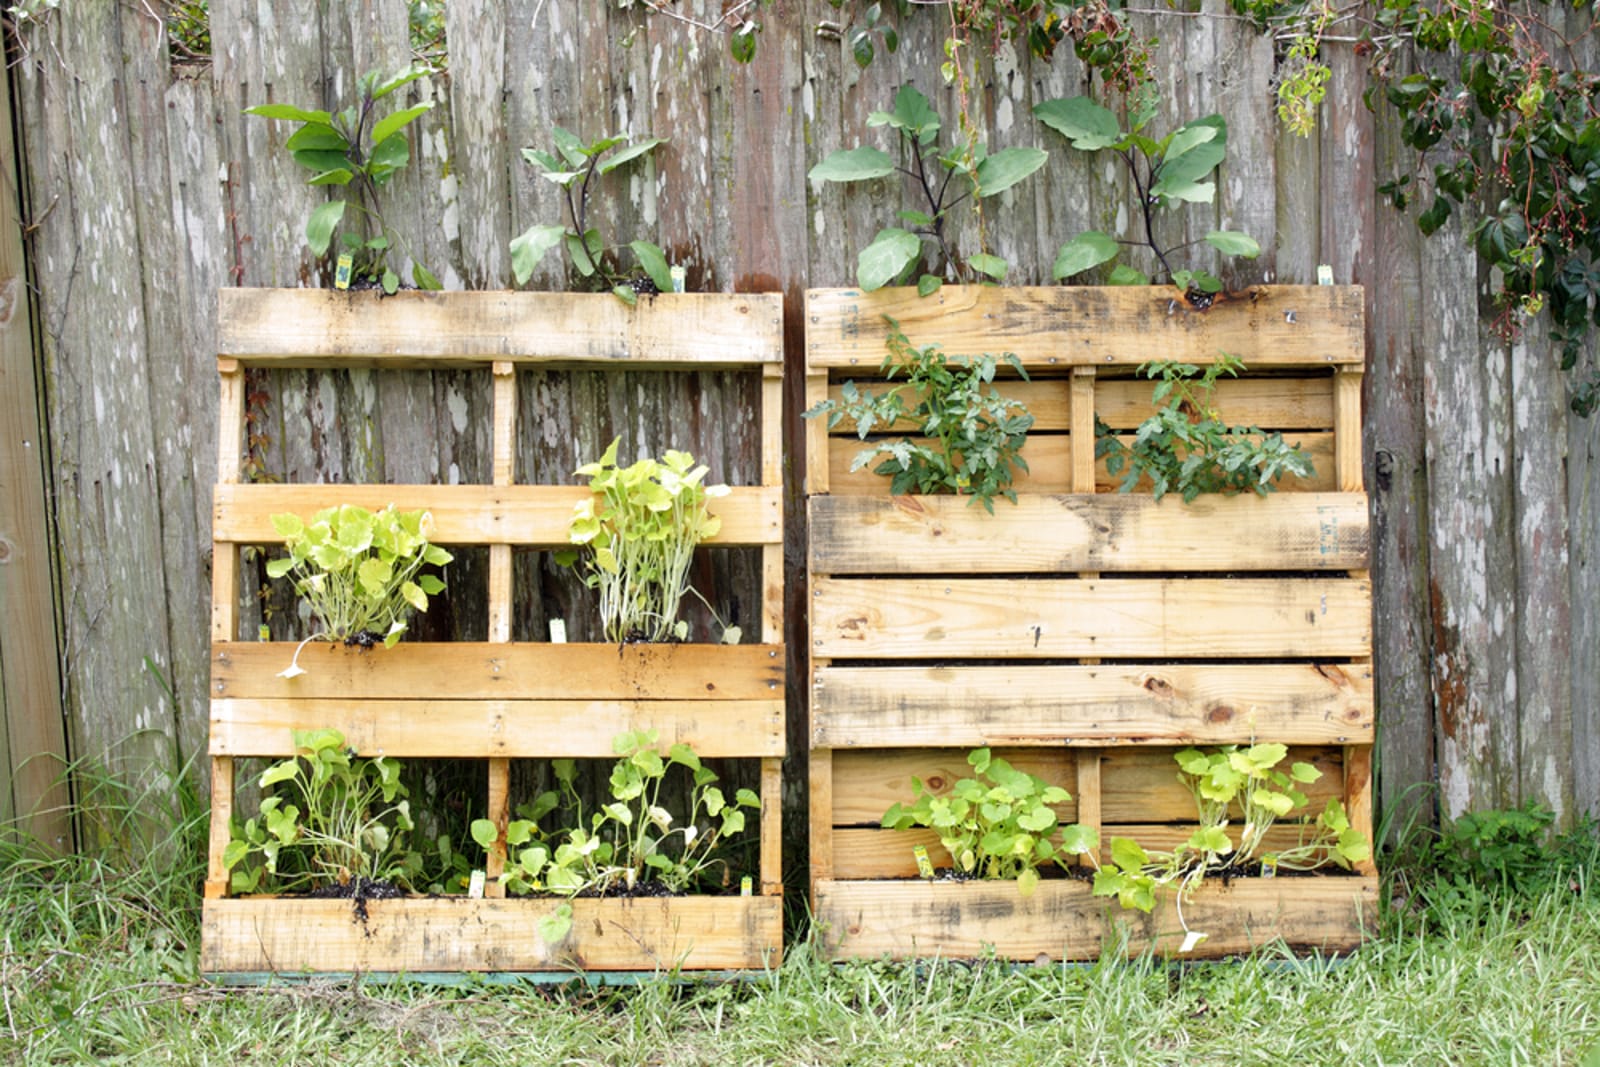
Perfect for small spaces, balconies, or blank walls, vertical pallet gardens create living walls that maximize growing space.
Materials Needed:
- 1 intact wooden pallet (HT marked)
- Landscape fabric or weed barrier cloth
- Staple gun and staples
- Potting soil
- Selection of plants (herbs, succulents, or flowers)
- Screws and anchors for wall mounting
Step-by-Step Process:
- Prepare and sand your pallet, ensuring all surfaces are smooth.
- Cut landscape fabric to cover the back, bottom, and sides of the pallet.
- Staple the fabric securely, creating pockets between the slats.
- Position the pallet horizontally and fill the pockets with soil.
- Plant your selections into the soil pockets.
- Allow plants to establish for 1-2 weeks while keeping the pallet horizontal.
- Once roots are established, carefully mount the pallet vertically on your wall.
Pro Tip: Choose plants with similar light and water requirements. Succulents work beautifully for sunny spots, while ferns and shade-loving plants thrive in shadier locations.
2. Raised Pallet Garden Bed

Convert pallets into space-efficient raised beds for vegetables, herbs, or flowers.
Materials Needed:
- 4-6 wooden pallets (depending on desired size)
- Deck screws
- Landscape fabric
- Staple gun
- Hammer
- Potting soil or garden soil/compost mix
Step-by-Step Process:
- Disassemble 2-3 pallets to harvest the individual boards.
- Use intact pallets as the base and sides of your raised bed.
- Attach harvested boards to create solid walls, closing gaps as needed.
- Line the inside with landscape fabric to prevent soil from escaping.
- Position in your desired garden location and fill with soil.
- Plant your garden according to your growing preferences.
Design Variation: For a more refined look, create a double-walled raised bed with space between the inner and outer walls, filling the gap with bark mulch or river rocks for insulation and aesthetics.
3. Pallet Pathway or Garden Decking
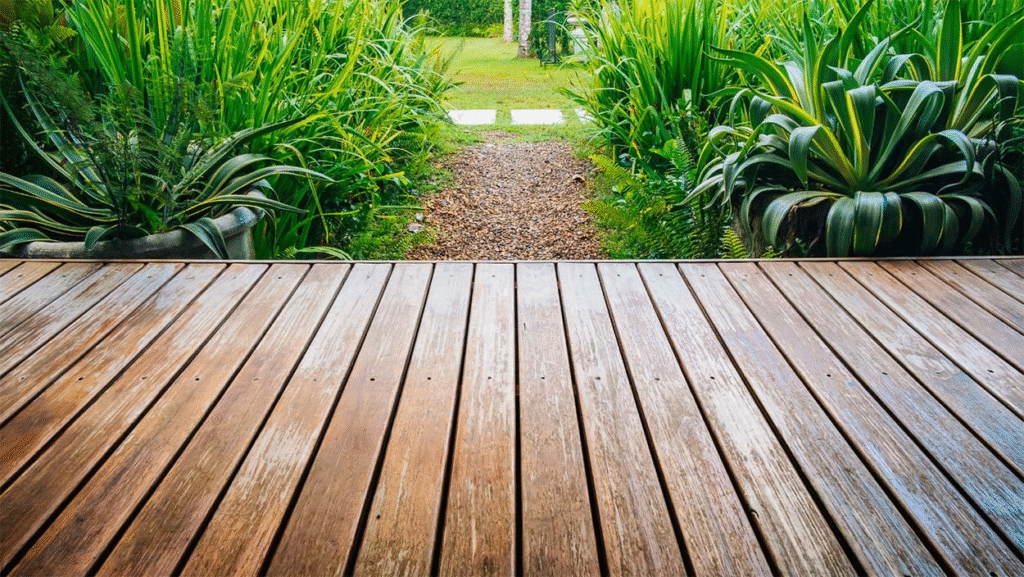
Create charming garden walkways or patio areas using pallet sections as decorative “stepping stones” or connected decking.
Materials Needed:
- Multiple pallets
- Saw
- Sandpaper
- Exterior wood stain or paint (optional)
- Landscape fabric
- Gravel or sand
Step-by-Step Process:
- Cut pallets into equal-sized sections (quarters work well for pathways).
- Sand thoroughly, rounding edges for safety and comfort.
- Apply weatherproof stain or paint if desired.
- Prepare pathway area by removing grass/weeds and laying landscape fabric.
- Add a 1-2 inch layer of gravel or sand for drainage and stability.
- Arrange pallet sections in your desired pattern, leaving small gaps for drainage.
- Fill gaps between sections with decorative pebbles, moss, or ground cover plants.
Maintenance Tip: Re-apply wood sealant annually to prevent rot and extend the life of your pallet pathway.
4. Multi-Tiered Pallet Planter

Create a cascading display of plants with different levels, perfect for herb gardens or flowering displays.
Materials Needed:
- 2-3 wooden pallets
- Saw
- Drill and screws
- Sandpaper
- Wood stain or exterior paint
- Landscaping fabric
- Potting soil
Step-by-Step Process:
- Cut pallets into stair-step configurations of decreasing width.
- Sand all edges and surfaces.
- Secure the sections together to create a stable structure.
- Line each tier with landscaping fabric to create planting pockets.
- Fill with soil and plant different varieties in each tier.
- Position in a garden corner or against a wall for maximum impact.
Plant Selection Tip: Plant trailing varieties in upper levels and taller plants in lower sections for a dynamic visual effect.
5. Pallet Compost Bin

Construct an efficient, accessible compost system using pallets as the structural framework.
Materials Needed:
- 4 identical wooden pallets
- 8 corner brackets
- Screws
- Hinges (optional for door)
- Wire mesh (optional)
Step-by-Step Process:
- Stand pallets on edge to form a square or rectangle.
- Secure corners with brackets and screws.
- For a two-bin system (active and curing compost), use 7 pallets in an E-shape configuration.
- Optionally attach one side with hinges for easy access.
- Line with wire mesh if the gaps between slats are large.
- Position in a partially shaded area with good drainage.
Enhancement Idea: Add a pallet lid that can be propped open during turning but closed to keep out excess rain and wildlife.
Backyard Designs with Pallets: Creating Outdoor Living Spaces
Beyond simple gardening applications, pallets can transform your backyard into functional outdoor rooms:
6. Pallet Outdoor Furniture Set

Create a complete seating arrangement from pallets, including chairs, benches, and tables.
Materials Needed:
- 6-8 wooden pallets
- Saw
- Drill and screws
- Sandpaper
- Weather-resistant cushions
- Exterior paint or stain
- Caster wheels (optional)
Step-by-Step Process for Basic Lounge Seating:
- Use 2 pallets stacked for the base of each seating element.
- Add a third pallet vertically against the back for backrests.
- Secure all sections with screws at connection points.
- Sand thoroughly to prevent splinters.
- Seal with exterior paint or stain.
- Add cushions for comfort and style.
- Optionally attach caster wheels to bases for mobility.
Design Variation: Create an L-shaped sectional by connecting two seating elements at right angles, adding corner brackets for stability.
7. Pallet Privacy Screen or Wind Break
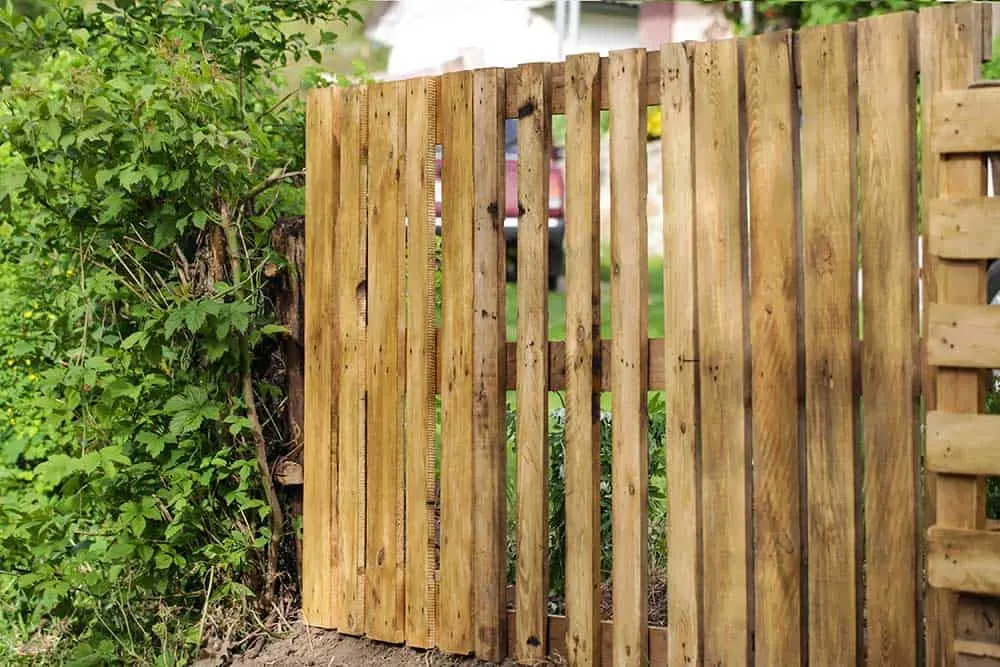
Construct a functional yet decorative barrier for privacy or to block prevailing winds in outdoor living areas.
Materials Needed:
- 3-5 wooden pallets (depending on desired length)
- Post hole digger or concrete footings
- Pressure-treated 4×4 posts
- Exterior screws
- Paint or stain
- Climbing plants (optional)
Step-by-Step Process:
- Determine placement and install posts at 4-5 foot intervals.
- Prepare pallets by cleaning, repairing, and weatherproofing.
- Attach pallets horizontally between posts using screws.
- For added height, stack a second row.
- Paint or stain to complement your garden aesthetic.
- Optionally plant climbing vines at the base to create a living screen.
Enhancement Idea: Attach small planter boxes to the screen for herbs or flowers, combining beauty and function.
8. Pallet Fire Pit Surround

Create a safe, attractive border around an existing fire pit with pallet wood.
Materials Needed:
- 2-3 pallets
- Circular saw
- Drill and screws
- Metal brackets
- Heat-resistant paint
- Sand or gravel
- Stone or brick for inner lining
Step-by-Step Process:
- Disassemble pallets completely to harvest the wood.
- Cut boards to equal lengths for your desired diameter.
- Form an octagon or circle, connecting boards with brackets.
- Line the inside with stone or brick for heat protection.
- Fill the area between the wood surround and fire pit with sand or gravel.
- Apply heat-resistant paint to the exterior wooden sections.
Safety Note: Maintain a minimum 2-foot gap between actual flames and any wooden elements. This design is for creating a seating/safety perimeter, not for containing the fire itself.
Landscaping Ideas with Pallets: Enhancing Garden Structure
Pallets can provide important structural elements for your landscape design:
9. Pallet Garden Tool Organizer
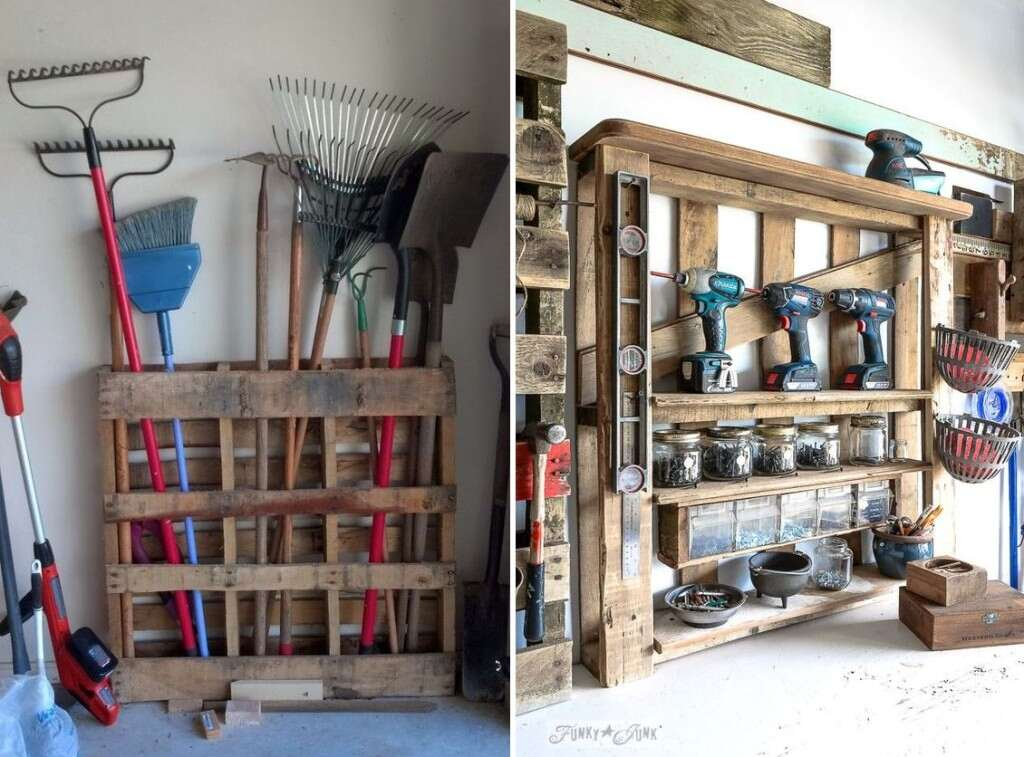
Keep your garden tools organized and accessible with a wall-mounted pallet storage system.
Materials Needed:
- 1 wooden pallet
- Screws and wall anchors
- Various hooks and clips
- Paint or stain (optional)
- Small containers for attachments
Step-by-Step Process:
- Clean and prepare the pallet, ensuring sturdiness.
- Mount horizontally on a shed or garage wall using appropriate anchors.
- Install hooks, nails, or tool clips between slats.
- Add small containers to hold seeds, gloves, or other small items.
- Organize tools by type or frequency of use.
Organization Tip: Paint tool silhouettes behind each hanging spot for quick visual reference of where each item belongs.
10. Pallet Potting Bench with Soil Storage

Create a dedicated workspace for transplanting and garden prep.
Materials Needed:
- 3-4 wooden pallets
- Saw
- Drill and screws
- Extra boards for work surface
- Hinges
- Bins or buckets for soil storage
- Paint or stain (optional)
Step-by-Step Process:
- Use 2 pallets as the vertical supports/legs.
- Attach a third pallet horizontally as the work surface.
- Reinforce the work surface with additional boards for a solid top.
- Create a backboard from the fourth pallet for hanging tools.
- Add shelving below for storage of pots and supplies.
- Install hooks for hanging frequently used hand tools.
- Add bins underneath for soil and amendments.
Enhancement Idea: Install a hinged potting surface that lifts to reveal soil storage, then closes to provide a clean work area.
Repurposing Pallets for Gardening: Special Applications
These unique pallet projects address specific gardening challenges:
11. Pallet Strawberry Planter

Create a space-efficient vertical planter perfect for strawberries and other small fruits.
Materials Needed:
- 1 wooden pallet
- Landscape fabric
- Staple gun
- Potting soil
- Strawberry plants
- Screws (for wall mounting if desired)
Step-by-Step Process:
- Stand the pallet on its short end.
- Line the back, bottom, and sides with landscape fabric, leaving the front open.
- Staple fabric securely, creating pockets between slats.
- Fill the structure with potting soil through the top.
- Plant strawberries in the front openings.
- Water thoroughly but gently to settle soil.
Growing Tip: Position in full sun but water frequently, as vertical planters dry out more quickly than ground plantings.
12. Pallet Trellis System
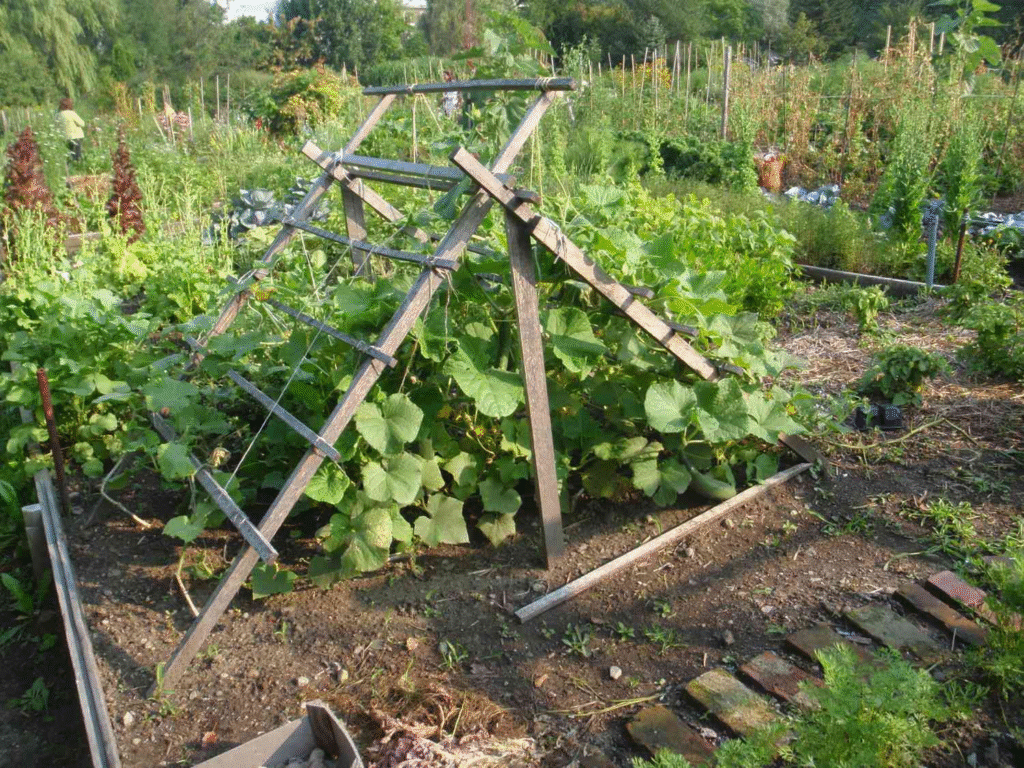
Create a support structure for climbing vegetables or flowering vines.
Materials Needed:
- 2 wooden pallets
- Saw
- Drill and screws
- Garden stakes or posts
- Wire or garden twine
- Weather-resistant paint or stain (optional)
Step-by-Step Process:
- Disassemble one pallet, keeping boards intact.
- Use the second pallet as the base structure.
- Create a ladder or grid pattern by attaching the salvaged boards.
- Secure the completed trellis to garden stakes or posts.
- Position behind growing areas for beans, peas, cucumbers, or flowering vines.
- Add horizontal wires between slats for additional climbing support.
Plant Pairing Idea: Plant shade-tolerant herbs or lettuces at the base of the trellis to benefit from the partial shade created by climbing plants.
Maintaining Your Pallet Garden Features
To ensure your pallet projects stand the test of time and weather:
Seasonal Maintenance Tasks
- Spring: Inspect for winter damage, replace any rotted sections, and refresh waterproofing.
- Summer: Check stability of all structures, tighten loose connections, and clean algae from shadier sections.
- Fall: Clear debris from crevices, apply additional protective coating if needed, and repair any damage.
- Winter: Cover sensitive structures or portable elements with tarps in extreme weather regions.
Extending Pallet Project Lifespan
- Apply new coats of weather-resistant sealant annually.
- Keep wooden surfaces clear of standing water or wet soil contact.
- Position structures slightly elevated from ground level to improve drainage.
- Consider applying environmentally safe wood preservatives to areas in contact with soil.
- Reinforce join points annually as wood naturally expands and contracts.
Environmental Considerations for Pallet Gardens
When using pallets in your landscape, keep these environmental factors in mind:
Sustainable Practices
- Choose pallets stamped with FSC (Forest Stewardship Council) certification when available.
- Opt for natural, eco-friendly sealants and paints with low VOC (Volatile Organic Compounds).
- Incorporate rainwater collection systems into pallet structures where possible.
- Create habitat niches for beneficial insects within pallet structures.
- Plan for eventual replacement and how materials will be disposed of or further repurposed.
Eco-Friendly Enhancements
- Install small solar lights in pallet projects for evening garden enjoyment.
- Create insect hotels in the gaps of vertical pallet structures.
- Use pallets as the framework for small-scale green roofs on garden sheds or dog houses.
- Incorporate rainwater diversion systems into pallet pathways for passive garden irrigation.
Design Inspiration: Real-World Pallet Garden Transformations
These case studies showcase the potential of pallet garden projects:
Urban Balcony Makeover

Challenge: A 6′ x 10′ city apartment balcony with no greenery and limited weight capacity.
Solution: A vertical pallet garden mounted to the wall held herbs and flowers, while a lightweight pallet bench provided seating. A pallet coffee table with a removable top revealed storage for garden supplies.
Results: The 50 square foot balcony now produces herbs year-round and creates a private outdoor retreat despite space limitations.
Suburban Garden Overhaul

Challenge: A featureless backyard with poor soil and no distinct spaces.
Solution: Pallet raised beds created a defined vegetable garden, while pallet decking formed a central patio area. A pallet privacy screen divided the space into “rooms” for different activities.
Results: The garden now includes edible, recreational, and social spaces, all achieved with minimal purchased materials.
Rural Homestead Organization
Challenge: An overwhelming collection of garden tools, supplies, and materials with no storage system.
Solution: A comprehensive pallet storage system including a potting bench, vertical tool organizer, and compost system streamlined garden operations.
Results: Increased efficiency led to expanded growing capacity and less time spent searching for tools and supplies.
Conclusion: Sustainable Beauty Through Creative Repurposing
Pallet garden projects represent the perfect intersection of sustainability, creativity, and functionality. By transforming these discarded wooden structures into beautiful, useful landscape features, gardeners can reduce waste while enhancing their outdoor spaces. The versatility of pallets means they can adapt to spaces of any size—from apartment balconies to sprawling rural properties—and complement any garden style from modern minimalist to rustic country.
Remember that the most successful pallet projects begin with careful selection of safe, sturdy materials and proper preparation. Taking the time to clean, repair, and weatherproof your pallets will ensure your garden creations last for many growing seasons.
As you explore the possibilities of pallet gardening, don’t be afraid to experiment and combine ideas to create custom solutions for your unique space. The beauty of working with repurposed materials is that each project carries its own character and story, adding depth and personality to your garden that store-bought features simply cannot match.
