Building a DIY Compost Bin: A Complete Guide
Are you looking to reduce waste, create nutrient-rich soil for your garden, and contribute to a healthier environment? Building your own compost bin is an excellent way to achieve all of these goals while saving money in the process. This comprehensive guide will walk you through everything you need to know about creating and maintaining a DIY compost bin that suits your specific needs and space constraints.
Why Build Your Own Compost Bin?
Before diving into the construction details, it’s worth understanding the benefits of composting and why building your own bin makes sense.
Composting allows you to:
- Reduce household waste by up to 30%
- Create free, nutrient-rich soil amendment for your gardens
- Decrease methane emissions from landfills
- Improve soil health and water retention
- Support local ecosystem health
According to the Environmental Protection Agency (EPA), food scraps and yard waste together make up more than 30 percent of what Americans throw away. Instead of sending these valuable organic materials to landfills, you can compost them in your backyard.
Choosing the Right Compost Bin Design
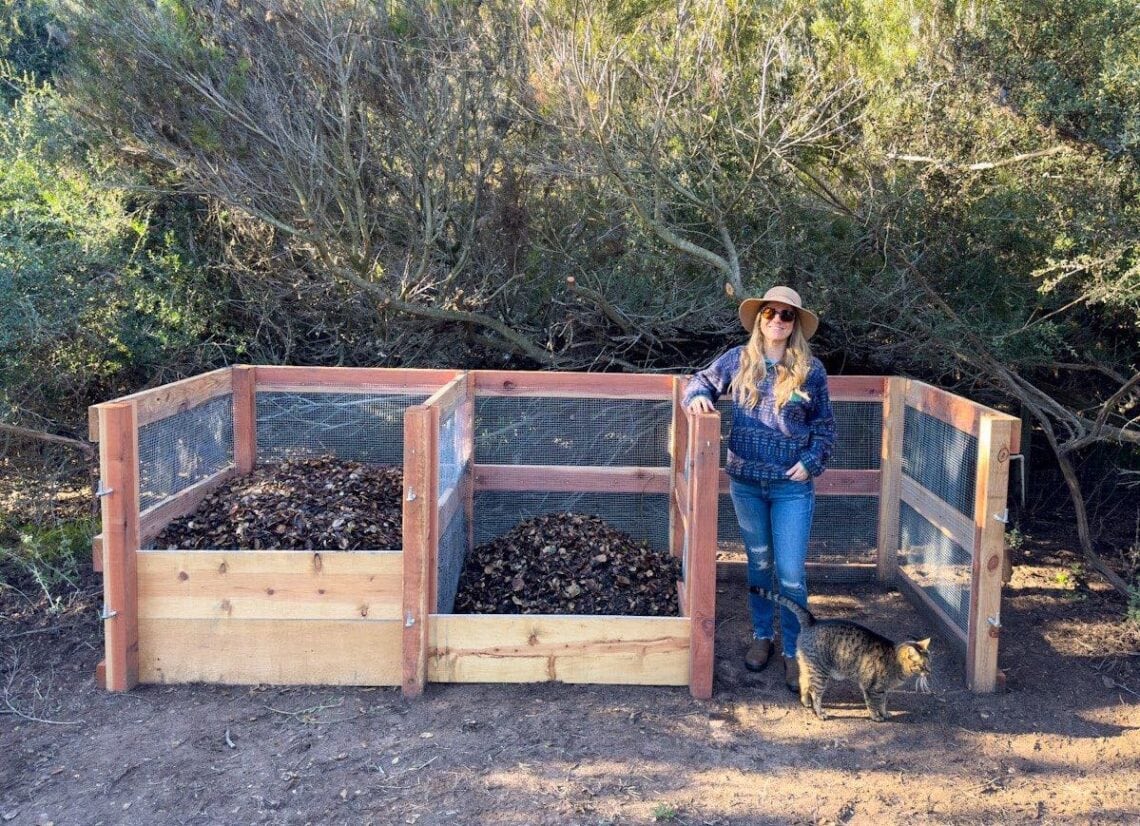
Your composting goals, available space, and lifestyle will determine which type of compost bin is best for you. Here are some popular options:
Enclosed Bin Systems
Enclosed bins are perfect if you:
- Have limited space
- Live in an urban or suburban area
- Want a tidy, contained system
- Need to discourage wildlife from accessing your compost
Open Bin Systems
Open bins might be better if you:
- Have ample yard space
- Generate large amounts of yard waste
- Want a system that’s easy to turn and maintain
- Live in a rural area without nearby neighbors
Tumbler Systems
Compost tumblers are ideal if you:
- Want faster composting results
- Have back issues that make turning traditional piles difficult
- Prefer a cleaner process with minimal contact with decomposing materials
- Need to deter pests
Materials Comparison for DIY Compost Bins
Different materials offer various benefits and drawbacks. Consider this comparison when selecting materials for your DIY project:
| Material | Cost | Durability | Insulation Value | Aesthetics | Eco-Friendliness |
|---|---|---|---|---|---|
| Wood | $$ | 3-7 years | High | High | High (untreated) |
| Plastic Totes | $ | 5-10 years | Medium | Low | Medium |
| Wire Mesh | $ | 2-5 years | Low | Low | High |
| Cinder Blocks | $$$ | 20+ years | High | Medium | Medium |
| Pallets | Free-$ | 2-4 years | Medium | Medium | Very High |
| Metal Drums | $$ | 10+ years | Low | Medium | Medium |
Essential Tools and Materials

Wooden Pallet Bin Materials
- 4 wooden pallets (untreated)
- Heavy-duty zip ties or galvanized screws
- Wire mesh (optional, for containing smaller materials)
- Hammer and nails or drill with bits
- Work gloves
- Measuring tape
Plastic Tote Bin Materials
- 2 plastic storage totes with lids (18-30 gallon size)
- Drill with 1/4″ and 1/2″ bits
- Box cutter or scissors
- Newspaper or cardboard
- Work gloves
Wire Mesh Bin Materials
- 10-15 feet of 3-foot-high hardware cloth or chicken wire
- Wire cutters
- 3-4 wooden or metal stakes
- Zip ties or wire
- Work gloves
- Measuring tape
Step-by-Step Construction Guide
Building a Wooden Pallet Compost Bin
A pallet bin is one of the simplest and most cost-effective options, perfect for medium to large yards.
- Prepare Your Site
- Choose a level area with good drainage
- Select a spot with partial shade to prevent the compost from drying out
- Ensure it’s accessible for adding materials and harvesting compost
- Prepare Your Pallets
- Inspect pallets for nails, splinters, or damage
- Ensure pallets are untreated wood (look for “HT” stamp for heat-treated)
- Sand rough edges to prevent injuries
- Assemble the Structure
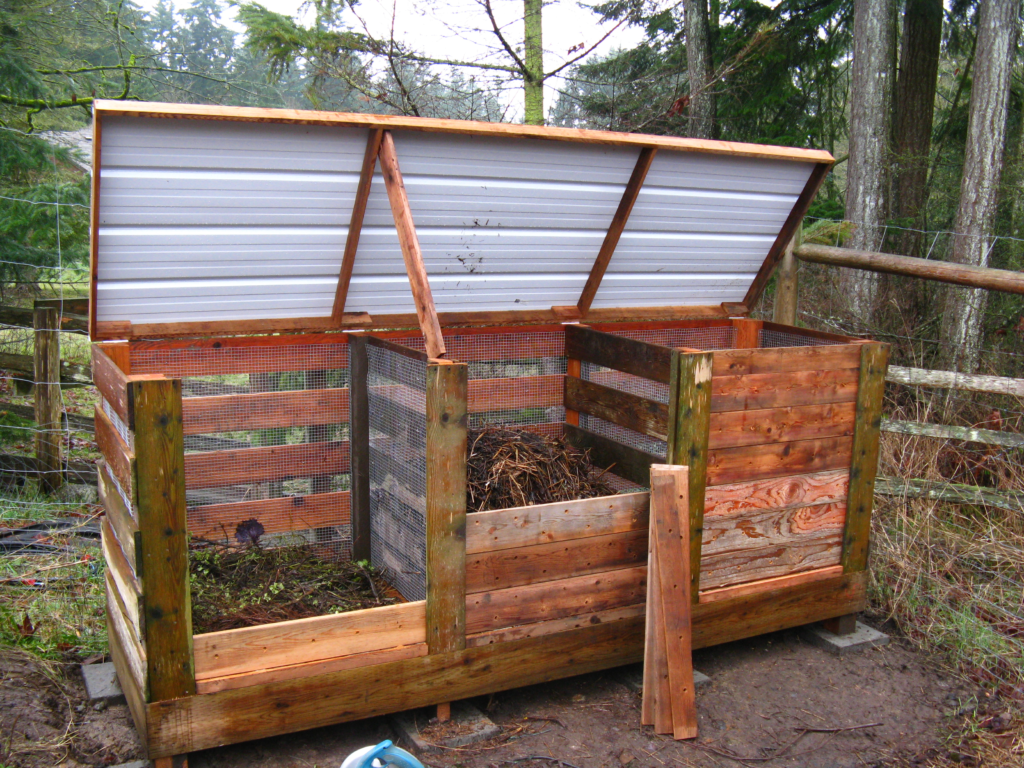
- Stand three pallets upright to form a U-shape
- Secure the corners with screws, wire, or heavy-duty zip ties
- Add the fourth pallet as a door, attaching it with hinges for easy access
- Optional: Line the inside with wire mesh to contain smaller materials
- Add Optional Features
- Cover: Attach a piece of plywood on top to keep rain out (drill holes for airflow)
- Floor: Add wire mesh on the bottom to deter rodents
- Divider: Create a two-bin system by adding a center pallet for active and finished compost
Creating a Plastic Tote Compost Bin
Perfect for apartments, small yards, or beginners, this system is affordable and easy to maintain.
- Prepare Your Totes
- Drill 15-20 1/4″ holes in the bottom of one tote for drainage
- Drill 15-20 1/2″ holes around the sides for airflow
- Drill 4-5 holes in the lid for ventilation
- Set Up the System
- Place the undrilled tote on the ground as a collection basin
- Place bricks or wood blocks inside this base tote
- Set the drilled tote on top of the blocks to create space for leachate collection
- Prepare Your Compost Base
- Add a 2-3 inch layer of torn newspaper or cardboard to absorb moisture
- Add a thin layer of soil or finished compost to introduce microorganisms
- Finishing Touches
- Secure the lid to keep pests out and moisture in
- Place in a convenient location for easy access
Constructing a Wire Mesh Bin
This open-air system is great for yard waste and offers excellent airflow.
- Shape the Wire
- Measure and cut hardware cloth or chicken wire to your desired circumference
- A 3-4 foot diameter works well for most home needs
- Create the Cylinder
- Form the wire into a cylinder shape
- Secure the ends together with smaller pieces of wire or zip ties
- Stabilize the Structure
- Drive stakes into the ground around the perimeter
- Attach the wire cylinder to the stakes using zip ties or wire
- Add an Access Point
- Consider creating a removable section for easier harvesting
- Alternatively, the entire bin can be lifted to access finished compost at the bottom
The Science of Successful Composting
Understanding the biology behind composting will help you create the optimal environment for decomposition.
The Perfect Carbon-to-Nitrogen Ratio
Composting requires a balance of “browns” (carbon-rich materials) and “greens” (nitrogen-rich materials). Aim for a ratio of approximately 3:1 browns to greens by volume.
Brown Materials (Carbon):
- Dry leaves
- Straw or hay
- Cardboard
- Paper
- Wood chips
- Sawdust (untreated wood)
- Dry plant stalks
Green Materials (Nitrogen):
- Kitchen scraps (fruits, vegetables)
- Fresh grass clippings
- Plant trimmings
- Coffee grounds
- Tea bags (paper only)
- Eggshells (crushed)
Maintaining Moisture and Aeration
The microorganisms that break down your compost need both water and oxygen to thrive:
- Moisture: Your compost should feel like a wrung-out sponge. Too dry, and decomposition slows; too wet, and it becomes anaerobic and smelly.
- Aeration: Turn your compost every 1-2 weeks to introduce oxygen and accelerate decomposition. For tumbler systems, rotate 2-3 times per week.
Troubleshooting Common Compost Problems
| Problem | Likely Cause | Solution |
|---|---|---|
| Foul Odor | Too wet or too much nitrogen | Add brown materials and turn pile |
| Pile Not Heating Up | Too dry, too small, or insufficient nitrogen | Add water, more materials, or more greens |
| Attracts Pests | Improper food waste or exposed materials | Bury food waste in center, avoid meat/dairy, secure bin |
| Slow Decomposition | Pieces too large, cold weather, or poor aeration | Chop materials smaller, insulate bin, turn more frequently |
| Flies or Gnats | Exposed food waste | Cover fresh food waste with browns or soil |
Seasonal Composting Tips for US Regions
Northern States (Cold Winters)
- Insulate your compost bin with straw bales during winter
- Build larger piles in fall to retain heat through winter
- Continue adding materials even in winter, though decomposition will slow
- Turn the pile less frequently during cold months
Southern States (Hot Summers)
- Position bins in partial shade to prevent excessive drying
- Monitor moisture more frequently during hot, dry periods
- Consider adding more water during summer months
- Turn the pile early in the morning or evening to avoid heat stress
Coastal States (Humid Conditions)
- Ensure excellent drainage to prevent waterlogging
- Add more carbon-rich materials to absorb excess moisture
- Consider a covered design to control rainfall effects
- Monitor more frequently for pests that thrive in humid conditions
Harvesting and Using Your Compost
Your patience will be rewarded with dark, crumbly compost that smells like rich forest soil. Here’s how to harvest and use this “black gold”:
When Is Compost Ready?
Finished compost is:
- Dark brown or black in color
- Crumbly in texture
- Earthy-smelling (not sour or ammonia-like)
- Unrecognizable from original materials
- Cool to the touch
Depending on your system, materials, and maintenance, this process takes anywhere from 2 months (hot, well-maintained pile) to 1 year (cold composting).
Harvesting Methods
For Single Bins:
- Stop adding new materials 2-3 months before you need the compost
- Remove finished compost from the bottom while leaving unfinished materials at the top
- Use a compost sifter to separate finished compost from larger pieces
For Multi-Bin Systems:
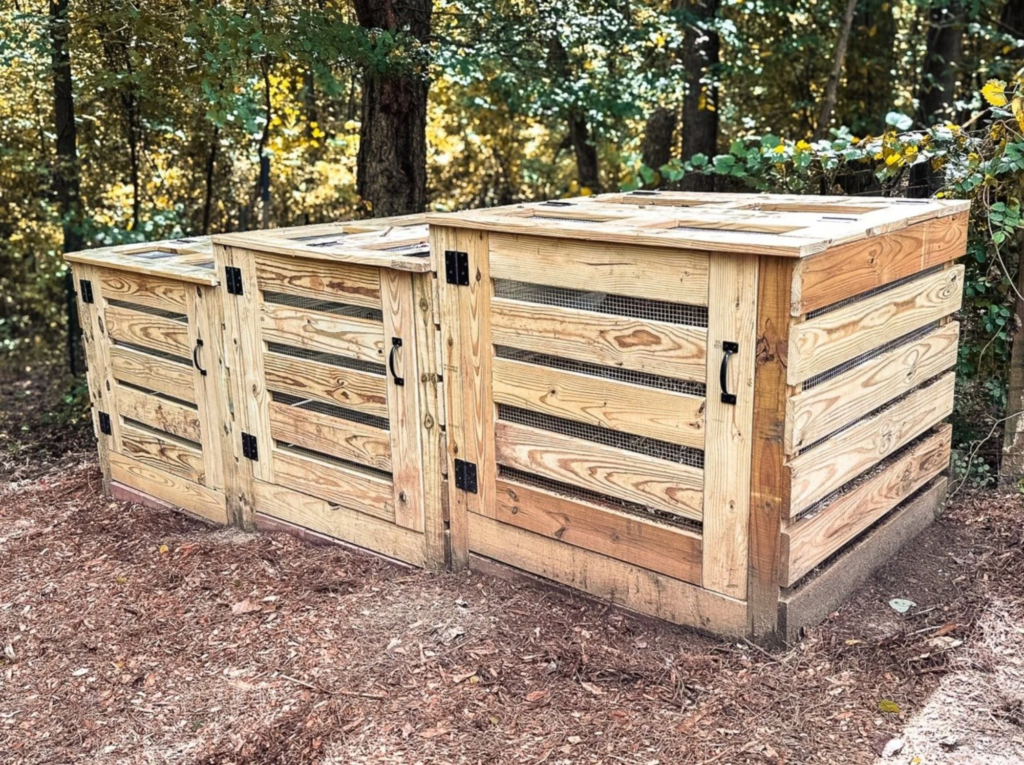
- Fill one bin completely, then start filling the second
- Allow the first bin to finish composting while using the second
- Harvest the first bin completely when ready
Using Your Compost
Your homemade compost has countless applications:
- Garden Beds: Mix 1-2 inches into the top 6 inches of soil
- Potted Plants: Blend 1 part compost with 3 parts potting soil
- Lawns: Spread a thin layer (1/4 inch) as topdressing
- Compost Tea: Steep compost in water to create a liquid fertilizer
- Seed Starting: Mix with potting soil for nutrient-rich seedling medium
According to the USDA Natural Resources Conservation Service, using compost improves soil structure, increases water retention, and adds valuable nutrients and beneficial microorganisms to your soil.
Advanced Composting Techniques
Once you’ve mastered basic composting, consider these advanced methods:
Vermicomposting (Worm Composting)
Perfect for apartment dwellers or those with limited space, vermicomposting uses red wiggler worms to break down kitchen scraps quickly.
Bokashi Composting
This anaerobic fermentation process allows you to compost meat and dairy products that traditional methods cannot handle.
Three-Bin System
Create a continuous composting system with separate bins for fresh materials, actively decomposing compost, and finished compost.
Hot Composting
Maintain temperatures between 130-150°F for faster decomposition and weed/pathogen killing power.
Environmental Impact of Home Composting
Your decision to compost at home has far-reaching environmental benefits:
- Reduced Methane Emissions: When organic waste decomposes in landfills, it produces methane, a greenhouse gas 25 times more potent than carbon dioxide.
- Lower Carbon Footprint: Home composting eliminates the need for transportation and processing of organic waste.
- Water Conservation: Compost-rich soil requires less irrigation, reducing water usage by up to 30%.
- Decreased Chemical Use: Gardens with compost-enriched soil often require fewer synthetic fertilizers and pesticides.
Conclusion
Building your own compost bin is a rewarding project that benefits both your garden and the planet. By selecting the right design for your space and needs, gathering appropriate materials, and understanding the science behind composting, you’re well on your way to creating nutrient-rich soil amendment while reducing your environmental footprint.
Remember that composting is as much art as science. Don’t be afraid to experiment with different materials and methods until you find the system that works best for you. With patience and attention, your DIY compost bin will provide years of valuable service to your garden and the environment.
Start your composting journey today, and watch as yesterday’s kitchen scraps and yard waste become tomorrow’s garden gold!
