How to Grow and Care for Tayberry: Complete Guide
Are you looking to add a unique and delicious berry variety to your garden? The tayberry might be exactly what you need. This remarkable hybrid fruit combines the best qualities of blackberries and raspberries, offering a distinctive sweet-tart flavor that makes it a prized addition to any culinary garden. In this comprehensive guide, you’ll discover everything you need to know about growing and caring for tayberries in various settings, from outdoor gardens to containers, so you can enjoy these exceptional berries in your own backyard.
What Is a Tayberry?
Before diving into cultivation methods, let’s understand what makes tayberries special. Developed in Scotland at the Scottish Horticultural Research Institute (now the James Hutton Institute) in the 1970s, the tayberry is a cross between a blackberry and a red raspberry. Named after the River Tay in Scotland, these berries combine the size and juiciness of blackberries with the aromatic qualities of raspberries.
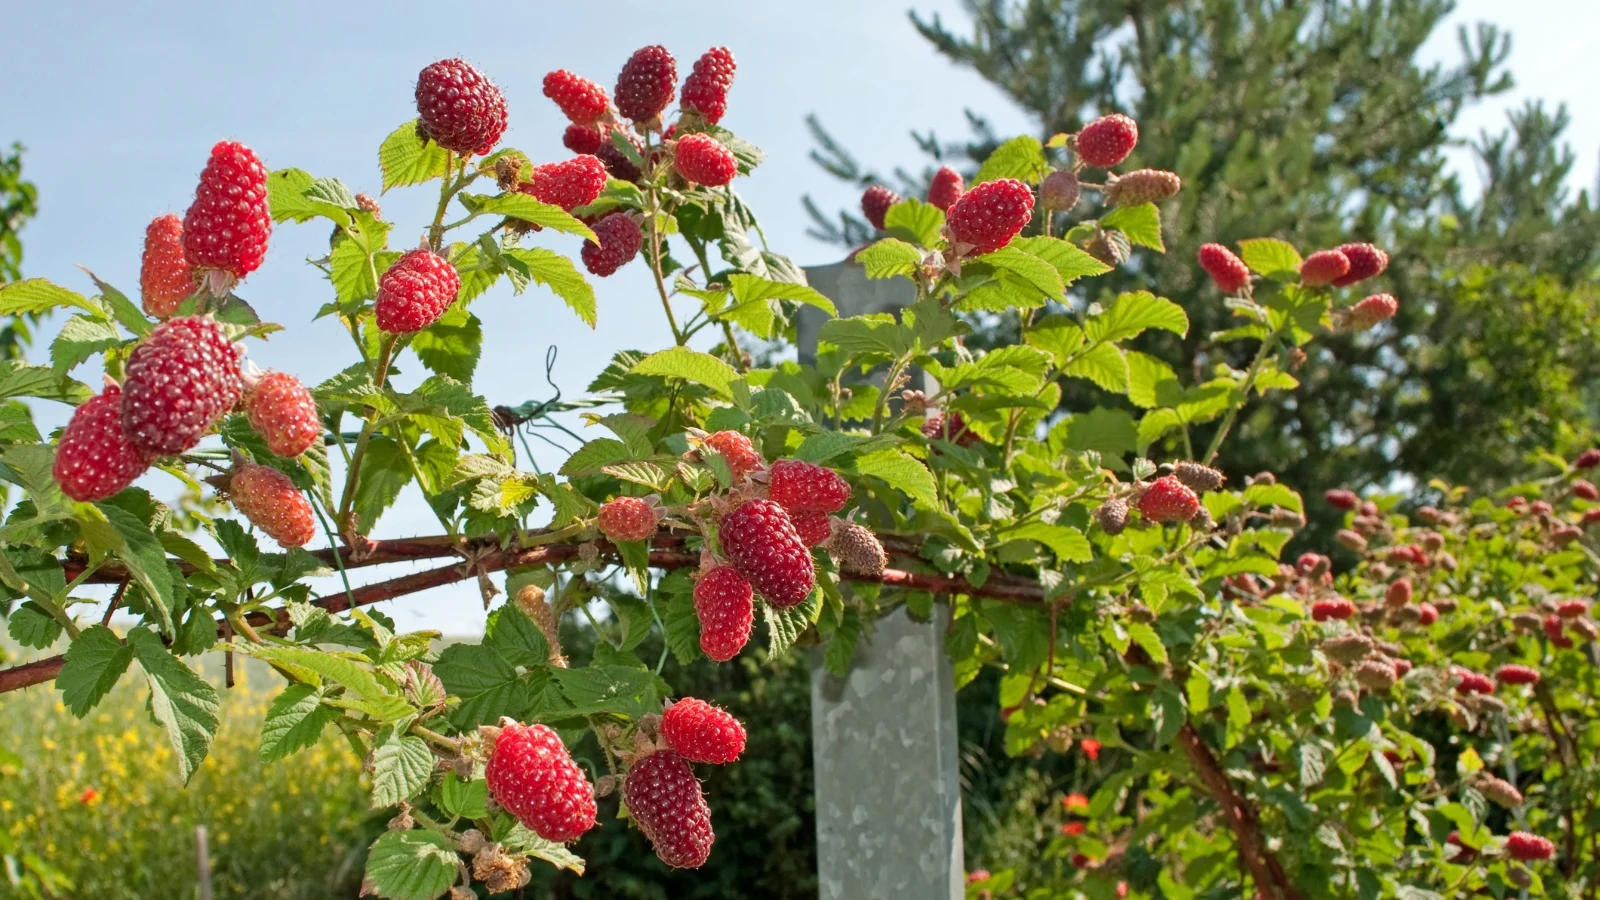
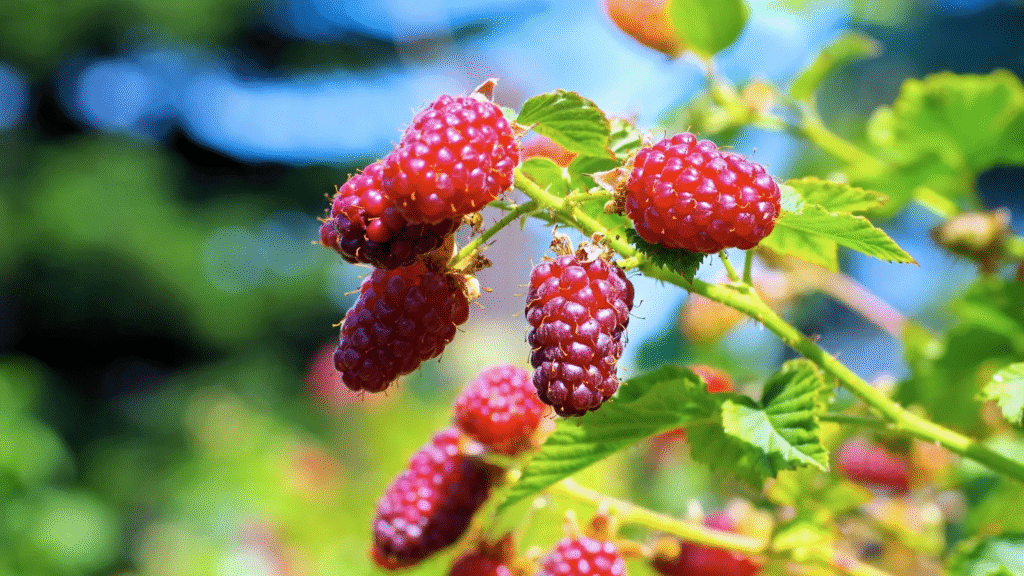
Tayberries produce large, cone-shaped fruits that are reddish-purple when ripe. They offer an exceptional flavor profile that many describe as more intense and complex than either parent berry. The plants themselves are vigorous, with canes that can grow up to 7 feet tall if left unsupported.
According to the USDA Agricultural Research Service, tayberries grow best in USDA hardiness zones 6-9, making them suitable for many regions across the United States.
Getting Started: Tayberry Growing Basics
Climate and Site Selection
Tayberries thrive in areas with:
- Mild winters and moderate summers
- At least 6-8 hours of direct sunlight daily
- Protection from strong winds
- Good air circulation
The ideal location for your tayberry plants is a spot with full sun exposure, though they can tolerate partial shade in hotter climates. If you’re in the southern parts of the US, providing afternoon shade can help protect the plants from extreme heat.
Soil Requirements
Tayberries aren’t overly fussy about soil, but they do have some preferences:
- Well-draining, loamy soil
- Slightly acidic to neutral pH (6.0-7.0)
- Rich in organic matter
Before planting, it’s advisable to conduct a soil test to determine if any amendments are needed. You can contact your local extension office through the National Institute of Food and Agriculture to get soil testing services.
Planting Tayberries
When to Plant
The optimal time to plant tayberries depends on your region:
- In warmer zones (8-9): Late fall to early winter
- In cooler zones (6-7): Early spring, after the threat of hard frost has passed
Planting Bare-Root Tayberries
Most tayberries are sold as bare-root plants. Here’s how to plant them:
- Soak the roots in water for 1-2 hours before planting
- Dig a hole wide enough to accommodate the root system (typically 12-18 inches wide)
- Create a small mound in the center of the hole
- Position the plant with roots spread over the mound
- Ensure the crown (where the stem meets the roots) is at soil level
- Backfill with soil and tamp down gently
- Water thoroughly
Spacing Requirements
Tayberries need room to grow:
- Between plants: 4-6 feet
- Between rows: 8-10 feet
This spacing allows for adequate air circulation and makes maintenance easier.
Growing Tayberries from Seed
While possible, growing tayberries from seed is challenging and not commonly practiced due to several factors:
- Seeds may not produce plants true to the parent
- Germination can be inconsistent
- Plants take longer to establish and produce fruit
If you’re determined to try growing from seed:
- Extract seeds from ripe tayberries and rinse thoroughly
- Stratify seeds by placing them in damp sand in a sealed container in the refrigerator for 3-4 months
- Plant in seed-starting mix in early spring
- Keep soil consistently moist until germination
- Transplant seedlings when they have several sets of true leaves
Most home gardeners find it more efficient to purchase established plants or propagate through stem cuttings or tip layering.
Container Growing for Tayberries
Container Selection and Preparation
Don’t have garden space? Tayberries can thrive in containers:
- Choose a container at least 18-24 inches in diameter and equally deep
- Ensure adequate drainage holes
- Use a high-quality potting mix designed for berries or fruit plants
- Add compost or well-rotted manure to increase organic matter content
Planting Process for Containers
- Place a layer of gravel at the bottom of the pot for drainage
- Fill the container halfway with potting mix
- Position the tayberry plant with the crown at the appropriate level
- Fill in around the roots with more potting mix
- Water thoroughly until water flows from drainage holes
Support Systems for Container Tayberries
Container-grown tayberries will need support:
- Install a sturdy trellis, cage, or stakes at planting time
- Train the canes as they grow to prevent tangling
- Secure canes with garden twine or plant ties
Trellising and Support Systems
Tayberries produce long, flexible canes that require support. Several trellis systems work well:
T-Trellis System
- Install posts 15-20 feet apart
- Attach a crossbar 3-4 feet long at the top of each post
- Run two to three wires between the crossbars
- Train tayberry canes along the wires
Fan System
- Install a series of vertical posts
- Attach horizontal wires 12-18 inches apart
- Train canes in a fan pattern along the wires
Whichever system you choose, install it at planting time to avoid disturbing established roots later.
Tayberry Maintenance and Care
Watering Requirements
Proper watering is crucial for tayberry success:
- New plants: Water thoroughly twice weekly during the first growing season
- Established plants: 1-2 inches of water weekly, more during hot, dry periods
- Container plants: Check daily and water when the top inch of soil feels dry
- Water at soil level to keep foliage dry and reduce disease risk
Fertilization Schedule
Tayberries have moderate fertility needs:
| Time of Year | Fertilizer Type | Application Rate | Notes |
|---|---|---|---|
| Early Spring | Balanced organic fertilizer (10-10-10) | 1/2 cup per plant | Apply when new growth begins |
| Late Spring | Compost or aged manure | 2-inch layer | Apply as mulch around plants |
| Early Summer | Balanced organic fertilizer | 1/4 cup per plant | Omit if plants are vigorous |
| Fall | Bone meal or 0-20-0 | 1/4 cup per plant | Helps with root development |
For container-grown tayberries, use a half-strength liquid fertilizer monthly during the growing season.
Mulching Benefits
Apply a 2-3 inch layer of organic mulch around your tayberry plants to:
- Conserve soil moisture
- Suppress weeds
- Moderate soil temperature
- Add organic matter as it breaks down
Good mulching options include straw, shredded leaves, wood chips, or pine needles.
Pruning and Training
Understanding Tayberry Growth Cycle
Tayberries produce biennial canes:
- First-year canes (primocanes): Vegetative growth only
- Second-year canes (floricanes): Produce fruit, then die
Pruning Schedule
Follow this pruning regimen for healthy, productive plants:
Summer Pruning (After Harvest)
- Remove all canes that have finished fruiting (they’ll look brown and woody)
- Cut these spent canes at ground level
- Thin out weak or damaged primocanes, leaving 5-7 strong new canes per plant
Winter Pruning (Late Dormant Season)
- Shorten remaining canes to 5-6 feet if needed
- Remove any damaged or diseased portions
- Secure remaining canes to your trellis system
Ongoing Maintenance
- Remove any suckers growing away from the main plant
- Prune away crossing or crowded canes to improve air circulation
Pest and Disease Management
Common Pests
Tayberries may encounter these common pests:
- Japanese Beetles: Handpick and drop in soapy water, or use row covers during beetle season.
- Spider Mites: Spray plants with strong jets of water or use insecticidal soap.
- Aphids: Encourage beneficial insects like ladybugs or use neem oil.
- Birds: Install bird netting before berries ripen.
Disease Prevention
Prevent these common diseases through good cultural practices:
- Cane Blight: Remove and destroy infected canes; ensure good air circulation.
- Powdery Mildew: Avoid overhead watering; apply sulfur-based fungicides if necessary.
- Root Rot: Plant in well-draining soil; avoid overwatering.
- Botrytis: Harvest ripe berries promptly; remove infected fruit immediately.
Harvesting and Using Tayberries
When and How to Harvest
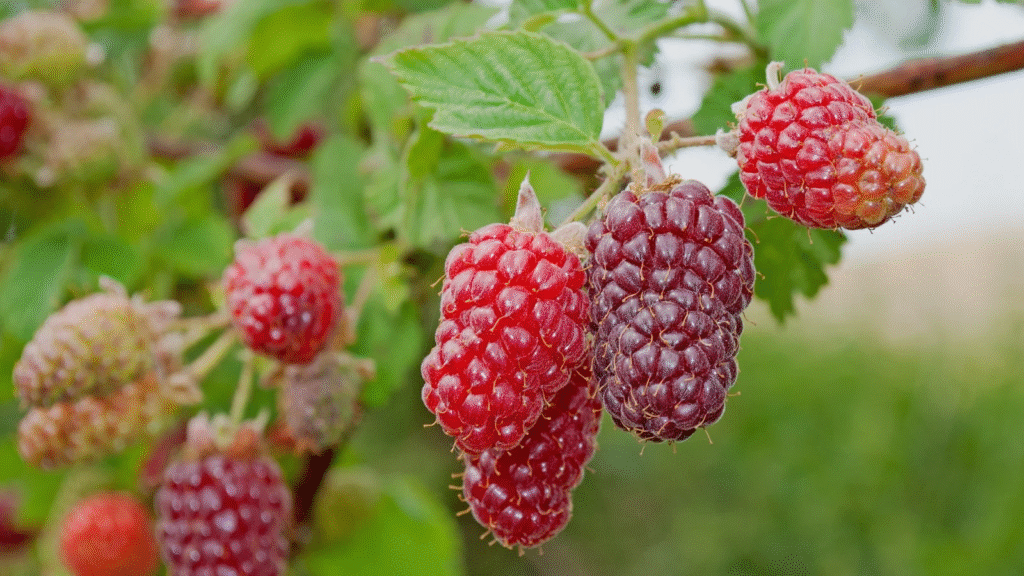
Tayberry harvest typically occurs in mid-summer (June to August, depending on your region). Here’s how to know they’re ready:
- Color changes from red to deep purple-red
- Berries detach easily from the plant
- Fruit feels slightly soft when gently squeezed
To harvest:
- Pick in the morning when temperatures are cool
- Gently roll berries into your hand rather than pulling
- Place directly into shallow containers to prevent crushing
- Refrigerate immediately if not using right away
Culinary Uses
Tayberries are versatile in the kitchen:
- Fresh eating
- Baking (pies, cobblers, muffins)
- Preserves and jams
- Sauces and syrups
- Wine making
- Smoothies and desserts
Their complex flavor makes them particularly valuable for preserves, where their aromatic qualities really shine.
Winter Protection in Colder Regions
If you’re growing tayberries in USDA zones 6 or colder regions of zone 7, provide winter protection:
- After fall pruning, lay canes on the ground
- Cover with a 4-6 inch layer of straw or pine needles
- Add a layer of burlap or floating row cover on top
- Secure edges with soil or stakes
- Remove protection gradually in spring as temperatures warm
Propagation Methods
Tip Layering
The easiest method for home gardeners:
- In late summer, bend a healthy primocane tip to the ground
- Bury the tip 1-2 inches deep in soil
- Secure with a garden staple or small rock
- Keep soil moist
- By spring, the tip will have rooted
- Cut the new plant free from the parent and transplant
Stem Cuttings
For multiple new plants:
- In early spring, take 6-8 inch cuttings from healthy primocanes
- Remove all but the top leaves
- Dip cut end in rooting hormone
- Plant in a pot with moist potting mix
- Cover with a plastic bag to create a humid environment
- Place in indirect light
- Transplant when roots are established (usually 6-8 weeks)
Tayberries in the US Market
Tayberries remain something of a specialty crop in the United States, which makes growing your own particularly rewarding. While commercial production is limited, interest is growing among small-scale farmers and home gardeners, especially in the Pacific Northwest, parts of California, and some areas of the Northeast.
The berries’ relatively short shelf life makes them less common in supermarkets, but they can occasionally be found at farmers’ markets and specialty stores during their brief season. This limited availability contributes to their premium pricing when commercially available.
By growing your own tayberries, you gain access to these gourmet berries at a fraction of the market cost. A well-maintained tayberry plant can produce 8-12 pounds of fruit annually once established, providing excellent value for the home gardener.
Conclusion
Growing tayberries requires some effort, but the reward of harvesting these exceptional berries makes it worthwhile. Whether you’re cultivating them in a spacious garden or in containers on a patio, tayberries offer a unique flavor experience that’s difficult to find in commercial markets.
By following the care guidelines in this article, you’ll be well on your way to enjoying these delicious berries fresh from your own garden. Remember that tayberries, like many perennial fruits, improve with each passing year as the plants become established. With proper care, your tayberry plants can provide delicious harvests for 7-10 years or more.
If you’re looking to diversify your garden with a berry that offers exceptional flavor and versatility in the kitchen, tayberries deserve a place in your growing space. Their unique heritage and relatively limited commercial availability make them a true gardener’s treasure that will impress family and friends alike.
