How to Grow Watercress: A Complete Guide for Home Gardeners
Watercress (Nasturtium officinale) is a nutrient-packed aquatic plant that adds a peppery kick to salads, sandwiches, and soups. This versatile green has been cultivated for thousands of years and is experiencing a renaissance in the US culinary scene. With its impressive nutritional profile and distinctive flavor, watercress deserves a place in your garden or kitchen. This guide will walk you through everything you need to know about growing this remarkable herb at home.
What Makes Watercress Special?
Before diving into cultivation techniques, let’s understand what makes watercress such a valuable addition to your herb collection:
Watercress is not just delicious—it’s a nutritional powerhouse. According to the USDA FoodData Central, watercress contains impressive amounts of vitamins A, C, and K, along with calcium, manganese, and potassium. These nutrients support immune function, bone health, and may help reduce inflammation.
In the US market, watercress has seen increasing demand as health-conscious consumers seek nutrient-dense greens. While you can purchase watercress at specialty grocers and farmers’ markets, growing your own ensures the freshest flavor and highest nutritional content.
Growing Watercress: Methods and Techniques
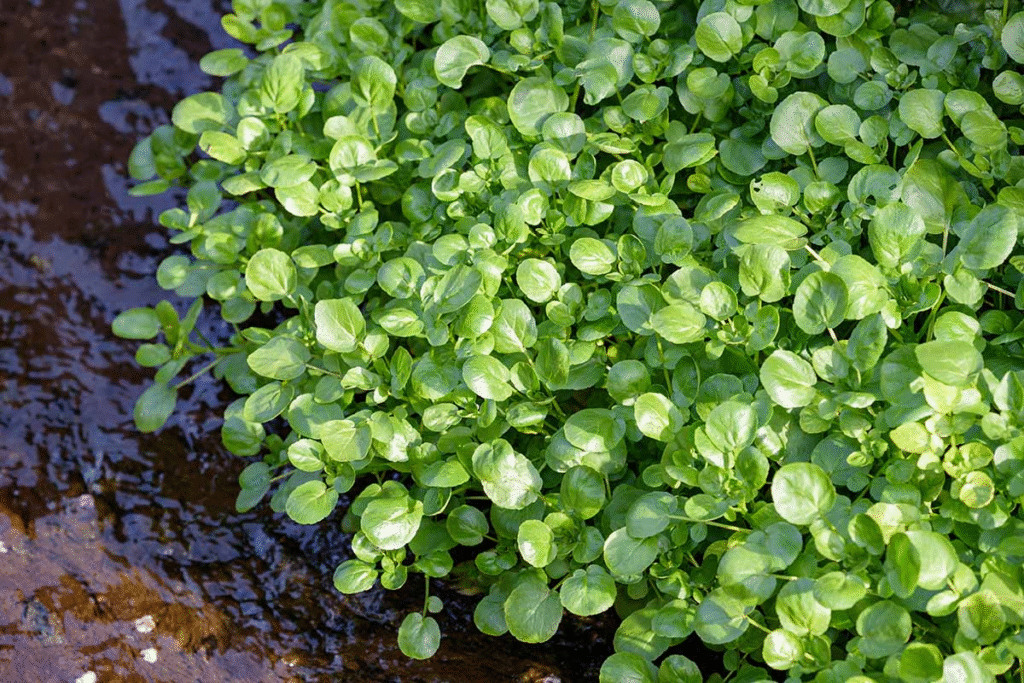
Watercress naturally grows in moving water, but you don’t need a stream or pond to cultivate this versatile herb. Let’s explore different methods to grow watercress at home.
Growing Watercress from Seed
Starting watercress from seed is economical and rewarding. Here’s how to do it:
- Seed Selection: Purchase high-quality watercress seeds from a reputable supplier. Look for organic options when possible.
- Seed Starting: Fill seed trays with a soilless seed-starting mix. Moisten the medium thoroughly.
- Sowing: Sprinkle seeds lightly over the surface of the growing medium. Watercress seeds are tiny, so avoid over-sowing.
- Light Coverage: Barely cover the seeds with a thin layer of the growing medium or vermiculite.
- Water and Light: Keep the medium consistently moist. Place in bright, indirect light, ideally maintaining temperatures between 50-60°F (10-15°C).
- Germination: Expect germination within 7-14 days.
- Transplanting: When seedlings develop their first true leaves, transplant them to your chosen growing system.
Container Growing: The Pot Method
Growing watercress in pots allows for easy maintenance and harvesting. Here’s how to set up a container watercress garden:
- Select Your Container: Choose a wide, shallow container at least 6 inches deep with drainage holes.
- Create a Reservoir: Place a smaller pot or saucer inside your main container to create a water reservoir.
- Growing Medium: Fill the container with a mixture of good-quality potting soil and compost, leaving 1-2 inches below the rim.
- Planting: Either transplant seedlings or directly sow seeds into the moistened soil.
- Watering: Keep the soil consistently wet but not waterlogged. Fill the reservoir regularly to maintain moisture.
- Location: Position your container where it will receive 4-6 hours of morning sun but be protected from harsh afternoon light.

Hydroponic Growing: The Indoor Method
For year-round harvests regardless of climate, hydroponic systems are ideal for watercress:
- Simple Setup: Fill a shallow container with 2-3 inches of water.
- Support Medium: Place a layer of pebbles, expanded clay pellets, or rock wool cubes to support the plants above water.
- Plant Establishment: Place seedlings or cuttings so their roots reach the water but their stems and leaves remain above.
- Water Quality: Change the water every 3-4 days to prevent stagnation.
- Nutrients: Add a diluted hydroponic nutrient solution once plants are established.
- Lighting: If growing indoors away from windows, provide 14-16 hours of artificial light using LED grow lights.
Optimal Growing Conditions for Watercress
Understanding watercress’s preferred environmental conditions will help you succeed with any growing method:
| Factor | Optimal Condition | Notes |
|---|---|---|
| Temperature | 50-60°F (10-15°C) | Cooler temperatures prevent bolting |
| Water pH | 6.5-7.5 | Slightly acidic to neutral |
| Light | Partial shade | 4-6 hours of filtered sunlight ideal |
| Water | Consistently moist | Never allow to dry out |
| Spacing | 4-6 inches between plants | Allows proper air circulation |
| Nutrient needs | Moderate | Benefits from regular, diluted feeding |
| Growing season | Spring and fall | Can be grown year-round indoors |
Common Challenges and Solutions
Even with proper care, you may encounter some challenges when growing watercress:
Pests and Diseases
Aphids: These small insects can infest new growth. Solution: Spray with a strong stream of water or apply insecticidal soap.
Leaf spot: Appears as dark spots on leaves. Solution: Improve air circulation and avoid overhead watering.
Root rot: Occurs in stagnant water conditions. Solution: Ensure water is fresh and regularly changed.
According to the USDA Agricultural Research Service, maintaining proper water quality is crucial for preventing disease in aquatic plants like watercress.
Environmental Issues
Bolting: Premature flowering can make leaves bitter. Solution: Grow in cooler temperatures and harvest regularly.
Yellowing leaves: Often indicates nutrient deficiency. Solution: Apply a diluted, balanced fertilizer.
Leggy growth: Caused by insufficient light. Solution: Increase light exposure or supplement with grow lights.
Harvesting and Using Your Watercress
Proper harvesting techniques ensure a continuous supply of fresh watercress:

When and How to Harvest
- Timing: Begin harvesting when plants reach 4-6 inches in height, typically 3-4 weeks after transplanting.
- Method: Use clean scissors to cut stems just above the water line or soil surface, leaving at least 2 inches of stem for regrowth.
- Frequency: Harvest regularly to promote bushier growth and prevent flowering.
- Season: In outdoor gardens, prime harvesting occurs in spring and fall when temperatures are cooler.
Storage Tips
Fresh watercress has a relatively short shelf life. To maximize freshness:
- Short-term: Store unwashed stems in a glass of water in the refrigerator, covered loosely with a plastic bag.
- Medium-term: Wrap unwashed watercress in damp paper towels, place in a perforated plastic bag, and refrigerate for up to a week.
- Preservation: While not ideal for freezing, watercress can be pureed with olive oil and frozen in ice cube trays for use in soups and sauces.
Culinary Uses for Your Homegrown Watercress
Now that you’re growing watercress successfully, here are some delicious ways to incorporate it into your meals:
Fresh Applications
- Add to salads for a peppery kick
- Use as a sandwich filling with cream cheese
- Blend into smoothies for added nutrients
- Garnish soups, eggs, or seafood dishes
- Create watercress pesto by substituting for basil
Cooked Applications
- Wilt into pasta dishes just before serving
- Add to stir-fries in the final minute of cooking
- Blend into soups for vibrant color and flavor
- Sauté with garlic as a side dish
- Include in omelets and frittatas

Watercress in the US Market
The US has seen growing interest in watercress, particularly in health-conscious markets. According to market research:
- Premium organic watercress can retail for $3-5 per bunch in specialty markets
- Restaurant demand has increased as chefs rediscover this traditional ingredient
- Health food trends have positioned watercress as a “superfood”
- Local farmers’ markets often feature watercress from small-scale producers
If you’re considering growing watercress commercially, consult the USDA’s Agricultural Marketing Service for resources on specialty crop production and marketing.
Sustainable Growing Practices
As a water-loving plant, watercress cultivation provides an opportunity to practice sustainable gardening:
- Water Conservation: Capture rainwater for your watercress systems.
- Integrated Growing: Use watercress as part of an aquaponic system where fish waste provides nutrients for the plants.
- Companion Planting: Grow watercress alongside other moisture-loving herbs like mint and Vietnamese coriander.
- Season Extension: Use cold frames or row covers to extend your outdoor growing season.
Conclusion: Your Watercress Growing Journey
Growing watercress at home connects you to a culinary tradition that spans centuries while providing exceptional nutritional benefits. Whether you choose to grow in containers, hydroponically, or in a garden setting, the methods outlined in this guide will help you successfully cultivate this versatile herb.
Remember that watercress thrives with consistent moisture, cool temperatures, and regular harvesting. By providing these conditions, you’ll enjoy a continuous supply of this peppery green for your culinary creations.
Start your watercress growing journey today, and you’ll soon be enjoying the unmatched flavor and nutritional benefits of this remarkable herb straight from your own garden.


