How to Plant and Grow a Plumeria for Fragrant Flowers
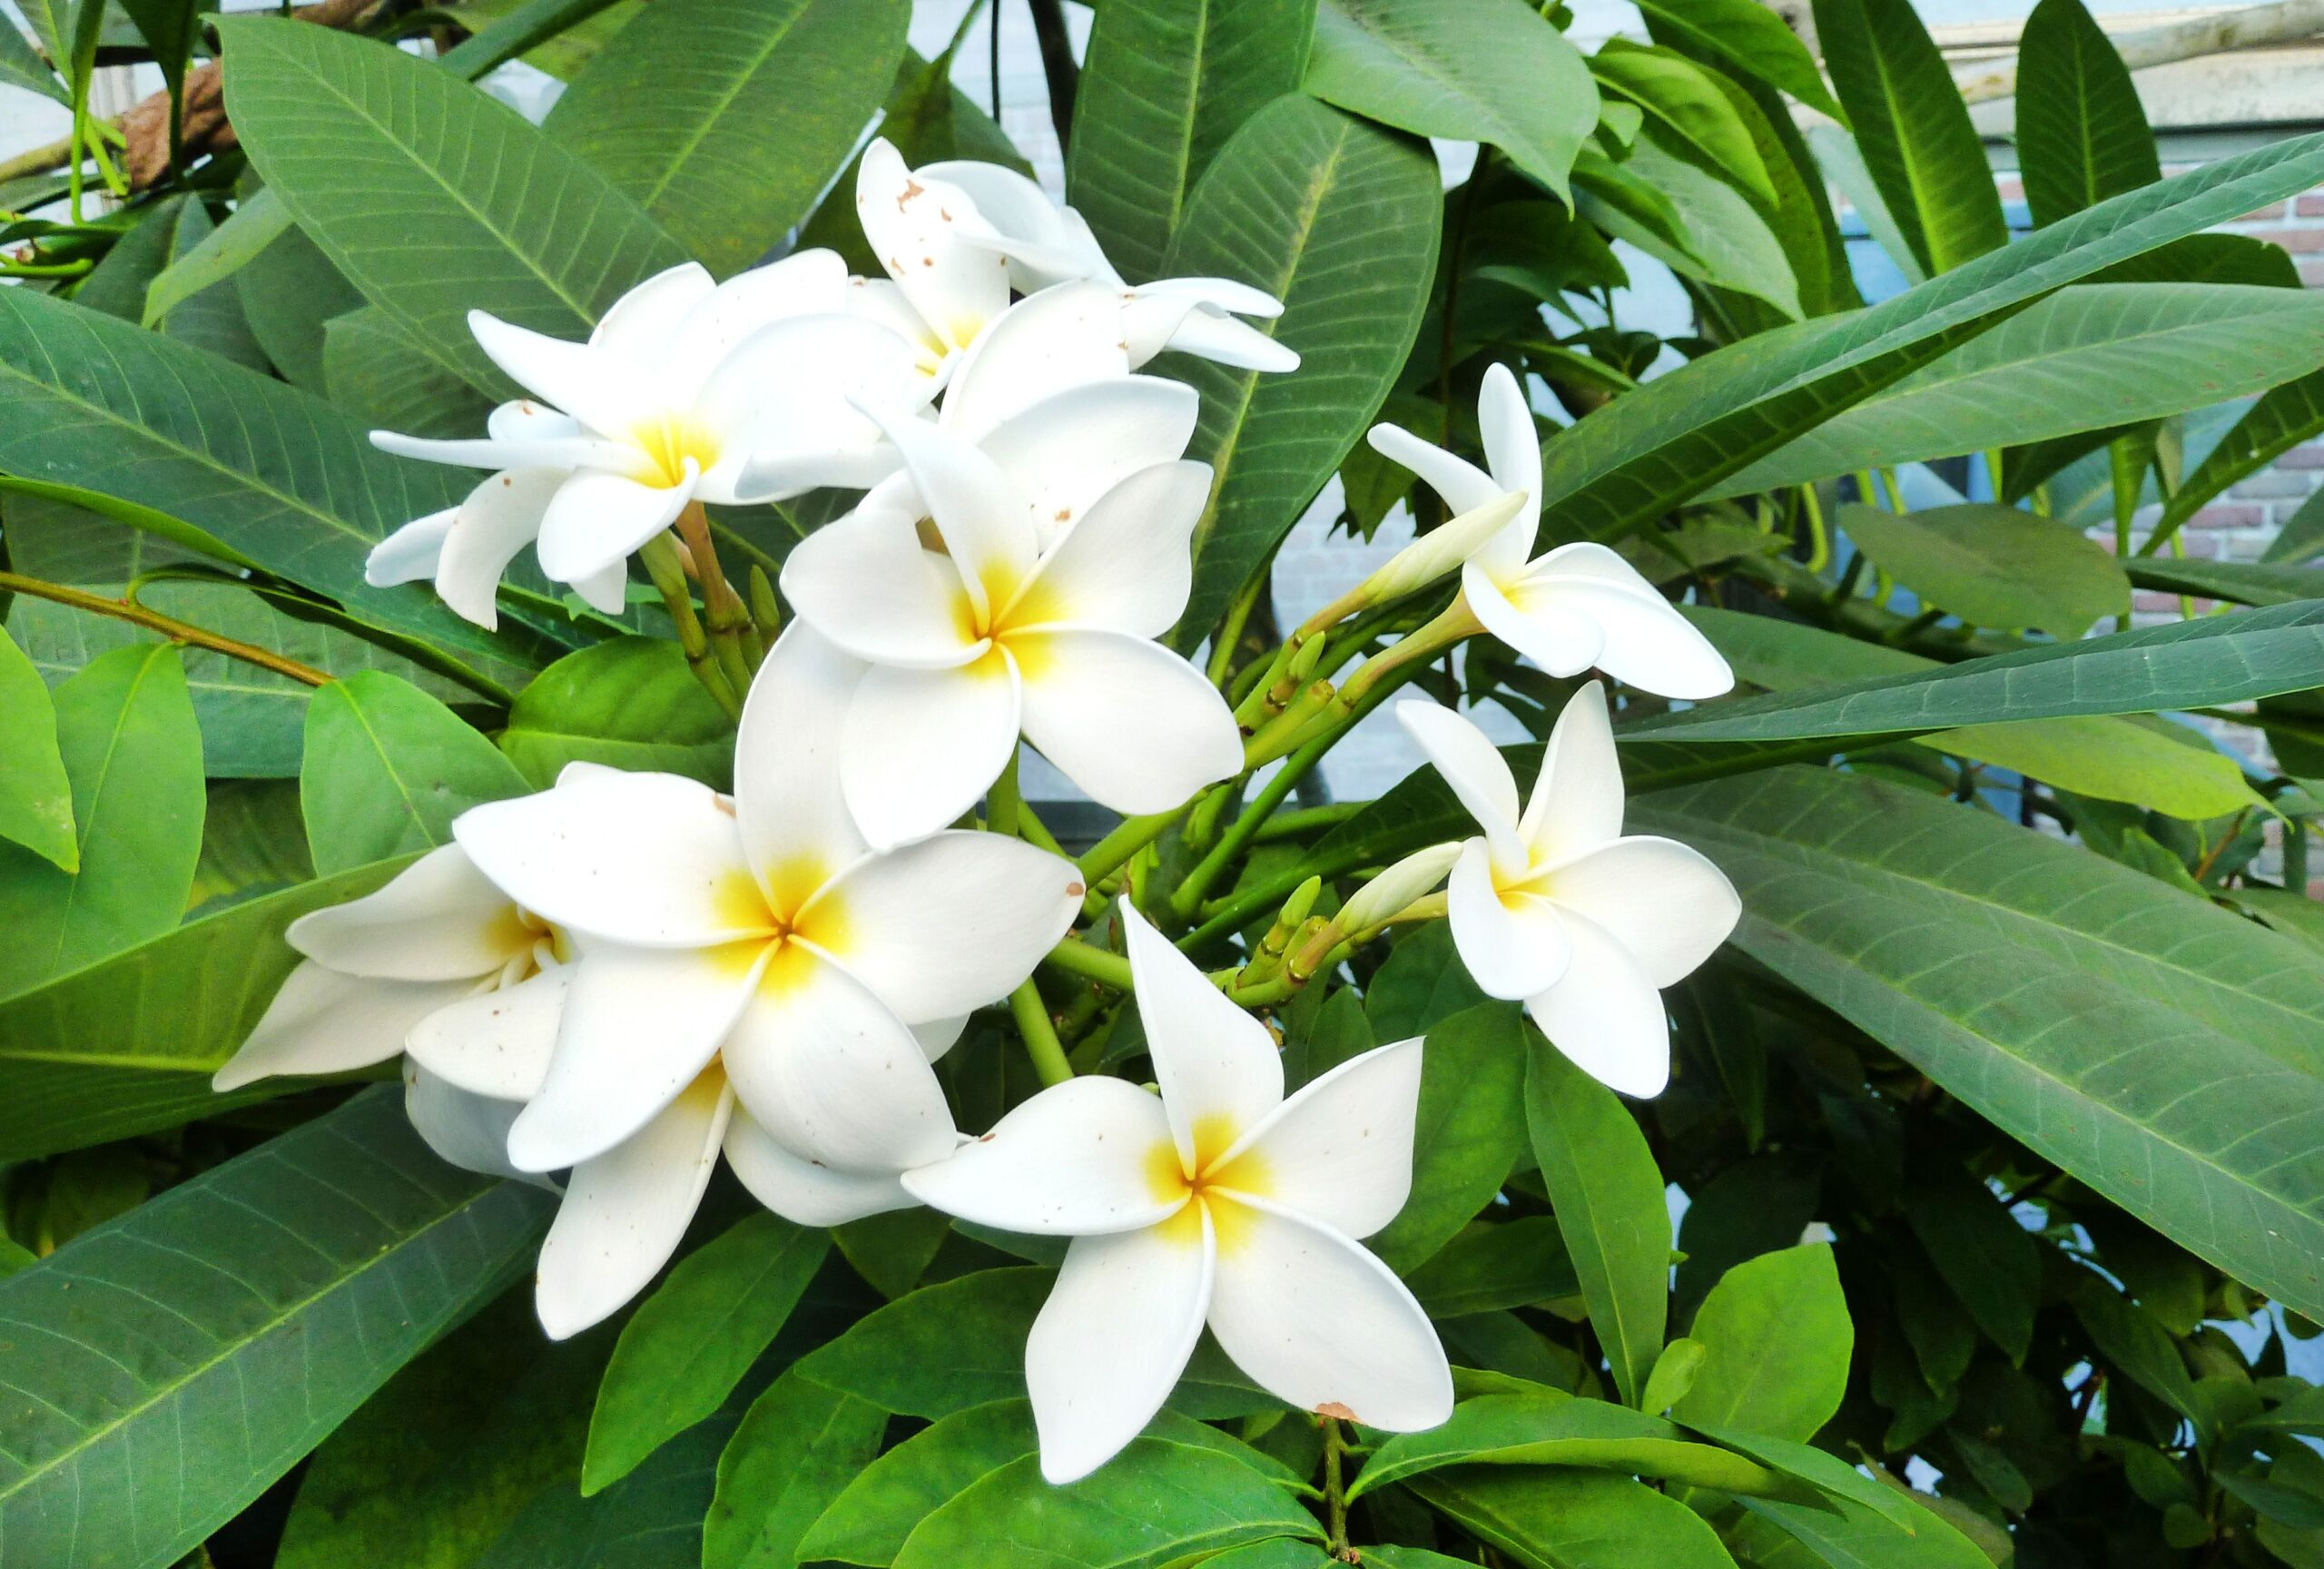
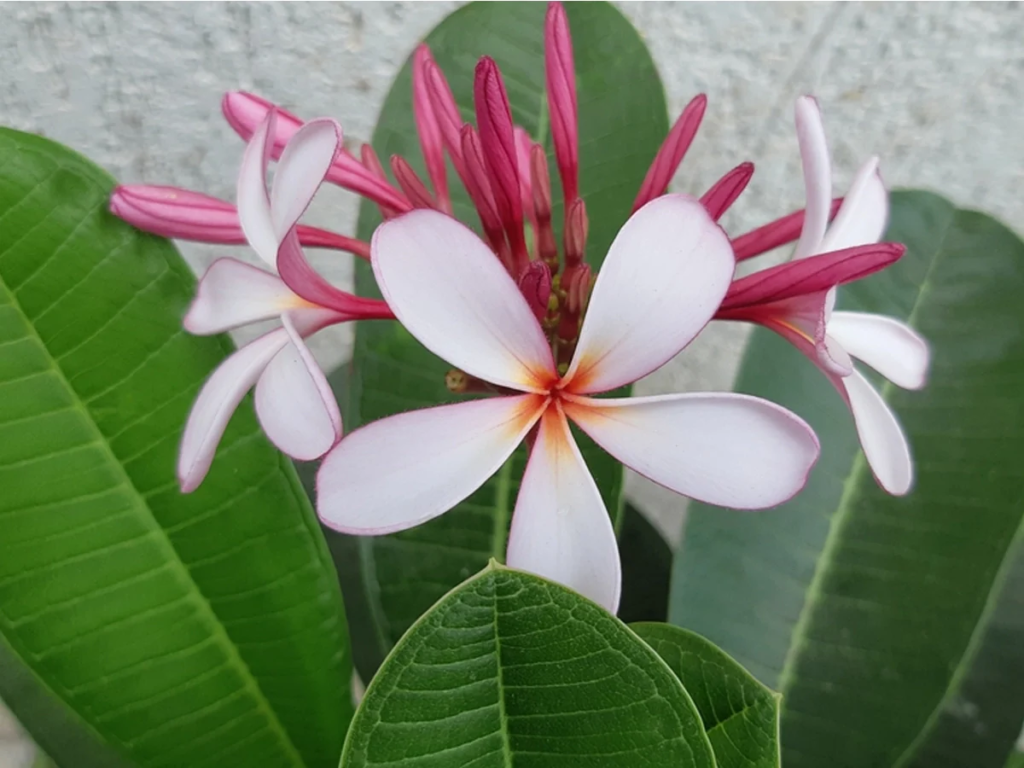
Plumeria, with its intoxicating fragrance and stunning blooms, is a tropical treasure that can transform your garden into a paradise reminiscent of Hawaiian beaches and lush island landscapes. Also known as frangipani, these flowering trees are prized not only for their sweet scent that fills the evening air but also for their exotic, pinwheel-shaped flowers that come in shades of pink, yellow, white, red, and multi-colored varieties. If you’ve ever dreamed of bringing this tropical beauty to your own backyard, you’re in the right place. This comprehensive guide will walk you through everything you need to know about planting, growing, and caring for plumeria to enjoy its fragrant flowers year after year.
Understanding Plumeria: A Tropical Beauty
Native to tropical regions of the Caribbean, Mexico, and Central America, plumeria (Plumeria spp.) has become synonymous with tropical paradise imagery. In the United States, these flowering trees thrive outdoors in USDA hardiness zones 9-11, which include parts of Florida, Texas, Arizona, California, and Hawaii. But don’t worry if you live outside these zones—plumeria can also be grown in containers and moved indoors during colder months, making them accessible to enthusiasts across the country.
According to the USDA Plant Database, there are several plumeria species, with Plumeria rubra and Plumeria obtusa being the most common in cultivation. Each species offers slightly different growth habits and flower characteristics, but all share that signature sweet fragrance that has made plumeria famous.
Types of Plumeria You Can Grow
Before diving into planting instructions, it’s important to understand the different types of plumeria available to you:
- Plumeria rubra – The most common species featuring deciduous trees with fragrant flowers in various colors including red, pink, yellow, and white.
- Plumeria obtusa – Known as Singapore plumeria, producing white flowers with yellow centers and glossy, rounded leaves that remain evergreen in suitable conditions.
- Plumeria pudica – Called bridal bouquet, featuring unique spoon-shaped leaves and white flowers that bloom year-round.
Most plumeria varieties grown in the US are cultivars of these species, bred for specific flower colors, growth habits, or enhanced fragrance.
Getting Started: Planning Your Plumeria Garden
When to Plant Plumeria
Timing is crucial when planting plumeria. These tropical beauties prefer to be planted during warm weather when there’s no risk of frost.
- Spring planting (March-May): Ideal for most US regions, allowing plants to establish before summer heat
- Early summer planting (June): Good for northern parts of growing zones
- Fall planting (September-October): Only recommended in zones 10-11 where winters are mild
Choosing the Right Location
Plumeria thrives in locations with:
- Full sun: At least 6-8 hours of direct sunlight daily
- Wind protection: While plumeria can withstand some wind, protection from strong, consistent winds helps prevent damage
- Good drainage: Standing water can quickly lead to root rot
If you’re growing plumeria in containers, choose a location on a patio, deck, or balcony that receives maximum sunlight and offers some protection from heavy winds.
Planting Plumeria: Step-by-Step Guide
Planting in the Ground
If you live in zones 9-11, you can plant plumeria directly in your garden following these steps:
- Prepare the soil: Create a mixture of regular garden soil with added perlite and coarse sand to improve drainage.
- Dig the hole: Make it twice as wide as the root ball but no deeper.
- Position your plumeria: Place it in the hole at the same depth it was in its original container.
- Backfill: Fill in around the root ball with your soil mixture and firm gently.
- Water thoroughly: Give your newly planted plumeria a deep watering to help settle the soil.
- Mulch lightly: Apply a thin layer of mulch, keeping it away from the stem to prevent rot.
Planting in Containers
For those outside tropical zones or with limited space, container planting is the way to go:
- Select a container: Choose a pot at least 12-15 inches in diameter with multiple drainage holes.
- Prepare potting mix: Create a mixture of 2 parts quality potting soil, 1 part perlite, and 1 part coarse sand.
- Add drainage layer: Place a layer of gravel or broken pottery pieces at the bottom of the pot.
- Plant your plumeria: Position at the same depth as in its original container, with the root crown slightly above the soil line.
- Fill and water: Add your potting mix around the roots and water thoroughly until it drains from the bottom.
Starting from Cuttings
One of the most rewarding aspects of growing plumeria is how easily they propagate from cuttings:
- Take a cutting: Cut a branch 12-18 inches long during the growing season.
- Cure the cutting: Allow it to dry in a shaded, warm location for 1-2 weeks until the cut end forms a callus.
- Prepare the pot: Fill a 1-gallon pot with cactus mix or your own blend of potting soil and perlite.
- Plant the cutting: Insert the callused end about 3-4 inches deep into the soil.
- Water sparingly: Only water when the soil is completely dry until roots develop (usually 4-8 weeks).
Caring for Your Plumeria

Watering Requirements
Proper watering is crucial for plumeria success. These plants prefer a “drought-flood” cycle rather than consistently moist soil:
| Growth Stage | Season | Watering Frequency | Signs of Overwatering | Signs of Underwatering |
|---|---|---|---|---|
| Active Growth | Spring/Summer | When top 2-3 inches of soil is dry | Yellow leaves, soft stems | Wilting, leaf curl |
| Flowering | Summer/Fall | Every 5-7 days | Flower drop, root rot | Reduced blooming |
| Dormancy | Winter | Once every 3-4 weeks or not at all | Stem rot | Normal during dormancy |
| Post-dormancy | Early Spring | Gradually increase as new growth appears | Slow leaf emergence | Delayed growth |
Fertilizing Your Plumeria
To encourage abundant flowering, plumeria benefits from regular fertilization during the growing season:
- Spring feeding: Begin when new growth appears with a balanced fertilizer (NPK 10-10-10).
- Summer feeding: Switch to a bloom-boosting formula higher in phosphorus (NPK 5-30-5) once monthly.
- Fall feeding: Reduce to half-strength applications as growth slows.
- Winter feeding: Withhold fertilizer during dormancy.
For container plants, consider using a slow-release fertilizer at the beginning of the growing season, supplemented with monthly liquid feedings.
Pruning and Maintenance
Plumeria requires minimal pruning, but some maintenance helps keep the plant healthy and attractive:
- Remove dead or diseased branches: Cut back to healthy tissue with sterilized pruning shears.
- Shape when dormant: Major pruning should be done during winter dormancy.
- Harvest flower cuttings: Cut stems at a 45-degree angle early in the morning for the strongest fragrance.
Protecting Plumeria from Pests and Diseases
While generally hardy, plumeria can face several challenges:
- Plumeria rust: This fungal disease creates orange powder on leaf undersides. Treat with copper-based fungicide recommended by the National Pesticide Information Center.
- Spider mites: These tiny pests cause stippling on leaves. Control with insecticidal soap or neem oil.
- Scale insects: These appear as bumps on stems. Remove with alcohol-soaked cotton swabs.
- Stem rot: Usually caused by overwatering. Cut away affected areas and reduce watering.
Overwintering Your Plumeria
If you live outside zones 9-11, you’ll need to protect your plumeria during winter:
Container Plants
- Reduce watering: Gradually decrease watering frequency as temperatures drop.
- Move indoors: Bring container plants inside when temperatures consistently fall below 50°F.
- Provide light: Place near a south-facing window or under grow lights.
- Accept dormancy: Many varieties will drop leaves and go dormant—this is normal.
- Minimal watering: Water only once every 3-4 weeks during dormancy.
In-Ground Plants
- Mulch heavily: Apply 4-6 inches of mulch around the base before first frost.
- Cover with frost cloth: During freeze warnings, cover the entire plant.
- Consider digging up: In zone 9, you might need to dig up and pot plumeria for winter protection.
Encouraging Abundant Blooms
The ultimate goal of growing plumeria is to enjoy its magnificent, fragrant flowers. Here are tips to maximize blooming:
- Ensure adequate sunlight: Plumeria needs at least 6-8 hours of direct sun to bloom properly.
- Use bloom-boosting fertilizer: Products high in phosphorus encourage flower formation.
- Avoid excess nitrogen: Too much causes lush foliage at the expense of flowers.
- Maintain proper watering: Drought stress can inhibit flowering.
- Allow root binding: Slightly root-bound container plants often flower more profusely.

Harvesting and Using Plumeria Flowers
Once your plumeria blooms, you’ll want to enjoy these fragrant flowers to their fullest:
Cutting Flowers
- Harvest in early morning when fragrance is strongest
- Choose flowers that have just fully opened
- Cut with clean scissors, leaving a short stem
- Place immediately in water if using for arrangements
Traditional Uses
- Lei making: String flowers for traditional Hawaiian necklaces
- Floral arrangements: Floating blooms in shallow water creates stunning displays
- Potpourri: Dried plumeria flowers retain their scent for natural air fresheners
- Essential oils: In Hawaii, plumeria is used in commercial fragrances and oils
Troubleshooting Common Plumeria Problems
Even experienced gardeners encounter issues with plumeria. Here are solutions to common problems:
Plant Won’t Bloom
- Possible cause: Insufficient light, improper fertilizer, or young plant
- Solution: Move to sunnier location, switch to bloom-boosting fertilizer, or be patient with young plants that may take 3-5 years to flower
Leaves Turning Yellow
- Possible cause: Overwatering, nutrient deficiency, or normal dormancy
- Solution: Reduce watering frequency, supplement with balanced fertilizer, or accept yellowing as part of dormancy cycle
Black Tips on Branches
- Possible cause: Frost damage or fungal infection
- Solution: Cut back to healthy tissue and protect from cold temperatures
Conclusion: Enjoying Your Tropical Paradise
Growing plumeria requires some initial investment of time and attention to detail, but the rewards are well worth it. Few garden experiences compare to the moment when your plumeria first blooms, filling your garden with its sweet tropical fragrance. Whether you’re growing these beautiful trees in your Florida backyard or nurturing a container specimen on your patio in a northern state, the exotic beauty of plumeria connects you to tropical traditions and creates a personal paradise wherever you call home.
By following the guidelines in this article, you’ll be well on your way to plumeria success. Remember that patience is key—these tropical beauties sometimes take their time to establish and bloom, but when they do, you’ll agree that they’re worth every moment of care you’ve invested.
