Dangerous Tree Removal: When and How to Handle Hazardous Trees on Your Property
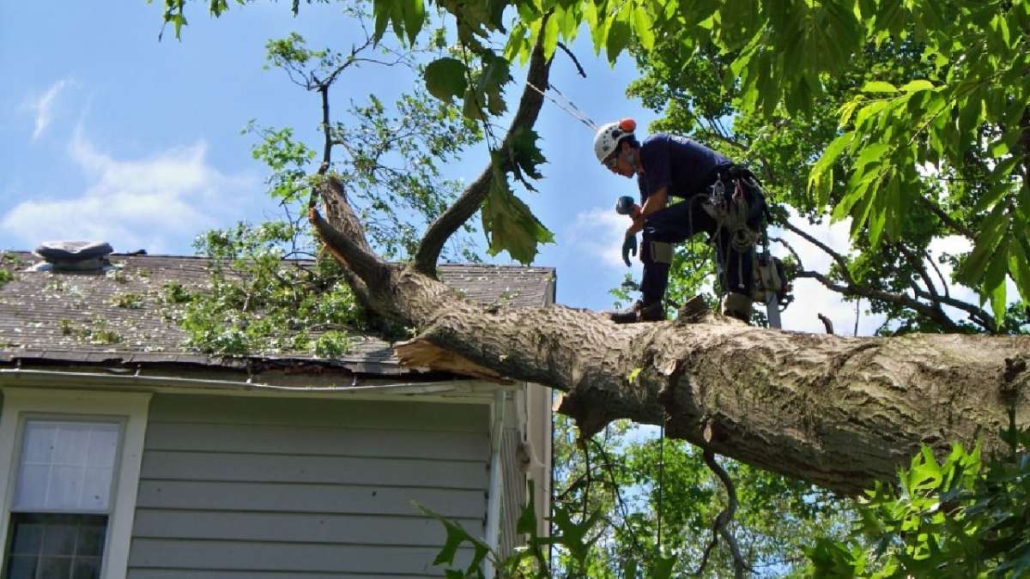
When a massive oak looms precariously over your roof or a diseased maple threatens your driveway, the question isn’t just whether to remove it—but how to do so safely. Dangerous tree removal represents one of the most challenging aspects of property maintenance, requiring specialized knowledge, proper equipment, and meticulous planning. This comprehensive guide will walk you through everything you need to know about identifying, assessing, and safely removing hazardous trees from your property.
Understanding the Risks of Hazardous Trees
That towering pine that’s stood for decades might seem permanent, but trees face numerous threats that can transform them from natural assets into significant liabilities. According to the Arbor Day Foundation, falling trees and branches cause over $1 billion in property damage annually in the United States. More concerning still, the U.S. Occupational Safety and Health Administration (OSHA) reports that tree removal ranks among the most dangerous occupations, with numerous fatalities occurring each year.
When you overlook dangerous trees on your property, you’re not just risking structural damage—you’re potentially endangering lives. A sudden storm, gust of wind, or the natural failure of a compromised tree can lead to catastrophic consequences with little warning.
Common Signs Your Tree Poses a Danger
Before discussing removal techniques, it’s crucial to identify which trees actually require removal. Not every older or imperfect tree poses a threat, and unnecessary removal wastes both money and valuable environmental resources. The U.S. Forest Service recommends watching for these warning signs that indicate a tree may be hazardous:
Structural Concerns:
- Large dead branches or a dead top section (often called “crown dieback”)
- Cracks extending deeply into or through the trunk
- Mushrooms growing from the base, indicating potential root decay
- Cavities or rotten areas on major limbs or the trunk
- Trees that lean significantly or suddenly
- Multiple trunks with weak attachment points
- Previous branch failure points with decay
Environmental Factors:
- Trees growing under power lines that haven’t been properly pruned
- Trees blocking visibility on driveways or streets
- Root damage from construction, grade changes, or soil compaction
- Exposure to strong winds after the removal of surrounding trees
- Soil erosion, exposing the root system
When you notice these signs, it’s time to consider a professional assessment. The USDA Forest Service provides detailed guidance on tree risk assessment that can help you make informed decisions about potentially hazardous trees on your property. You can find their Urban Tree Risk Management guide at https://www.fs.usda.gov/naspf/publications/urban-tree-risk-management-community-guide-program-development.
Professional vs. DIY Tree Removal: Making the Right Choice
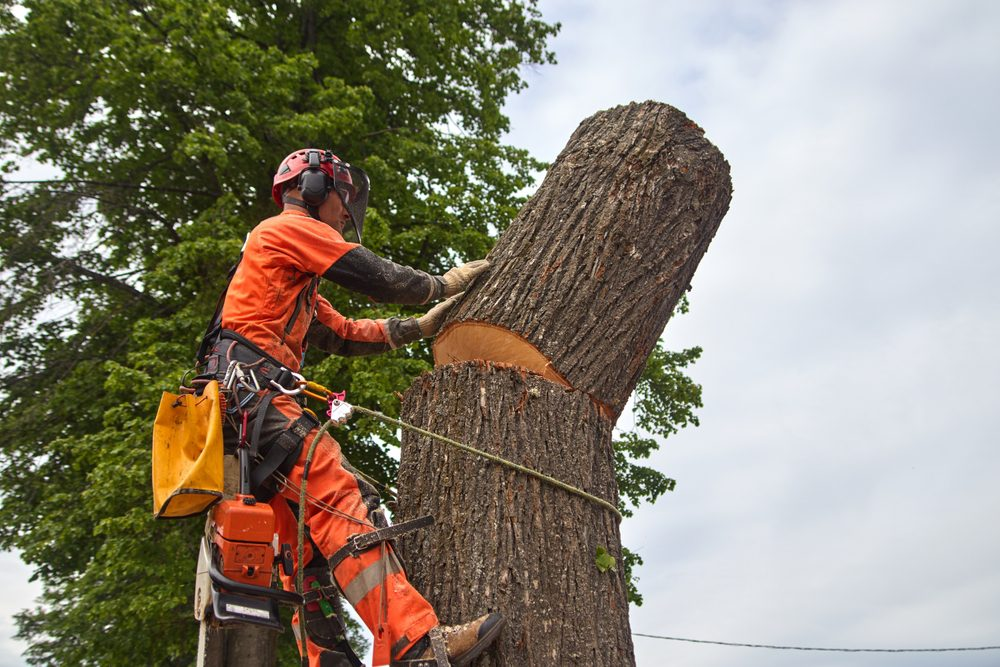
While you might be tempted to handle tree removal yourself to save money, this decision requires careful consideration. Tree removal is inherently dangerous, and professionals have the training, experience, and equipment to manage risks effectively.
When to Call a Professional
According to the Tree Care Industry Association, certain situations almost always warrant professional intervention:
- Trees larger than 20 feet in height
- Trees near power lines (never attempt removal yourself)
- Trees that would hit structures if they fell unexpectedly
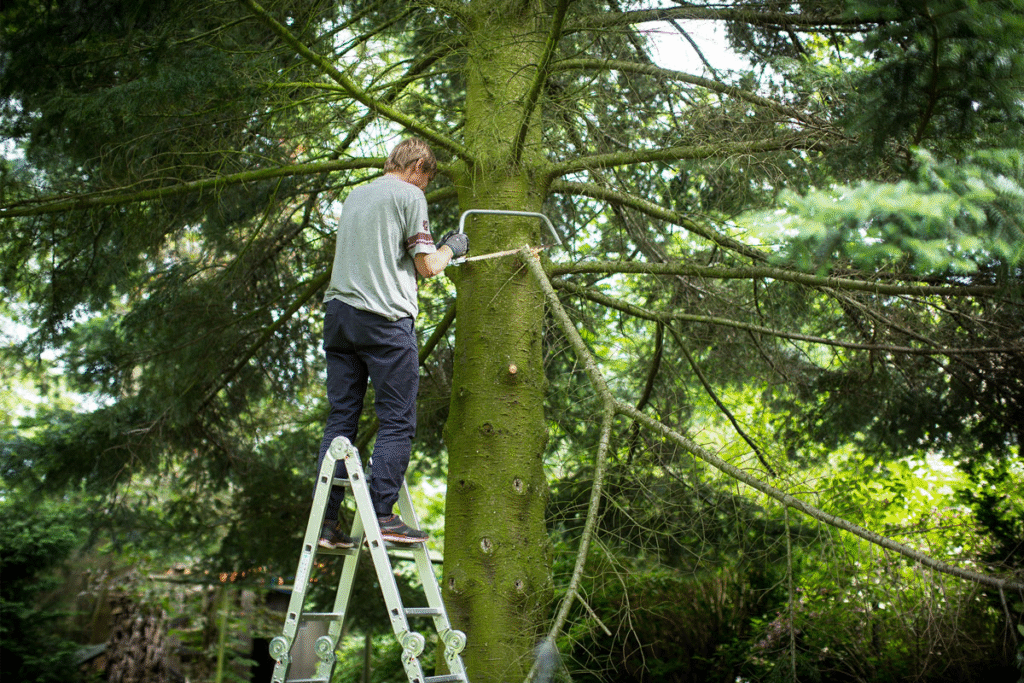
- Trees requiring climbing or the use of a ladder
- Trees that require advanced cutting techniques due to lean or positioning
- Trees with significant decay or structural weakness
- Any tree removal you feel uncomfortable attempting
The Centers for Disease Control and Prevention (CDC) states that even professionals face significant risks during tree removal operations. Their analysis of occupational fatalities found that being struck by falling objects and falls from elevation are the most common causes of death in tree work. If trained professionals face these dangers, homeowners with limited equipment and experience face even greater risks.
You can find valuable safety information from OSHA regarding tree care operations at https://www.osha.gov/tree-care, which outlines the hazards associated with tree work and the safety requirements for professionals.
The True Cost of Tree Removal
Many homeowners balk at professional tree removal quotes without considering the complete picture. Here’s a breakdown of typical costs associated with dangerous tree removal in the United States:
| Tree Height | Average Cost Range | Additional Factors That Increase Cost |
|---|---|---|
| 20-30 feet | $400-$800 | Difficult access, proximity to structures, disease/infestation |
| 30-60 feet | $800-$1,500 | Emergency removal, additional equipment needs, complex rigging |
| 60-80 feet | $1,500-$2,500 | Power line proximity, extensive decay, permit requirements |
| 80+ feet | $2,500-$4,500+ | Technical dismantling, crane requirements, historic preservation issues |
These costs typically include:
- Professional risk assessment
- Specialized equipment operation
- Liability insurance coverage
- Proper disposal of debris
- Worker safety provisions
- Expert knowledge of cutting techniques
What these costs don’t include is the potential price of amateur mistakes: property damage, medical bills, insurance claims, and even legal liability if something goes wrong. When viewed through this lens, professional tree removal often represents the more economical choice in the long run.
The Professional Tree Removal Process: What to Expect
When you hire qualified arborists for dangerous tree removal, you’re paying for a methodical approach developed through years of experience. Understanding this process helps you evaluate potential contractors and prepare your property appropriately.
Assessment and Planning
The first step in any professional tree removal is a comprehensive assessment. A qualified arborist will evaluate:
- The tree’s structural integrity and failure points
- Surrounding structures, power lines, and obstacles
- Soil conditions and root system stability
- Access points for equipment and personnel
- Fall zone calculations and clearance requirements
- Environmental factors like wind patterns and nearby vegetation
This assessment leads to a detailed removal plan, which might involve traditional felling, sectional dismantling, or crane-assisted removal depending on the circumstances. The arborist should explain their proposed approach and any potential complications.
The U.S. Department of Agriculture provides resources for understanding tree risk assessment at https://www.fs.usda.gov/managing-land/urban-forests/tree-health, which can help you understand what professionals should be looking for during this critical phase.
Site Preparation and Safety Protocols
Before cutting begins, professional tree services implement rigorous safety protocols:
- Establishing a safety perimeter with signage
- Removing obstacles and protecting immovable objects
- Positioning equipment strategically
- Conducting pre-work safety briefings
- Verifying emergency response procedures
- Checking weather conditions for safe operation
These preparations might seem excessive for a single tree removal, but they reflect the real dangers involved. According to the International Society of Arboriculture, proper preparation can prevent the majority of tree work accidents.
Removal Techniques for Hazardous Trees
Professionals use several techniques for removing dangerous trees, each suited to different circumstances:
Traditional Felling: When space permits, directing the tree’s fall with precision cuts and guiding equipment remains the most straightforward approach. This requires careful calculation of the fall path, escape routes, and potential obstacles.
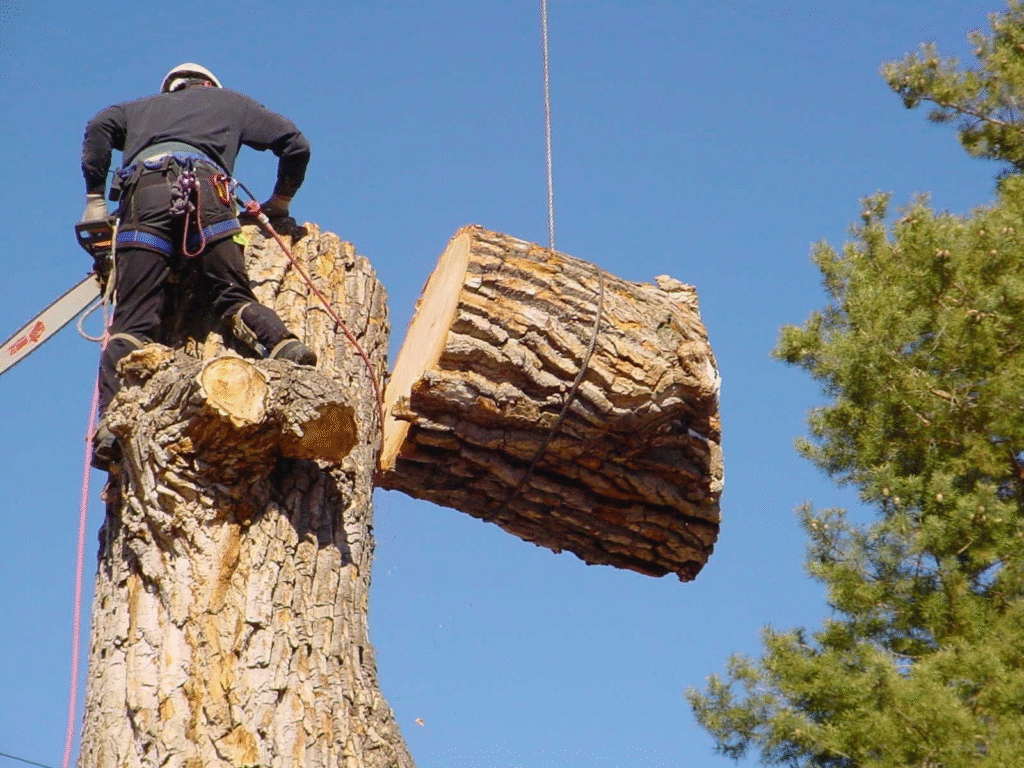
Sectional Dismantling: In confined spaces or when a tree threatens structures, arborists remove the tree in carefully managed sections. This process involves:
- Climbers ascending the tree with specialized gear
- Cutting branches and sections from the top down
- Using rigging systems to lower cut pieces safely
- Gradual reduction of the tree’s height and spread
- Finally removing the trunk in manageable sections
This technique requires extensive training and specialized equipment but allows for safe removal in challenging locations.
Crane-Assisted Removal: For severely compromised trees or those in extremely tight spaces, crane assistance provides the highest level of control. The process involves:
- Positioning a crane with sufficient reach and capacity
- Attaching secure rigging to predetermined tree sections
- Making precision cuts to separate sections
- Lifting sections clear of obstacles and lowering them to a processing area
While expensive, this method offers unparalleled safety for removing trees that might otherwise cause significant damage.
DIY Tree Removal: When It’s Appropriate and How to Do It Safely
If you’re considering removing a smaller hazardous tree yourself, proceed with extreme caution. The National Safety Council reports that thousands of emergency room visits each year result from amateur tree cutting accidents.
When DIY Might Be Appropriate
Self-removal might be reasonable only when:
- The tree is small (under 20 feet tall)
- It’s away from structures, power lines, and obstacles
- You have proper equipment and knowledge
- The tree has a clear fall path
- You understand proper cutting techniques
- You’re physically capable of the work involved
- You have at least one knowledgeable assistant
Even then, careful preparation is essential.
Essential Safety Equipment
If you proceed with DIY removal, insist on proper safety gear:
- ANSI-approved hardhat with face shield
- Cut-resistant chaps or pants
- Steel-toed boots with good traction
- Heavy-duty work gloves
- Eye and ear protection
- First aid kit readily accessible
The Occupational Safety and Health Administration provides detailed guidelines for personal protective equipment at https://www.osha.gov/personal-protective-equipment.
Basic Cutting Technique for Smaller Trees
For smaller trees (under 10 inches in diameter) with a clear fall zone:
- Assess the lean: Determine the tree’s natural lean direction, which is typically the safest felling direction.
- Create a notch cut: On the side facing the intended fall direction, make a downward cut at a 45-degree angle, stopping when you’re about 1/3 through the trunk diameter. Then make a horizontal cut that meets the bottom of your angled cut, creating a wedge that you can remove.
- Make the felling cut: On the opposite side of the notch, make a horizontal cut slightly above the bottom of your notch. This is called the “back cut.” Do not cut all the way to the notch—leave a hinge of wood about 10% of the trunk diameter.
- Retreat safely: As the tree begins to fall, move away at a 45-degree angle opposite the fall direction.
Even with these basic instructions, significant practice and knowledge are required for safe execution. Consider taking a professional course before attempting even small tree removals.
After Removal: Stump Management and Replanting Considerations
Once a hazardous tree has been safely removed, you’ll need to decide how to handle the remaining stump and whether to plant a replacement tree.
Stump Removal Options
Several approaches to stump management exist:
Grinding: Professional stump grinders can reduce the stump to wood chips several inches below ground level, allowing for replanting or relandscaping. This is typically the most efficient option for complete removal.
Chemical treatments: Commercial stump removers accelerate decomposition but require months or years to completely break down the wood. These products typically contain potassium nitrate and should be used according to manufacturer instructions.
Natural decay: Allowing natural decomposition takes the longest (3-10 years depending on species and climate) but costs nothing. Covering with soil and planting over the area can hide the stump while it breaks down.
Manual removal: For smaller stumps, you might dig around the roots and extract the stump with tools like a mattock, pry bar, and pruning saw. This approach is labor-intensive but effective for smaller specimens.
Smart Replanting Strategies
When considering replacement trees, avoid future problems with these guidelines:
- Research mature size: Many tree problems stem from planting species that grow too large for their location. The Arbor Day Foundation offers an excellent tree selection tool at https://www.arborday.org/trees/righttreeandplace/.
- Consider infrastructure: Plant at least 15-20 feet from foundations and 30+ feet from power lines for medium to large species.
- Assess soil conditions: Match species requirements to your soil type, drainage conditions, and sun exposure.
- Diversify your landscape: Plant different species to avoid susceptibility to species-specific diseases or pests.
- Choose native when possible: Native trees typically require less maintenance and provide better habitat value. The U.S. Forest Service maintains resources on native trees at https://www.fs.usda.gov/learn/trees.
Legal and Insurance Considerations for Tree Removal
Before removing any tree, understand the legal and insurance implications to avoid costly mistakes.
Permits and Regulations
Many municipalities require permits for tree removal, particularly for:
- Trees above certain diameter thresholds
- Heritage or protected species
- Trees in conservation areas
- Street trees or those in public right-of-ways
- Trees protected by homeowner association rules
Contact your local planning department to determine specific requirements in your area. Failing to obtain necessary permits can result in significant fines.
Insurance Implications
Consider these insurance factors:
- Your homeowner’s policy may cover damage from tree failures, but typically only if you’ve taken reasonable precautions with hazardous trees
- Removal of damaged trees following storms may be covered under some policies
- DIY removal accidents might not be covered if you’re deemed negligent
- Professional tree services should carry their own liability insurance ($1 million minimum recommended)
- Always verify insurance coverage before work begins
The National Association of Insurance Commissioners provides helpful guidance on understanding homeowners insurance and tree damage at https://content.naic.org/index-consumer.htm.
Neighbor Disputes and Property Lines
Trees near property boundaries often create conflicts. Basic principles to understand:
- Trees growing on your property are generally your responsibility
- You may have the right to trim branches that cross your property line, but not in a way that damages the tree’s health
- If your neighbor’s tree threatens your property, document your concerns in writing before taking action
- Consider mediation services before pursuing legal remedies
Each state has different laws governing tree disputes. When in doubt, consult a real estate attorney familiar with local regulations.
Conclusion: Prioritizing Safety in Tree Management
While dangerous tree removal presents significant challenges, understanding the risks and following proper procedures dramatically reduces the potential for accidents and property damage. Whether you hire professionals or tackle smaller projects yourself, thorough assessment, careful planning, and appropriate equipment remain essential.
Remember that tree management extends beyond removal—regular inspection and preventative maintenance can identify potential hazards before they require expensive emergency intervention. Consider establishing a relationship with a certified arborist who can provide guidance on maintaining your trees’ health and safety.
By approaching hazardous trees with the respect they deserve, you protect not only your property but also the safety of your family and community. When in doubt, always err on the side of caution and seek professional assistance for challenging tree removal situations.
For additional resources on tree care and safety, visit the United States Department of Agriculture’s Urban and Community Forestry program at https://www.fs.usda.gov/managing-land/urban-forests.
