How to Grow and Use Culinary Herbs: Planting Ginger at Home
Growing ginger (Zingiber officinale) at home is not only economical but also provides you with fresh, organic ginger root whenever you need it. Whether you have a spacious garden, a small balcony for containers, or just a sunny windowsill, you can successfully grow this aromatic and flavorful herb right in your own home. This comprehensive guide will walk you through everything you need to know about planting, growing, and harvesting ginger for culinary use.
Why Grow Your Own Ginger?
Before diving into the planting process, let’s look at why growing your own ginger is beneficial:
- Freshness: Home-grown ginger has superior flavor and aroma compared to store-bought options.
- Organic Growing: You control what goes into your soil and onto your plants.
- Cost-Effective: A small piece of ginger rhizome can produce a substantial harvest.
- Sustainable: Growing at home reduces packaging waste and transportation emissions.
- Therapeutic: Gardening has proven mental health benefits.
According to the USDA’s Agricultural Research Service, ginger contains compounds like gingerols and shogaols that have numerous health benefits, including anti-inflammatory and antioxidant properties (USDA ARS).
Understanding Ginger: The Basics
Ginger is not technically an herb but a rhizome, an underground stem that sends out roots and shoots from its nodes. Native to Southeast Asia, this tropical plant thrives in warm, humid conditions with indirect sunlight. In the US, ginger grows best in USDA hardiness zones 9-12, but you can successfully grow it in any zone if you bring it indoors during colder months.
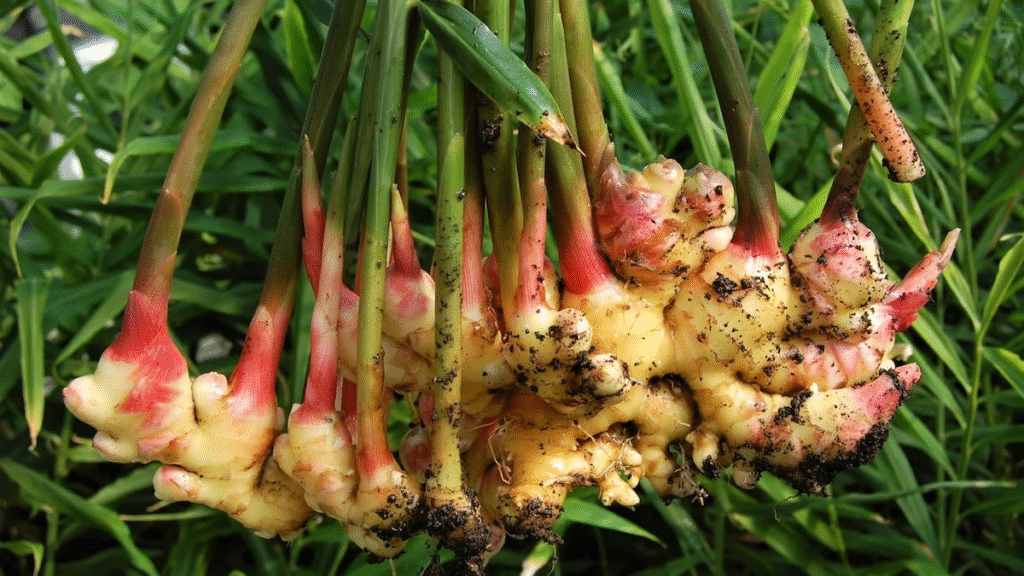
The ginger plant can reach 2-4 feet tall with narrow, glossy green leaves. The part we harvest and use in cooking is the rhizome, which grows horizontally just beneath the soil surface.
Selecting Ginger for Planting
Finding the Right Ginger Rhizomes
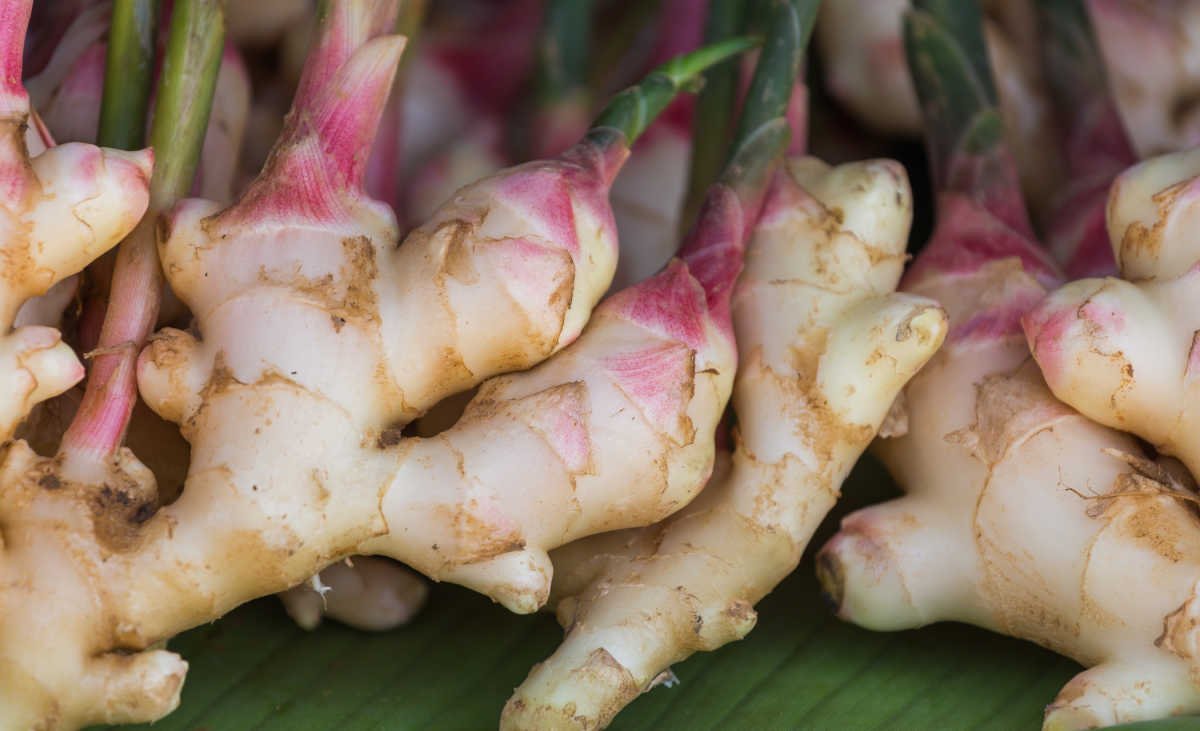
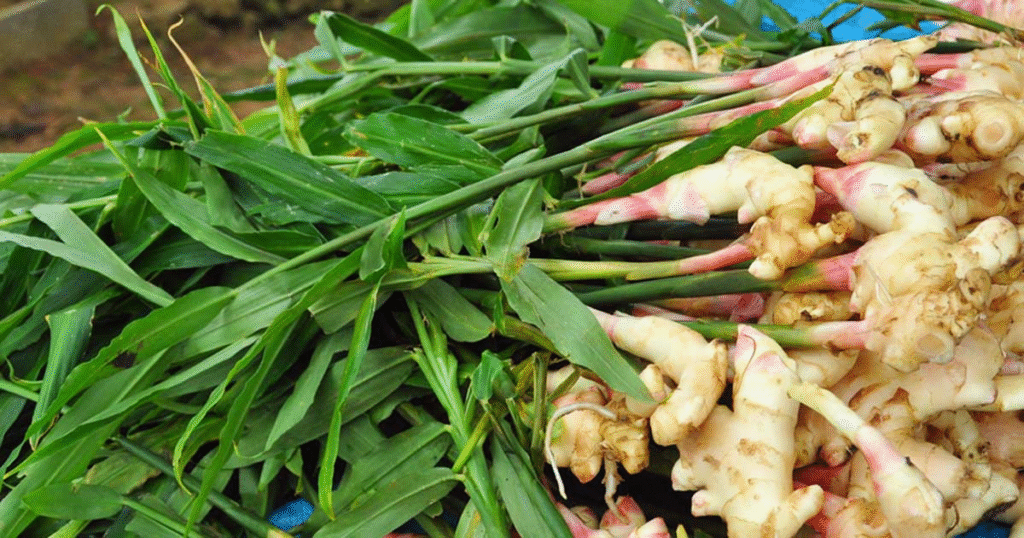
To start your ginger growing journey, you need to find high-quality ginger rhizomes, commonly referred to as “ginger roots.” You have several options:
- Grocery Store Ginger: Look for plump pieces with visible growth buds or “eyes” (small, pointed bumps on the surface). Organic ginger is preferable as it hasn’t been treated with growth inhibitors.
- Seed Companies: Specialized seed companies offer ginger rhizomes specifically for planting.
- Garden Centers: As interest in growing ginger increases, many garden centers now carry planting stock.
Preparing Ginger Rhizomes for Planting
Once you’ve acquired your ginger, follow these steps to prepare it for planting:
- Check for Viability: Look for firm pieces with several eye buds.
- Cut into Sections: Cut the rhizome into pieces, ensuring each section has at least 1-2 growth buds and is about 1-2 inches long.
- Optional Pre-Sprouting: Place the pieces in a warm, humid environment for 1-2 weeks until tiny roots or green shoots begin to form.
How to Plant Ginger in Garden Beds
If you live in a warm climate (zones 9-12) or during the warm season in cooler zones, planting ginger directly in your garden can yield excellent results.
Site Selection and Preparation
- Choose the Right Location: Select a spot that receives partial shade to filtered sunlight. Morning sun with afternoon shade is ideal.
- Soil Requirements: Ginger thrives in rich, loose, well-draining soil with high organic content. Aim for a pH between 5.5 and 6.5.
- Soil Preparation: Work compost or well-rotted manure into the soil to improve fertility and drainage. The National Organic Program under the USDA provides guidelines for organic soil amendments that can be used (USDA Organic).
Planting Process for Garden Beds
- Timing: Plant in early spring after all danger of frost has passed and soil temperatures reach at least 60°F (15.5°C).
- Planting Depth: Plant ginger pieces 2-4 inches deep with the growth buds pointing upward.
- Spacing: Space plants 12-15 inches apart to allow room for rhizome development.
- Watering: Water thoroughly after planting, ensuring the soil is moist but not waterlogged.
How to Plant Ginger in Pots
Container gardening is an excellent option for growing ginger, especially if you have limited space or live in colder climates where you’ll need to bring plants indoors.
Selecting the Right Container
- Size: Choose a wide, shallow pot at least 12-16 inches in diameter and 12 inches deep. Ginger rhizomes grow horizontally, so width is more important than depth.
- Material: Clay, ceramic, or plastic pots all work well. Ensure the container has adequate drainage holes.
Potting Mix for Container Ginger
Create a rich, well-draining potting mix by combining:
- 1 part quality potting soil
- 1 part compost
- 1 part coconut coir or peat moss
- A small amount of perlite or sand for improved drainage
Planting Process for Containers
- Add Drainage Material: Place a layer of small stones or broken pottery at the bottom of the pot to enhance drainage.
- Fill with Soil Mix: Add your potting mix, leaving about 2 inches from the top.
- Plant the Rhizomes: Place ginger pieces 2-3 inches deep, with buds pointing upward. For a standard 14-inch pot, you can plant 3-4 pieces.
- Water Thoroughly: Water until moisture appears from the drainage holes.
- Placement: Position the pot in a warm location with bright, indirect light.
Growing Ginger Indoors
Growing ginger indoors allows you to control environmental conditions and enjoy fresh ginger year-round, regardless of your climate.
Creating the Ideal Indoor Environment
- Light: Place your ginger pot near a window with filtered sunlight. East or west-facing windows often provide the right amount of light.
- Temperature: Maintain temperatures between 75-85°F (24-29°C) during the day and not below 65°F (18°C) at night.
- Humidity: Ginger loves humidity. Use a pebble tray with water or place the pot near other plants to increase humidity.
- Air Circulation: Ensure good air movement to prevent fungal issues.
Indoor Planting Calendar
| Month | Indoor Ginger Growing Activity |
|---|---|
| January | Start pre-sprouting rhizomes indoors |
| February | Plant pre-sprouted rhizomes in containers |
| March-May | Provide bright indirect light; maintain consistent moisture |
| June-August | Feed with organic fertilizer; maintain high humidity |
| September-October | Reduce watering slightly as plants mature |
| November | Begin harvesting if desired |
| December | Continue harvesting or maintain plants for next season |
Nurturing Your Ginger Plants
Watering Requirements
Whether growing in containers or garden beds, proper watering is crucial for healthy ginger:
- Frequency: Keep soil consistently moist but never soggy. Water when the top inch of soil feels dry.
- Technique: Water at soil level to avoid wetting the foliage, which can encourage diseases.
- Mulching: Apply 2-3 inches of organic mulch around plants to retain moisture and suppress weeds.
Fertilizing Ginger Plants
Ginger is a moderate feeder that benefits from regular fertilization:
- Organic Options: Use compost tea, fish emulsion, or a balanced organic fertilizer.
- Application: Feed plants every 4-6 weeks during the growing season.
- Timing: Stop fertilizing about a month before harvest to improve flavor.
Common Pests and Diseases
While ginger is relatively trouble-free, watch for these issues:
- Pests: Root knot nematodes, rhizome flies, and aphids can affect ginger. Use appropriate organic controls as needed.
- Diseases: Bacterial wilt, rhizome rot, and leaf spot are common issues. Ensure good air circulation and avoid overwatering to prevent these problems.
According to the USDA Agricultural Research Service’s Plant Hardiness Zone Map, understanding your local climate is essential for successful ginger cultivation (USDA Plant Hardiness Zone Map).
Harvesting Your Homegrown Ginger
When to Harvest
The timing of your ginger harvest depends on your preferences:
- Young Ginger: Harvest after 4-6 months for tender, mild ginger with thin skin.
- Mature Ginger: For full-flavored, spicy ginger, wait 8-10 months after planting.
- Continuous Harvesting: You can carefully dig around the edges of the plant and break off small pieces as needed while leaving the main plant intact.
Harvesting Process
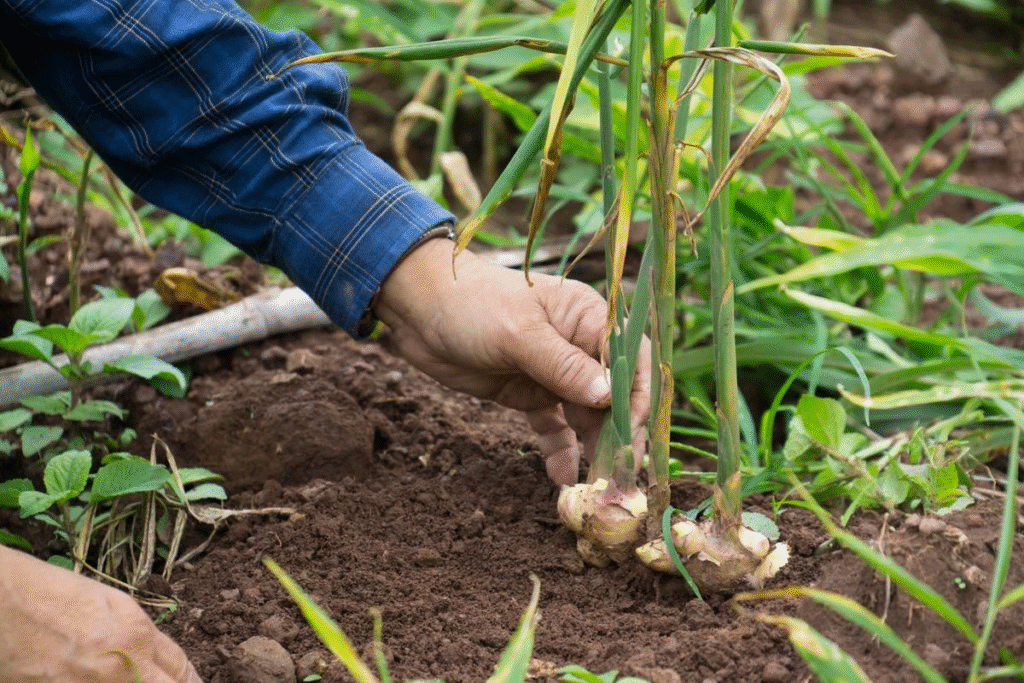
- Garden Beds: Use a garden fork to gently lift the rhizomes from the soil.
- Containers: Tip the pot on its side and carefully remove the soil to expose the rhizomes.
- Cleaning: Gently brush off soil and rinse rhizomes with water.
Storing and Using Your Harvest
Storage Methods
- Fresh Storage: Store unwashed ginger in a paper bag in the refrigerator for up to 3 weeks.
- Freezing: Clean, peel, and slice or grate ginger before freezing in airtight containers for up to 6 months.
- Drying: Slice ginger thinly and dry in a food dehydrator or oven on low heat until completely dry and brittle.
Culinary Uses for Homegrown Ginger
Your freshly harvested ginger will enhance countless dishes:
- Fresh Applications: Add grated ginger to stir-fries, soups, marinades, and dressings.
- Beverages: Make soothing ginger tea or add to smoothies.
- Baking: Incorporate ginger into cookies, cakes, and bread.
- Preservation: Create ginger syrup, candied ginger, or ginger pickles.
Medicinal Applications
Beyond its culinary uses, ginger has been traditionally used for various medicinal purposes:
- Digestive Aid: Ginger tea can help soothe upset stomachs and aid digestion.
- Anti-inflammatory: Compounds in ginger may help reduce inflammation.
- Immune Support: Ginger can be part of a holistic approach to immune system support.
The National Center for Complementary and Integrative Health provides evidence-based information on the medicinal properties of ginger (NCCIH – Ginger).
Growing Ginger from Seed: Is It Possible?
While most gardeners grow ginger from rhizomes, you might wonder about starting from seeds. True ginger seeds are rare in the US market because:
- Flowering is Uncommon: In typical growing conditions, especially outside tropical regions, ginger plants rarely flower and produce seeds.
- Viability Issues: Even when seeds are produced, they often have low germination rates.
- Time Considerations: Growing from seed takes significantly longer than starting from rhizomes.
If you’re determined to try growing from seed, you’ll need to:
- Source seeds from specialized tropical plant suppliers
- Provide high humidity and temperatures around 85°F (29°C) for germination
- Be patient, as germination can take several weeks to months
For most home gardeners, rhizome propagation remains the most practical approach.
Ginger in the US Market
Economic Importance
The ginger market in the United States has seen substantial growth in recent years, driven by:
- Culinary Trends: The popularity of Asian, Caribbean, and fusion cuisines has increased demand for fresh ginger.
- Health Consciousness: Growing awareness of ginger’s potential health benefits has expanded its use beyond traditional culinary applications.
- Specialty Products: Value-added products like ginger beers, teas, and supplements have created new market segments.
While Hawaii produces some commercial ginger, most of the US supply is imported from countries like China, Brazil, and Thailand. This creates an opportunity for home gardeners to grow their own fresh, high-quality ginger.
Varieties Available in the US
Several ginger varieties can be found in the US market:
- Common Ginger (Zingiber officinale): The standard variety used in most cooking.
- Baby Ginger: Harvested young for a milder flavor and tender texture.
- Blue Hawaiian: A variety with bluish rings inside the rhizome and a robust flavor.
- Japanese Ginger (Zingiber mioga): Grown for its edible flower buds rather than rhizomes.
Seasonal Ginger Growing Calendar for US Regions
For successful ginger cultivation, timing your planting and care activities according to your region is essential:
Southern States (Zones 8-11)
- January-February: Prepare and plant rhizomes
- March-August: Active growth phase; regular watering and feeding
- September-November: Reduce watering for rhizome maturation
- December-January: Harvest mature rhizomes
Central States (Zones 6-7)
- March-April: Start rhizomes indoors
- May: Move outdoors after last frost
- June-September: Main growing season
- October: Bring indoors before first frost
- November-February: Maintain as houseplants or harvest
Northern States (Zones 3-5)
- February-March: Start pre-sprouting indoors
- April-May: Plant in containers indoors
- June-August: Possible outdoor time during peak summer
- September: Return indoors
- October-January: Maintain as houseplants or harvest
Conclusion: Your Ginger Growing Journey
Growing ginger at home connects you with a centuries-old tradition of herb cultivation while providing your kitchen with fresh, aromatic ginger for cooking and wellness applications. With patience and proper care, you can enjoy the satisfaction of harvesting your own ginger, regardless of where you live.
Remember that ginger growing is a slower process compared to many common garden herbs, but the reward is well worth the wait. Start with quality rhizomes, provide the right growing conditions, and soon you’ll be adding your own home-grown ginger to your favorite recipes.
Whether you’re a seasoned gardener or a beginner, growing ginger offers an accessible and rewarding experience that enhances both your garden and your culinary adventures. By following the guidelines in this article, you’ll be well on your way to ginger growing success.
To learn more about growing herbs and spices in your region, consider contacting your local USDA Cooperative Extension Office (Find Your Local Extension Office).
