How to Grow Hubbard Squash: A Complete Growing Guide
Hubbard squash, with its sweet, nutty flesh and impressive storage capabilities, is a prized addition to any home garden. These winter squashes produce large, hard-shelled fruits that can weigh anywhere from 8 to 20 pounds and will store for months after harvest. Whether you have a spacious backyard garden, a sunny patio with room for containers, or even a bright indoor space, you can successfully grow these nutritious vegetables with the right approach.
What is Hubbard Squash?
Before diving into growing techniques, let’s get acquainted with this heirloom variety. Hubbard squash (Cucurbita maxima) is characterized by its:
- Tear-drop shape with a hard, bumpy rind
- Vibrant colors ranging from blue-gray to green to orange
- Sweet, fine-grained orange flesh
- Long storage life (up to 6 months when properly cured)
- High nutritional value (rich in vitamins A and C, fiber, and potassium)
According to the USDA’s Agricultural Research Service, winter squashes like Hubbard are excellent sources of carotenoids, which may help reduce risk of certain cancers and eye diseases (USDA NAL).
When and Where to Plant Hubbard Squash
Timing is crucial for a successful Hubbard squash harvest. As warm-season crops, these plants require:
- Soil temperatures of at least 60°F (15.5°C)
- No threat of frost for the growing season
- A long growing season (100-120 days to maturity)
For most of the US, this means planting after the last spring frost. You can check your specific frost dates using the USDA Plant Hardiness Zone Map available at the National Gardening Association.
Outdoor Garden Planting
When planning your garden, select a location with:
- Full sun (minimum 6 hours daily, preferably 8+)
- Well-draining, fertile soil
- Protection from strong winds
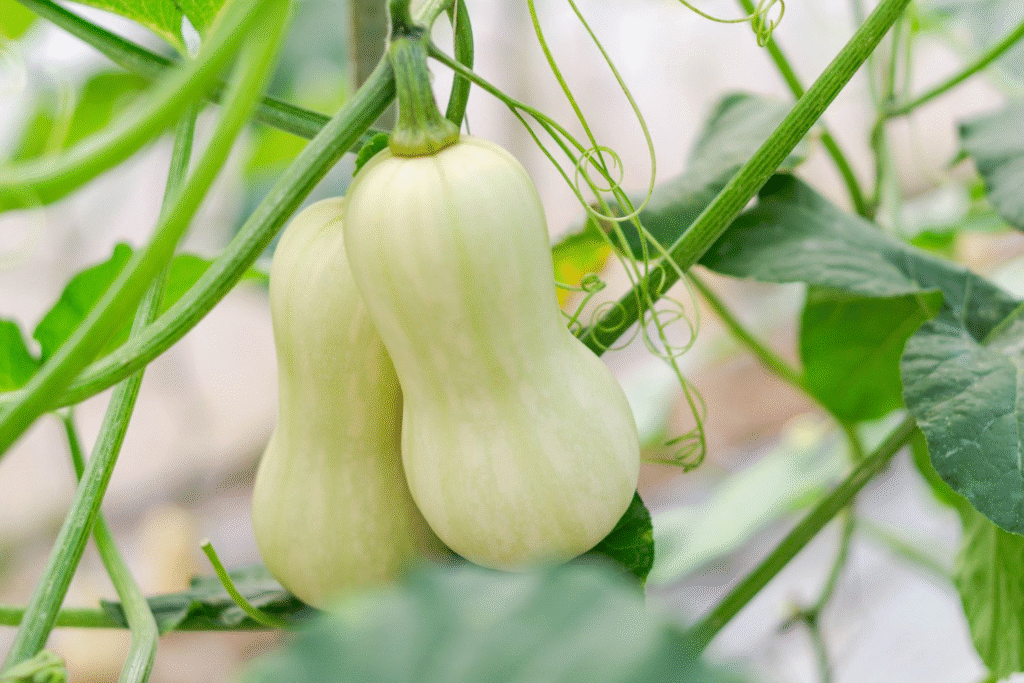
- Plenty of space (each plant needs 4-6 feet in all directions)
Starting Hubbard Squash from Seed
One of the most rewarding aspects of growing Hubbard squash is starting from seed. Let’s look at the different approaches based on your growing environment.
Direct Sowing Outdoors
For gardeners in USDA zones 5-9 with a sufficiently long growing season:
- Wait until soil temperatures reach 60°F (usually 2-3 weeks after the last frost)
- Prepare soil by incorporating 2-3 inches of compost
- Create small mounds about 4-6 feet apart
- Plant 3-5 seeds per mound, 1 inch deep
- Water thoroughly after planting
- Once seedlings develop 2-3 true leaves, thin to the strongest 2-3 plants per mound
Starting Seeds Indoors
If you have a shorter growing season or want to get a head start:
- Start seeds 3-4 weeks before the last expected frost
- Use biodegradable pots (3-4 inches) to minimize root disturbance during transplanting
- Plant seeds 1 inch deep in quality seed-starting mix
- Maintain soil temperature of 70-75°F using a heat mat if necessary
- Place seedlings in bright light once they emerge
- Harden off seedlings by gradually exposing them to outdoor conditions over 7-10 days
- Transplant after all danger of frost has passed
Growing Hubbard Squash in Containers
Yes, despite their sprawling nature, you can grow Hubbard squash in containers:
- Select a large container (minimum 20 gallons/24-inch diameter)
- Ensure excellent drainage holes
- Use high-quality potting mix enriched with compost
- Plant 2-3 seeds and thin to the strongest seedling
- Provide a trellis or allow vines to cascade over the container edge
- Water more frequently than garden-grown plants
Growing Hubbard Squash Indoors
While challenging, growing Hubbard squash indoors is possible with the right setup:
- Choose a compact Hubbard variety like ‘Baby Blue’ or ‘Baby Green’
- Select a location near a south-facing window that receives 8+ hours of direct sunlight
- Supplement with grow lights if natural light is insufficient
- Use a large container (25+ gallons)
- Hand-pollinate flowers (transfer pollen from male to female flowers using a small brush)
- Maintain indoor temperatures between 70-85°F during the day and 60-65°F at night
- Provide good air circulation with a small fan
Hubbard Squash Varieties
Here’s a comparison of popular Hubbard squash varieties to help you choose the right one for your growing situation:
| Variety | Days to Maturity | Size/Weight | Color | Best Growing Method | Special Features |
|---|---|---|---|---|---|
| Blue Hubbard | 110-120 days | 15-40 lbs | Blue-gray | Garden | Excellent storage, classic flavor |
| Golden Hubbard | 100 days | 8-12 lbs | Orange-red | Garden/Large Container | Earlier harvest, manageable size |
| Baby Blue Hubbard | 95 days | 4-5 lbs | Blue-gray | Garden/Container/Indoor* | Compact growth, good for small spaces |
| Green Hubbard | 115 days | 12-15 lbs | Dark green | Garden | Traditional flavor, good keeper |
| Sweet Meat | 100-110 days | 10-15 lbs | Slate gray | Garden | Exceptional flavor, high sugar content |
| Red Kuri | 95 days | 5-8 lbs | Orange-red | Garden/Container | Technically a Hubbard type, sweeter flavor |
*With supplemental lighting and hand pollination
Caring for Your Hubbard Squash Plants
Watering Requirements
Proper watering is crucial for developing healthy fruits:
- Provide 1-2 inches of water weekly
- Water at the base to avoid wetting foliage
- Use drip irrigation or soaker hoses when possible
- Increase watering during fruit development
- Reduce watering as fruits mature and approach harvest time
Fertilizing Schedule
Hubbard squash are heavy feeders that benefit from:
- Initial soil preparation with compost or aged manure
- Light application of balanced fertilizer (10-10-10) at planting
- Side dressing with compost when vines begin to run
- Additional feeding when fruits begin to form (use fertilizer higher in phosphorus and potassium)
According to the USDA NRCS Plant Materials Program, excessive nitrogen can produce abundant foliage at the expense of fruit production.
Mulching Benefits
Apply 2-3 inches of organic mulch around plants to:
- Conserve soil moisture
- Suppress weeds
- Prevent soil-borne diseases from splashing onto leaves
- Keep developing fruits clean and dry
Supporting Vine Growth
While Hubbard squash typically grows as a sprawling vine, you can:
- Allow vines to spread naturally (requires 50+ square feet per plant)
- Train vines onto trellises or fences (for smaller varieties)
- Redirect vines as needed to keep pathways clear
Common Challenges and Solutions
Pest Management
Several pests target squash plants:
- Squash bugs: Handpick and destroy eggs; use row covers until flowering
- Cucumber beetles: Apply diatomaceous earth around young plants
- Squash vine borers: Cover stems with soil at leaf nodes to encourage secondary root development
Disease Prevention
Common diseases affecting Hubbard squash include:
- Powdery mildew: Space plants properly for air circulation; apply neem oil at first signs
- Bacterial wilt: Control cucumber beetles (which spread the disease); remove and destroy infected plants
- Blossom end rot: Maintain consistent soil moisture; add calcium if needed
Pollination and Fruit Development
Hubbard squash produces separate male and female flowers on the same plant:
- Male flowers appear first on long stems
- Female flowers have a small fruit at the base
- Bees and other pollinators typically handle pollination
- Hand pollination may be necessary indoors or when pollinators are scarce
Harvesting and Storing Your Hubbard Squash
When to Harvest
Look for these signs of readiness:
- Skin has hardened (cannot be punctured with a fingernail)
- Stem begins to dry and cork
- Deep, rich color has developed
- Vines may start to die back
- Usually 100-120 days after planting
Proper Harvesting Technique
To maximize storage life:
- Cut (don’t pull) squash from the vine using pruning shears
- Leave 2-3 inches of stem attached (stemless squash spoil more quickly)
- Handle carefully to avoid bruising
- Harvest before heavy frost
Curing Process
Proper curing enhances flavor and extends storage:
- Clean fruits gently with a dry cloth
- Place in a warm (80-85°F), dry location with good air circulation for 10-14 days
- Turn occasionally to ensure even curing
Long-term Storage
Properly cured Hubbard squash will keep for 4-6 months when:
- Stored in a cool (50-55°F), dry place
- Kept on shelves with good air circulation
- Checked periodically for signs of spoilage
Using Your Hubbard Squash Harvest
After investing months in growing these magnificent vegetables, enjoy them in various ways:
- Roasted with herbs and olive oil
- Puréed for soups or pies
- Cubed and added to stews or curries
- Mashed as a nutritious side dish
- Stuffed with grains and proteins for a complete meal
Market Potential in the US
Beyond personal enjoyment, growing Hubbard squash can provide income opportunities:
- Farmers’ markets value heirloom varieties like Hubbard
- CSA (Community Supported Agriculture) members appreciate unusual offerings
- Farm-to-table restaurants seek local, seasonal produce
- Value-added products like purées, baked goods, and preserves extend market reach
According to the USDA Agricultural Marketing Service, winter squash commanded an average wholesale price of $0.75-1.25 per pound in recent years, with specialty and heirloom varieties often fetching premium prices.
Conclusion
Growing Hubbard squash rewards you with beautiful, nutritious, long-keeping fruits that connect you to centuries of agricultural tradition. Whether you’re cultivating them in a spacious garden, on a sunny patio, or even indoors under the right conditions, the process of nurturing these plants from seed to harvest offers both practical and intangible benefits. With adequate space, sunlight, and attention to their basic needs, you’ll enjoy an abundant harvest that can nourish you throughout the winter months.
