How to Grow and Use Culinary Parsnips: A Complete Guide
Are you looking to add a versatile and delicious root vegetable to your garden? Parsnips (Pastinaca sativa) offer a sweet, nutty flavor that enhances soups, roasts, and many other dishes. This ancient vegetable has been cultivated since Roman times and continues to be a valuable addition to modern American cuisine. In this comprehensive guide, you’ll discover everything you need to know about growing parsnips in your garden, in containers, and even indoors from seed to harvest.
Understanding Parsnips
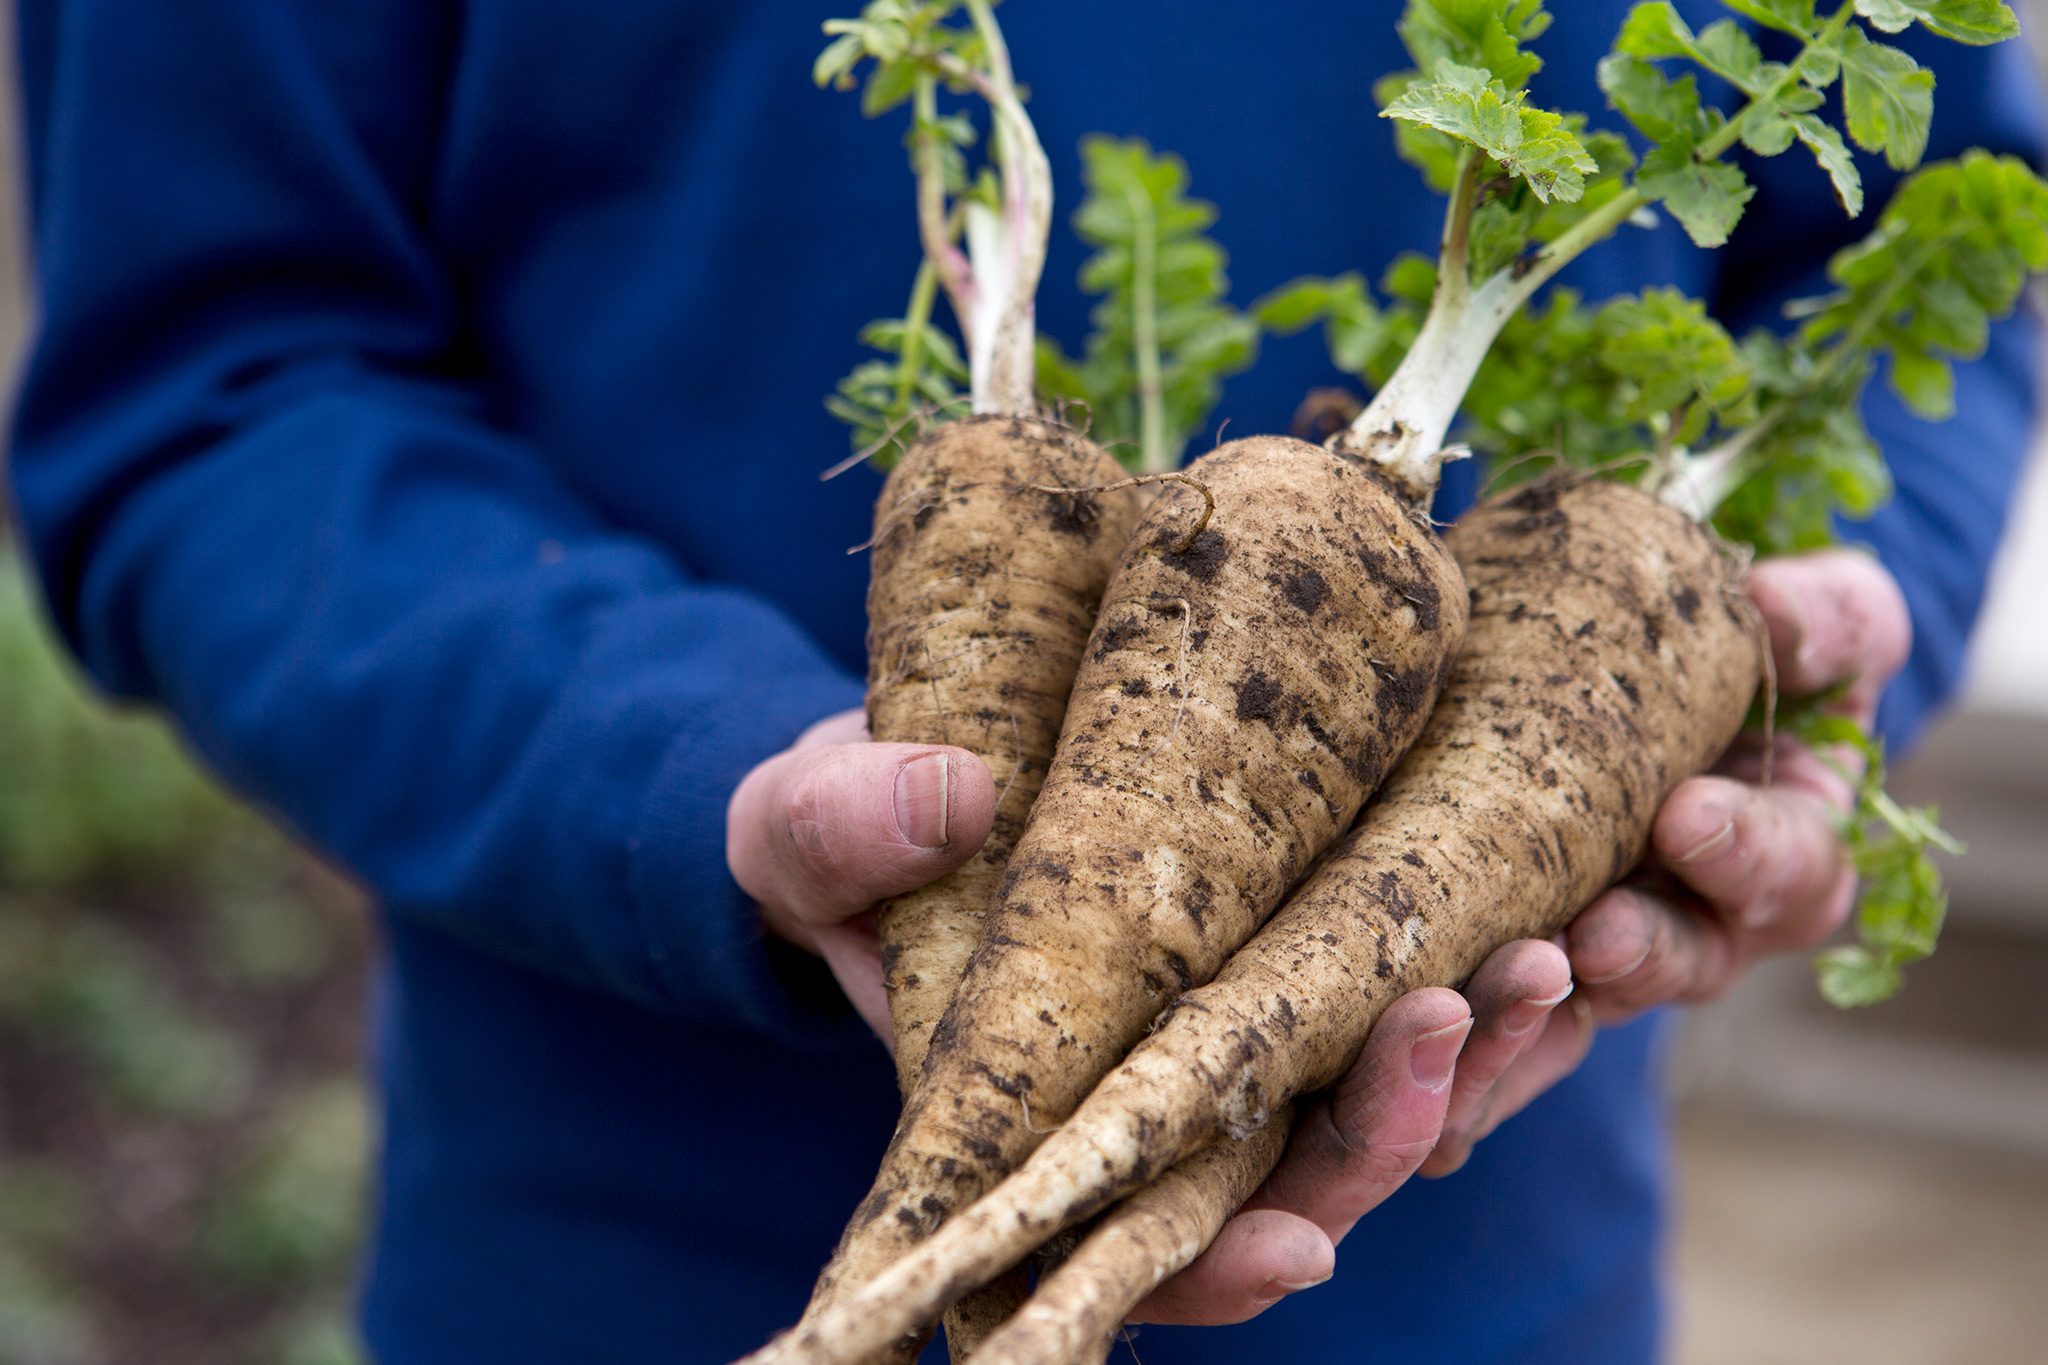
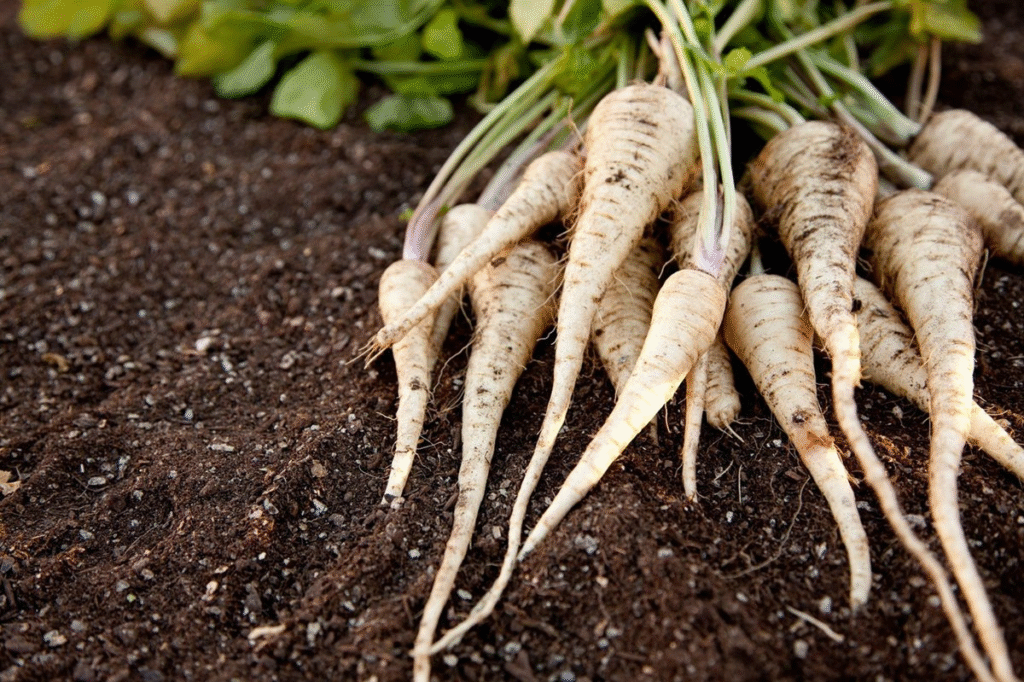
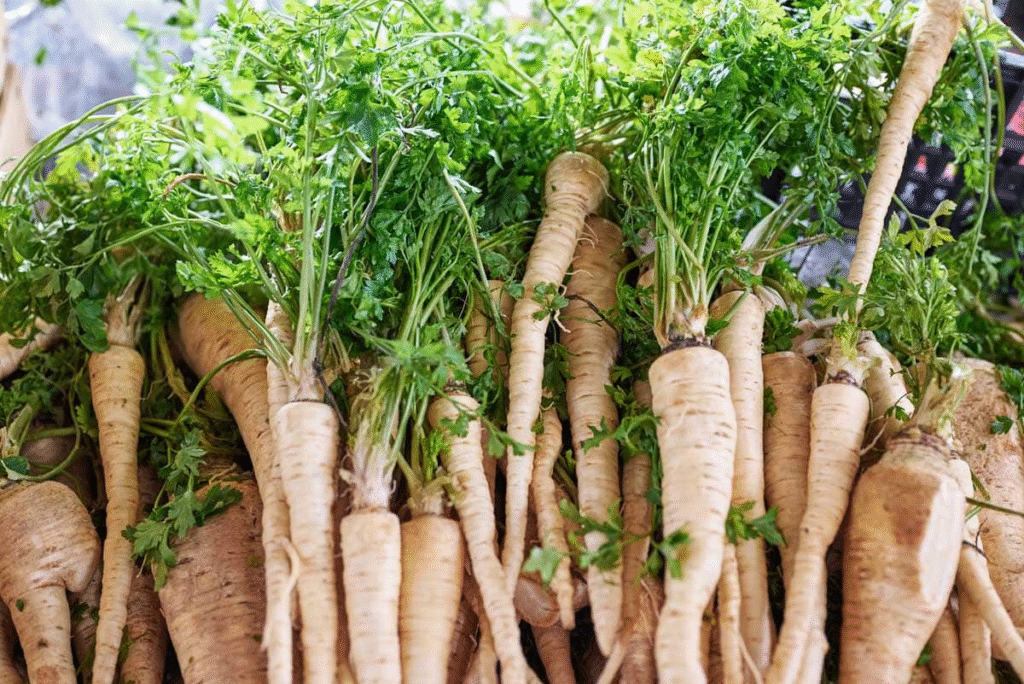
Before diving into cultivation methods, let’s understand what makes parsnips unique. These root vegetables belong to the Apiaceae family, alongside carrots and parsley. They’re known for their cream-colored tapered roots that resemble carrots but offer a distinctly sweeter flavor, especially after exposure to cold temperatures which converts their starches to sugar.
According to the USDA Agricultural Research Service, parsnips are excellent sources of vitamin C, fiber, and potassium. They’re increasingly popular in the US market, with demand growing for locally produced, organic varieties.
Parsnip Varieties for US Gardens
Choosing the right variety is crucial for successful cultivation. Here are some popular varieties well-suited to American growing conditions:
- Hollow Crown: An heirloom variety with excellent flavor and reliable performance
- Harris Model: Produces smooth, white roots with minimal side roots
- Gladiator F1: Offers disease resistance and uniform growth
- Cobham Improved Marrow: Known for its sweet flavor and winter hardiness
- Albion: Develops clean, white roots with resistance to canker
Growing Parsnips in Your Garden
Site Selection and Soil Preparation
Parsnips thrive in full sun but can tolerate partial shade. They require deep, loose soil to develop their characteristic long roots without deformities. When selecting your garden location, keep these requirements in mind:
- Choose an area receiving at least 6 hours of sunlight daily
- Select a spot where you haven’t grown carrots, celery, or other Apiaceae family plants in the past 3 years
- Ensure good drainage to prevent root rot
Soil preparation is critical for parsnip success. These plants prefer a slightly acidic to neutral pH between 6.0-7.0. According to the National Garden Bureau, proper soil preparation can make the difference between straight, beautiful roots and forked, stunted ones.
Follow these steps to prepare your soil:
- Remove rocks, sticks, and debris that might obstruct root growth
- Till to a depth of at least 12 inches to create loose soil
- Incorporate 2-3 inches of compost to improve structure and fertility
- Avoid fresh manure which can cause root forking
- Consider a soil test through your local extension office to check pH and nutrient levels
Planting Parsnips from Seed
Parsnips are almost exclusively grown from seed as they don’t transplant well due to their taproot structure. Here’s how to ensure successful germination:
- Timing: Plant seeds 2-3 weeks before the last spring frost date in your area. In most US growing zones, this falls between March and May.
- Seed Preparation: Parsnip seeds have notoriously low germination rates and short viability. Always purchase fresh seeds for the current growing season. You can increase germination by pre-soaking seeds in room temperature water for 24 hours before planting.
- Planting Method:
- Create shallow furrows about 1/2 inch deep
- Space rows 18-24 inches apart
- Sow seeds thickly (every 1/2 inch) as germination can be spotty
- Cover lightly with fine soil and water gently
- Germination: Be patient! Parsnip seeds can take 2-3 weeks to emerge. Keep the soil consistently moist during this period. According to research from Cornell University’s Vegetable Program, maintaining soil temperature between 50-70°F optimizes germination.
Care and Maintenance
Once your parsnips have germinated and reached about 2 inches in height, it’s time to thin them:
- Thinning: Carefully thin seedlings to stand 3-4 inches apart, selecting the strongest plants to remain. This spacing allows roots to develop properly without competition.
- Watering: Provide consistent moisture, especially during root development. Parsnips need about 1 inch of water weekly. Irregular watering can cause roots to split or become woody.
- Mulching: Apply a 2-3 inch layer of organic mulch to conserve moisture, suppress weeds, and keep soil cool. Straw, shredded leaves, or grass clippings work well.
- Fertilizing: Parsnips aren’t heavy feeders. If you’ve prepared your soil well with compost, additional fertilization may not be necessary. If needed, apply a balanced organic fertilizer (10-10-10) midseason.
- Weed Control: Keep the area weed-free, especially when plants are young. Be careful when weeding near mature plants to avoid damaging the roots.
Pest and Disease Management
While generally robust, parsnips can face several challenges. Here are common issues and organic management strategies:
| Pest/Disease | Symptoms | Management |
|---|---|---|
| Carrot rust fly | Tunnels in roots, reddish-brown trails | Cover with row covers, practice crop rotation |
| Parsnip canker | Dark patches on crown and roots | Ensure good drainage, avoid overhead watering |
| Leaf spot | Brown spots on foliage | Remove affected leaves, avoid wetting foliage |
| Root rot | Soft, discolored roots with foul smell | Improve drainage, practice crop rotation |
| Aphids | Clusters of small insects, curled leaves | Spray with insecticidal soap or neem oil |
For more detailed information on organic pest management strategies, visit the USDA National Organic Program website.
Harvesting Parsnips
One of parsnips’ unique qualities is that their flavor improves after exposure to cold temperatures. The timing of your harvest can significantly impact taste:
- Early Harvest: Roots can be harvested about 120 days after planting when they reach 1-2 inches in diameter at the crown.
- Fall Harvest: For the sweetest flavor, wait until after the first few frosts. The cold converts starches to sugar, creating a notably sweeter taste.
- Winter Harvest: In zones 3-7, parsnips can be left in the ground through winter and harvested as needed, using mulch to prevent the ground from freezing solid. In colder regions, harvest before the ground freezes completely.
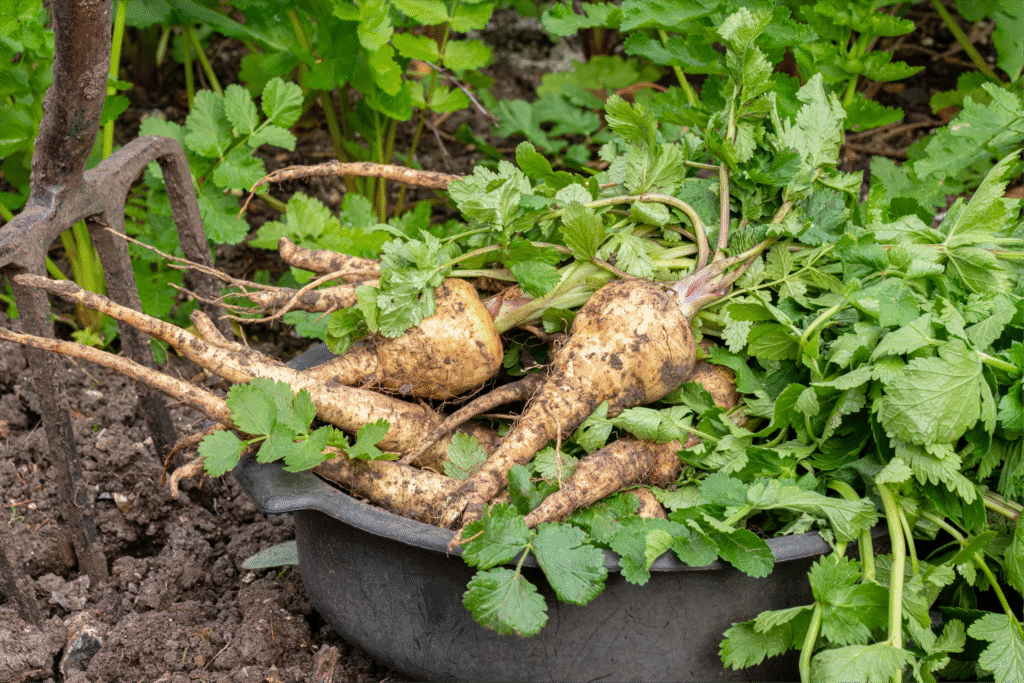
- Harvesting Technique: Loosen the soil carefully with a garden fork before pulling to prevent breaking the roots. Grab firmly at the crown and pull steadily.
Growing Parsnips in Containers
Don’t have garden space? You can successfully grow parsnips in containers with these guidelines:
Container Selection and Preparation
- Container Size: Choose deep containers at least 18 inches deep and 12 inches wide. Half barrels, deep grow bags, or specialized root vegetable containers work well.
- Soil Mix: Use a high-quality potting mix blended with compost at a ratio of 3:1. Avoid heavy garden soil which can compact in containers.
- Drainage: Ensure adequate drainage holes to prevent waterlogging.
Planting and Care
Follow these steps for container-grown parsnips:
- Fill your container to about 1 inch below the rim with your soil mix
- Sow seeds 1/2 inch deep and 2 inches apart
- After germination, thin to 3-4 inches apart
- Place containers in a location receiving at least 6 hours of sunlight daily
- Water more frequently than garden-grown parsnips, as containers dry out faster. Check moisture levels daily during hot weather
- Feed monthly with a balanced liquid organic fertilizer diluted to half strength
Container Challenges and Solutions
Container-grown parsnips face unique challenges:
- Consistent Moisture: Install a self-watering system or set regular watering schedules
- Temperature Management: Move containers to shadier spots during extreme heat
- Winter Protection: In cold climates, insulate containers with bubble wrap or move to a protected area like a garage or shed
Growing Parsnips Indoors
While challenging, growing parsnips indoors is possible with careful planning and the right setup.
Indoor Growing Requirements
- Light: Parsnips need 10-12 hours of bright light daily. A south-facing window may be sufficient, but most indoor growers will need supplemental grow lights.
- Temperature: Maintain temperatures between 60-70°F for optimal growth.
- Container Selection: Extra-deep containers (at least 20 inches) are essential for proper root development.
Step-by-Step Indoor Growing
- Setup: Place your container in your brightest window or under grow lights.
- Planting: Fill container with lightweight potting mix amended with compost. Sow seeds as you would for outdoor containers.
- Care:
- Water thoroughly when the top inch of soil feels dry
- Run a fan on low to improve air circulation and reduce disease risk
- Feed monthly with half-strength organic fertilizer
- Succession Planting: For continuous harvest, start new containers every 6-8 weeks.
Using Culinary Parsnips
Congratulations on growing your own parsnips! Now it’s time to enjoy the fruits of your labor in the kitchen.
Preparation and Storage
- Cleaning: Gently scrub harvested parsnips under cool running water. Young parsnips generally don’t need peeling, while older ones benefit from peeling to remove any fibrous outer layer.
- Storage:
- Short-term: Place unwashed parsnips in a perforated plastic bag in the refrigerator crisper drawer for up to 3 weeks
- Long-term: Store in damp sand in a cool cellar (32-40°F) for up to 6 months
- Freezing: Blanch peeled, chopped parsnips for 2-3 minutes, cool quickly in ice water, drain, and freeze in airtight containers
Culinary Uses
Parsnips are incredibly versatile in the kitchen. Here are some popular preparation methods:
- Roasting: Cut into chunks, toss with olive oil, salt, and herbs, then roast at 425°F until caramelized (about 30-40 minutes).
- Mashing: Boil until tender, then mash with butter, cream, and seasonings for an alternative to mashed potatoes.
- Soups and Stews: Add diced parsnips to soups and stews for natural sweetness and hearty texture.
- Baking: Incorporate grated parsnips into quick breads, muffins, or cakes for moisture and subtle sweetness.
- Chips: Thinly slice and deep fry or bake for unique vegetable chips.
Troubleshooting Common Issues
Poor Germination
If your seeds aren’t sprouting:
- Check seed freshness (use only current-year seeds)
- Ensure consistent soil moisture
- Consider soil temperature (may need to wait for warmer conditions)
- Try pre-sprouting seeds between damp paper towels
Forked or Stubby Roots
Deformed roots can result from:
- Rocky or compacted soil
- Fresh manure application
- Improper thinning
- Nematode damage
Solution: Prepare soil thoroughly next season, removing obstacles and improving texture with mature compost.
Bitter Taste
If your parsnips taste bitter rather than sweet:
- Harvest after several frosts for naturally sweeter flavor
- Check maturity (under-mature or over-mature roots can taste bitter)
- Ensure consistent watering (drought stress can affect flavor)
Conclusion
Growing parsnips requires patience but rewards you with delicious, nutritious roots that store well and complement countless dishes. Whether you’re cultivating them in a spacious garden, containers on your patio, or even indoors under grow lights, these versatile vegetables deserve a place in your growing plan.
Start with quality seeds, provide proper growing conditions, and harvest at the right time for the sweetest flavor. Before long, you’ll be enjoying homegrown parsnips that far surpass anything available in stores.
Remember that parsnips improve with cold exposure, making them perfect for fall gardens and winter harvests. With proper storage techniques, you can enjoy your harvest throughout the winter months, bringing garden-fresh flavor to your table even when snow covers the ground.
