How to Grow Beans: A Complete Guide for Home Gardens
Growing beans is one of the most rewarding experiences for gardeners of all skill levels. Whether you’re looking to grow bush beans in containers on your patio, pole beans climbing up trellises in your backyard garden, or a large plot of beans for your family’s consumption, this guide will walk you through everything you need to know. Beans are not only nutritious and versatile in the kitchen, but they also enrich your soil with nitrogen, making them perfect companion plants in your garden ecosystem.
Why Grow Beans at Home?
Before diving into the planting process, let’s understand why beans are such a fantastic crop for home gardeners in the US:
- Easy to grow: Beans are beginner-friendly and can thrive in various conditions
- Highly productive: A small space can yield a substantial harvest
- Economical: Bean seeds are inexpensive compared to the cost of store-bought beans
- Nutritional powerhouse: Beans provide protein, fiber, and essential vitamins
- Soil improvement: As legumes, beans fix nitrogen in the soil, benefiting future plantings
- Market value: According to the USDA, the US dry bean market was valued at over $1 billion in recent years, showing the economic importance of this crop
According to the USDA National Agricultural Statistics Service, the United States is one of the top global producers of dry beans, with North Dakota, Michigan, Nebraska, and Minnesota being major producing states.
Types of Beans for Your Garden
Before you plant, you need to decide which type of beans will work best for your space and needs:
Bush Beans
Bush beans grow on compact plants (1-2 feet tall) that don’t require support. They produce most of their harvest at once, making them ideal for canning and preserving.
Pole Beans
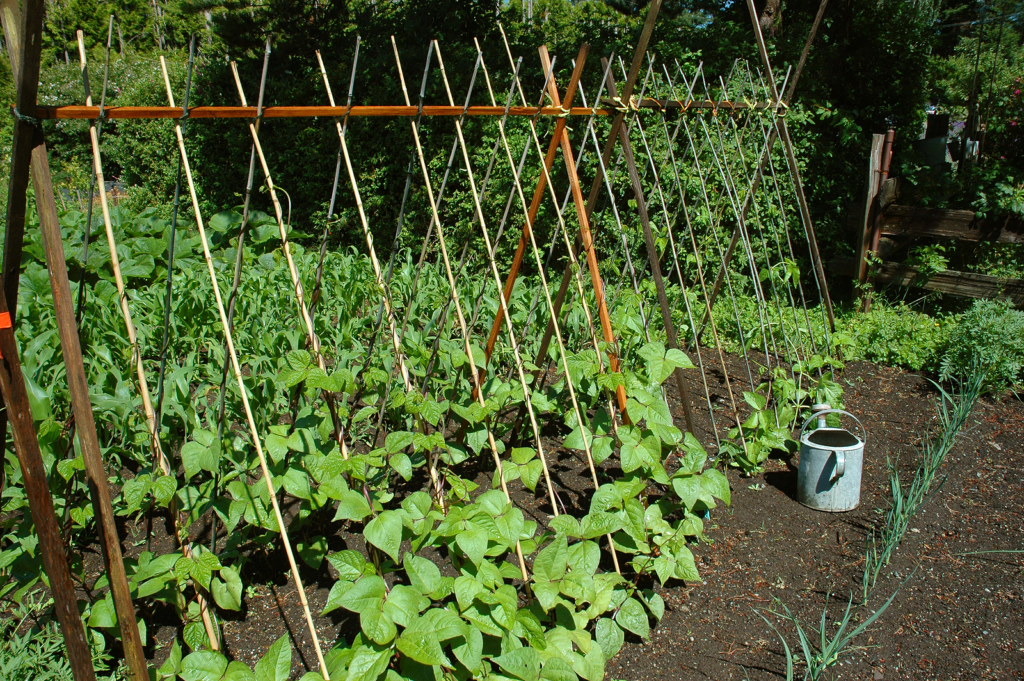
Pole beans grow as climbing vines that require support (a trellis, pole, or fence). They produce continuously throughout the growing season, giving you a steady supply of fresh beans.
Lima Beans
These heat-loving beans produce broad, flat pods and creamy beans. They come in both bush and pole varieties.
Dry Beans
Grown primarily for their dried seeds rather than the pods, these include kidney beans, black beans, navy beans, and pinto beans.
When to Plant Beans
Timing is crucial when planting beans. As warm-season crops, beans are sensitive to frost and require warm soil to germinate properly.
| Bean Type | Soil Temperature | Planting Time | Days to Germination | Days to Harvest |
|---|---|---|---|---|
| Snap Beans (Bush) | 70-80°F | 2-3 weeks after last frost | 8-10 days | 50-60 days |
| Snap Beans (Pole) | 70-80°F | 2-3 weeks after last frost | 8-10 days | 60-70 days |
| Lima Beans | 75-85°F | 3-4 weeks after last frost | 8-12 days | 65-75 days (bush), 85-90 days (pole) |
| Dry Beans | 70-80°F | 2-3 weeks after last frost | 8-10 days | 80-100 days |
For most regions in the US, this means planting in mid to late spring, but you can consult your local extension office for specific planting dates in your area. The USDA Plant Hardiness Zone Map can help you determine the best timing for your region.
How to Plant Beans in Different Settings
Planting Beans in Containers
If you’re limited on space or have a patio garden, containers are an excellent option for growing beans, especially bush varieties.
What you’ll need:
- Container (at least 12 inches deep and wide)
- Quality potting mix
- Bean seeds
- Organic fertilizer (optional)
- Watering can
Steps:
- Fill your container with high-quality potting mix, leaving about an inch of space at the top.
- Moisten the soil thoroughly before planting.
- Plant seeds 1 inch deep and 2-3 inches apart.
- For pole beans, insert a support structure at planting time.
- Water gently and place in a location that receives at least 6 hours of sunlight daily.
- Thin seedlings to 4-6 inches apart once they have their first true leaves.
Planting Beans in a Home Garden
For backyard gardens, you have more flexibility with space and can grow both bush and pole varieties.
What you’ll need:
- Garden space with well-draining soil
- Compost or organic matter
- Bean seeds
- Trellis or support for pole beans
- Basic garden tools (trowel, rake)
Steps:
- Choose a sunny location that receives at least 6-8 hours of direct sunlight.
- Prepare the soil by removing weeds and incorporating compost.
- Create furrows about 1 inch deep for bush beans, with rows spaced 18-24 inches apart.
- For pole beans, space rows 3-4 feet apart to allow for trellising.
- Plant seeds 1 inch deep and 2-4 inches apart within the row.
- Cover with soil, gently firm it down, and water thoroughly.
- For pole beans, install trellises, teepees, or other supports at planting time.
- Mulch around plants once they reach about 4 inches tall to conserve moisture and suppress weeds.
Planting Beans in a Large Plot
If you’re fortunate enough to have access to a larger plot of land, you can grow beans on a bigger scale.
What you’ll need:
- Prepared plot with loosened soil
- Compost or aged manure
- Bean seeds (consider buying in bulk)
- Garden tools (hoe, rake)
- Irrigation system (optional but helpful)
- Row covers (optional for pest protection)
Steps:
- Test your soil pH (beans prefer 6.0-7.0) and amend if necessary. The USDA Natural Resources Conservation Service offers resources on soil health management.
- Till the soil to a depth of 8-10 inches, incorporating organic matter.
- Create planting rows with proper spacing: 18-24 inches for bush beans, 3-4 feet for pole beans.
- Consider creating raised beds for better drainage in heavy soils.
- Plant seeds 1 inch deep, spacing them according to variety (typically 2-4 inches apart).
- If planting multiple rows, consider staggering planting dates by 2-3 weeks for a continuous harvest.
- Install trellising systems for pole beans before or just after planting.
- Consider using drip irrigation for efficient watering.

Caring for Your Bean Plants
Once your beans are in the ground, proper care will ensure a bountiful harvest:
Watering
- Provide 1-1.5 inches of water per week
- Water at the base of plants to avoid wetting foliage
- Use drip irrigation or soaker hoses when possible
- Increase watering during flowering and pod development
Fertilizing
- Beans require minimal fertilization due to their nitrogen-fixing abilities
- Apply a balanced organic fertilizer before planting
- Avoid high-nitrogen fertilizers, which can lead to lush foliage but poor pod production
Mulching
- Apply 2-3 inches of organic mulch around plants
- Mulch helps maintain soil moisture and temperature
- Straw, shredded leaves, or compost work well as mulch materials
Support Structures
For pole beans, ensure your support structure is:
- Sturdy enough to handle the weight of mature vines
- At least 6-8 feet tall
- Installed at planting time to avoid disturbing roots later
Common Bean Plant Problems
Even with careful attention, bean plants can encounter several challenges:
Pests
- Bean beetles: Handpick or use row covers
- Aphids: Spray with insecticidal soap or a strong stream of water
- Cutworms: Use cardboard collars around seedlings
Diseases
- Bacterial blight: Plant resistant varieties and avoid overhead watering
- Powdery mildew: Ensure proper spacing for air circulation
- Root rot: Improve drainage and avoid overwatering
The USDA Agricultural Research Service provides comprehensive resources on managing garden pests and diseases organically.
Harvesting Your Beans
The proper harvesting time depends on the bean type and your intended use:
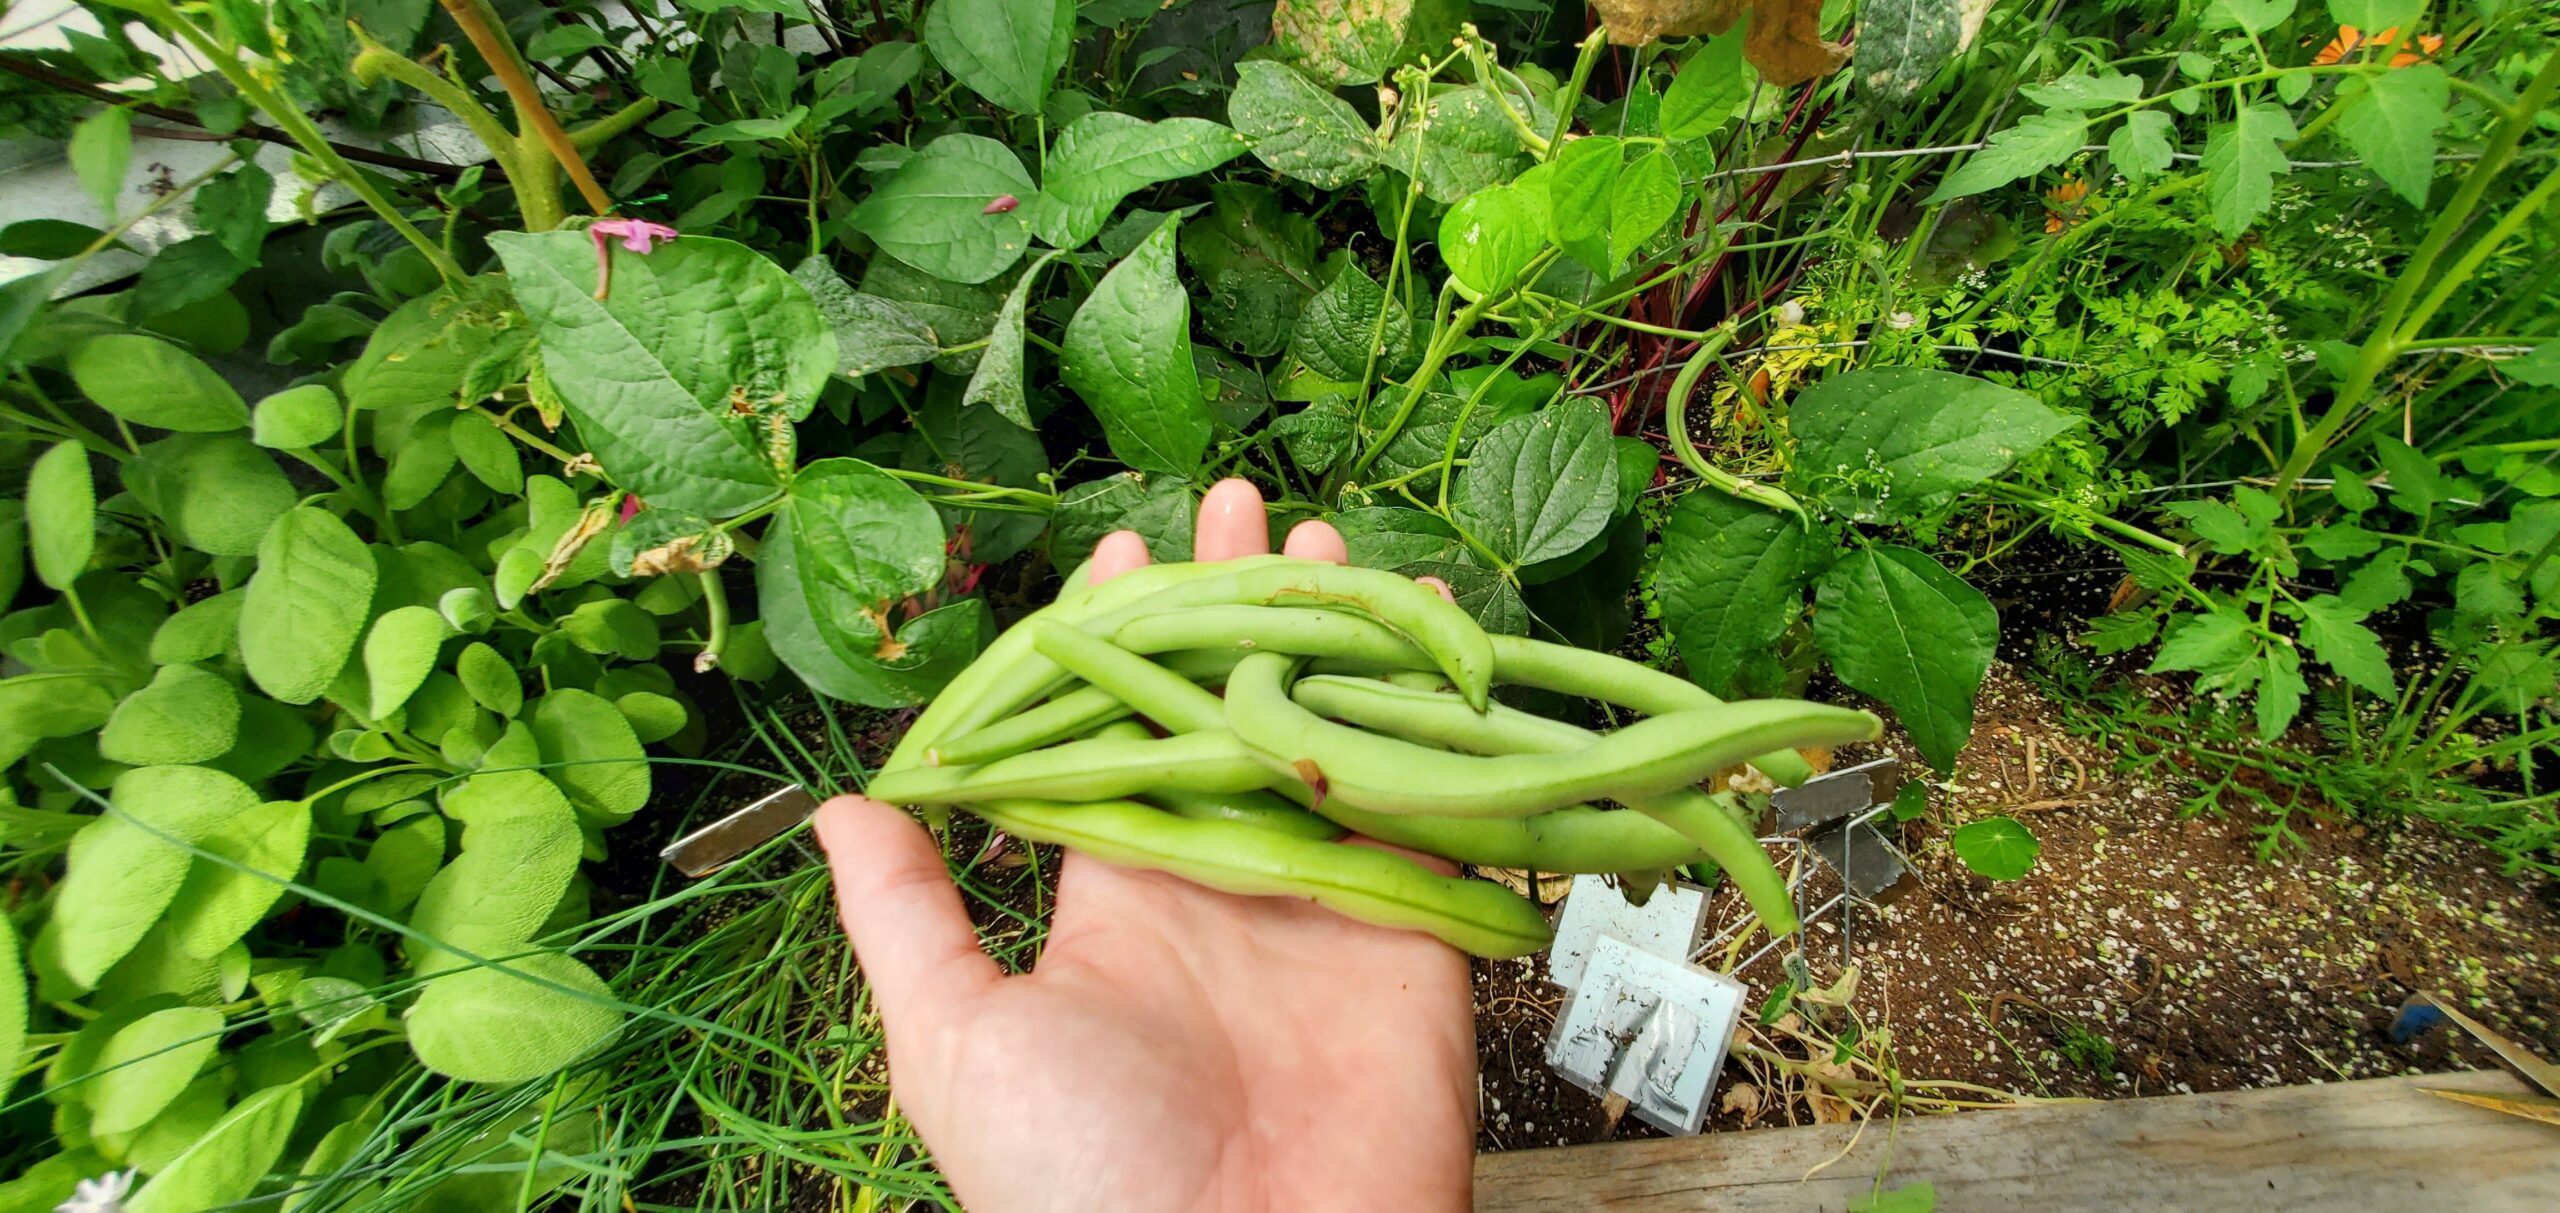
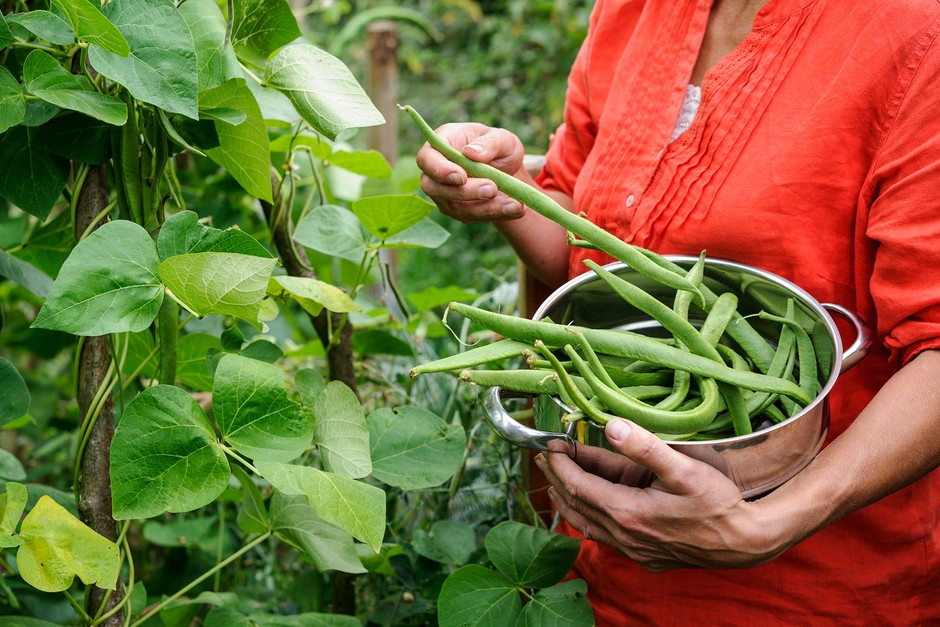
Snap Beans (Green, Yellow, Purple)
- Harvest when pods are firm, crisp, and before seeds bulge
- Pick every 2-3 days to encourage continued production
- Hold the stem with one hand and pick with the other to avoid damaging plants
Lima Beans
- Harvest when pods are plump and seeds have reached full size
- Shell immediately after harvest for the best flavor
Dry Beans
- Allow pods to dry completely on the plant until they rattle when shaken
- Harvest entire plants when most pods are dry
- Complete drying in a well-ventilated area if necessary
- Shell and store in airtight containers
Saving Seeds for Next Season
One of the advantages of growing beans is the ease of saving seeds for future plantings:
- Allow some pods to fully mature and dry on the plant
- Harvest when pods are brown and seeds rattle inside
- Remove seeds from pods and allow to dry further (1-2 weeks)
- Store in airtight containers in a cool, dark location
- Label with variety name and date
According to the USDA Agricultural Research Service’s National Plant Germplasm System, properly stored bean seeds can remain viable for 3-4 years.
Beans in the US Market
The US bean market has seen growing demand due to increased interest in plant-based proteins and traditional culinary uses. According to the USDA Economic Research Service, Americans consume an average of 7.5 pounds of beans per person annually, with consumption trending upward.
If you’re considering growing beans commercially, even on a small scale for farmers’ markets, focus on:
- Specialty varieties not commonly found in supermarkets
- Organic growing practices
- Value-added products like dried bean soup mixes
- Fresh beans sold by the pound when in season
Conclusion
Planting beans is a rewarding activity that can provide you with nutritious food while improving your soil. Whether you’re growing in containers on an apartment balcony, in raised beds in your backyard, or across a larger plot, beans are adaptable, productive, and beneficial to your garden ecosystem.
By following the guidelines in this article, you’ll be well on your way to enjoying fresh, homegrown beans throughout the growing season. Remember that each growing season brings new learning opportunities, so don’t be afraid to experiment with different varieties and techniques to find what works best in your unique growing environment.
