How to Propagate Plants from Cuttings: A Complete Guide
There’s something truly magical about creating new plants from cuttings. Not only is plant propagation an economical way to expand your garden, but it’s also deeply satisfying to watch a simple cutting transform into a thriving plant under your care. Whether you’re a seasoned gardener or just beginning your plant journey, propagating plants from cuttings is a skill worth mastering.
In this comprehensive guide, you’ll discover everything you need to know about plant propagation through cuttings—from understanding the science behind it to step-by-step instructions for different types of plants. We’ll cover the best techniques, common mistakes to avoid, and provide expert tips to ensure your propagation success.
Understanding Plant Propagation
Plant propagation is the process of creating new plants from a variety of sources—seeds, cuttings, bulbs, or other plant parts. Propagation from cuttings, specifically, involves taking a portion of an established plant and encouraging it to grow its own root system, resulting in a new, independent plant.
Why Propagate from Cuttings?
Propagating plants from cuttings offers several advantages over other methods:
- Genetic Consistency: Plants grown from cuttings are exact genetic replicas (clones) of their parent plants. This ensures that desirable traits like flower color, growth habit, and disease resistance are preserved.
- Faster Results: Growing plants from cuttings is generally quicker than starting from seeds. Many cuttings can develop roots within weeks, while seeds may take months to grow into substantial plants.
- Cost-Effective: Instead of purchasing new plants, you can expand your collection for free using plants you already own.
- Preservation: You can preserve rare or heirloom varieties by taking cuttings, ensuring these plants continue to thrive for generations.
- Satisfaction: There’s an immense joy in nurturing a small cutting and watching it develop into a full-fledged plant under your care.
According to the USDA’s Cooperative Extension System, propagation from cuttings is one of the most accessible and rewarding gardening skills for home gardeners to develop.
Types of Plant Cuttings
Not all plant cuttings are created equal. Different plants require different approaches to propagation. Here are the primary types of cuttings you might work with:
Stem Cuttings
Stem cuttings are the most common type used for propagation. These involve sections of the plant’s stem, which contain nodes (points where leaves attach) from which new roots can develop.
Stem cuttings can be further categorized into:
Softwood Cuttings: Taken from new, soft growth in spring or early summer. These cuttings root quickly but require careful handling and humidity management.
Semi-hardwood Cuttings: Collected from partially mature wood of the current season’s growth, typically in late summer or early fall. They have a moderate rooting time.
Hardwood Cuttings: Taken from mature, dormant wood after leaves have fallen in late autumn or winter. These are the most resilient but may take longer to root.
Leaf Cuttings
Some plants can grow entirely new individuals from just a leaf or section of a leaf. This method is popular for plants like African violets, begonias, and succulents.
Root Cuttings
For certain plants, particularly those that naturally spread through their root system, root cuttings can be an effective propagation method. These are typically taken during the dormant season.

Best Plants for Beginner Propagators
If you’re new to propagation, start with plants known for their rooting ease. The following table outlines some of the easiest plants to propagate from cuttings, along with their preferred cutting types and success rates:
| Plant Name | Cutting Type | Rooting Time | Success Rate | Notes |
|---|---|---|---|---|
| Pothos (Epipremnum aureum) | Stem | 1-3 weeks | Very High | Can root in water or soil |
| Spider Plant (Chlorophytum) | Plantlets | 1-2 weeks | Very High | Natural offshoots root easily |
| Philodendron | Stem | 1-3 weeks | High | Roots readily in water |
| English Ivy (Hedera helix) | Stem | 2-4 weeks | High | Prefers humid conditions |
| Coleus | Stem | 1-2 weeks | Very High | Roots quickly in water |
| Lavender | Semi-hardwood | 3-6 weeks | Moderate | Needs well-draining medium |
| Rosemary | Semi-hardwood | 3-8 weeks | Moderate | Benefits from rooting hormone |
| Jade Plant (Crassula) | Leaf or Stem | 2-4 weeks | High | Allow cuts to callus before planting |
| Snake Plant (Sansevieria) | Leaf | 4-8 weeks | Moderate | Cut leaves into sections |
| Tradescantia (Wandering Jew) | Stem | 1-2 weeks | Very High | Extremely easy for beginners |
Essential Tools and Materials
Before you begin propagating plants, gather these necessary supplies:
Basic Tools:
- Clean, sharp scissors or pruning shears
- Small containers or pots with drainage holes
- Propagation medium (potting soil, perlite, vermiculite, or a mix)
- Clear plastic bags or propagation domes
- Spray bottle for misting
- Labels and waterproof marker
Optional but Helpful:
- Rooting hormone powder or gel
- Heat mat for bottom warmth
- Humidity monitor
- Small stakes or supports
- Seedling heating pads for temperature-sensitive cuttings
According to the National Gardening Association, maintaining cleanliness of your tools is crucial for successful propagation. The USDA National Institute of Food and Agriculture recommends sterilizing cutting tools with rubbing alcohol before taking cuttings to prevent disease transmission.
Step-by-Step Guide to Propagating from Stem Cuttings
The most common form of propagation for houseplants and many garden plants is through stem cuttings. Here’s a detailed process to follow:
1. Selecting and Preparing Your Cutting
Select healthy material: Choose a healthy, disease-free parent plant. The best cuttings come from new growth that isn’t flowering.
Timing matters: Morning is generally the best time to take cuttings, when plants are fully hydrated.
Make the cut: Using clean, sharp scissors or pruning shears, cut a 4-6 inch section of stem. Make cuts at a 45-degree angle just below a node (the point where leaves attach to the stem).
Prepare the cutting: Remove leaves from the bottom half of the cutting, leaving 2-4 leaves at the top. For large-leaved plants, you may need to trim remaining leaves by half to reduce water loss.
2. Treatment and Planting
Optional hormone application: If using rooting hormone, dip the cut end into the powder or gel, tapping off any excess. Studies from the University of California Cooperative Extension show that while not always necessary, rooting hormones can increase success rates by 15-30% for difficult-to-root species.
Prepare the container: Fill a small pot with moistened propagation medium. Pre-mixed seed starting soil works well, or create your own mix of equal parts perlite and peat moss or coco coir.
Insert the cutting: Make a hole in the medium with a pencil or your finger, insert the cutting about 1-2 inches deep, and gently firm the medium around it. The hole prevents the rooting hormone from being wiped off as you insert the cutting.
3. Creating the Ideal Environment
Humidity management: Cover the potted cutting with a clear plastic bag or propagation dome to maintain humidity. Leave some openings for air circulation to prevent mold.
Light requirements: Place the cutting in bright, indirect light. Direct sunlight can be too intense and cause stress to the developing cutting.
Temperature control: Maintain temperatures between 65-75°F (18-24°C). Bottom heat from a heat mat can speed up rooting for many species.
Watering regime: Keep the propagation medium consistently moist but not soggy. Mist the cutting occasionally to maintain humidity.
4. Monitoring and Transplanting
Check for roots: After a few weeks (timeframes vary by plant species), gently tug on the cutting. Resistance indicates root formation. Some plants root so readily you can see roots forming along the sides of a clear container.
Hardening off: Once roots have developed, gradually acclimate the new plant to normal conditions by opening the humidity cover increasingly over several days.
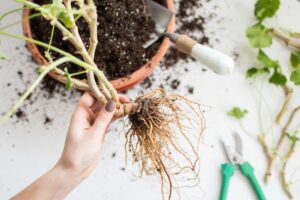
Transplanting: When a healthy root system has developed (typically when roots are 1-2 inches long), transplant the new plant into a slightly larger pot with standard potting soil.
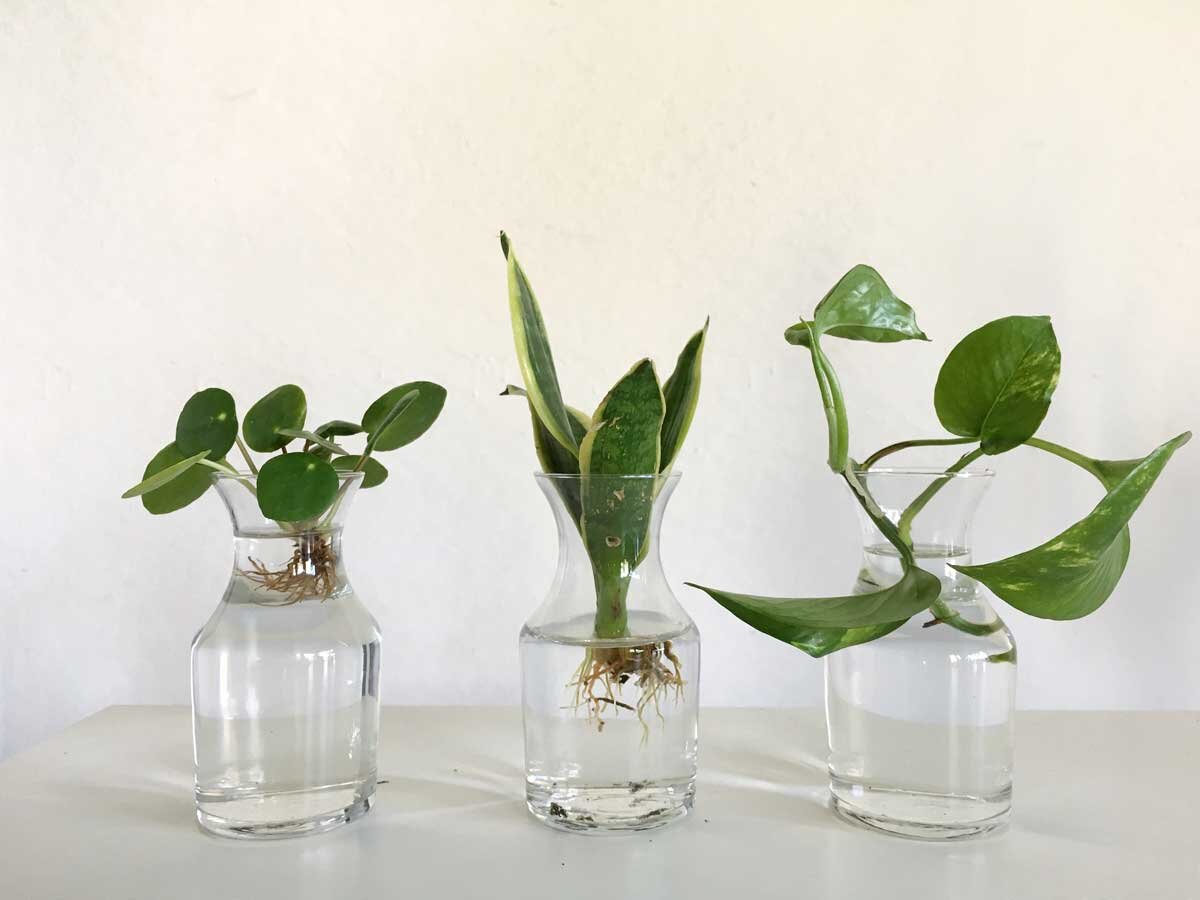
Water Propagation Method
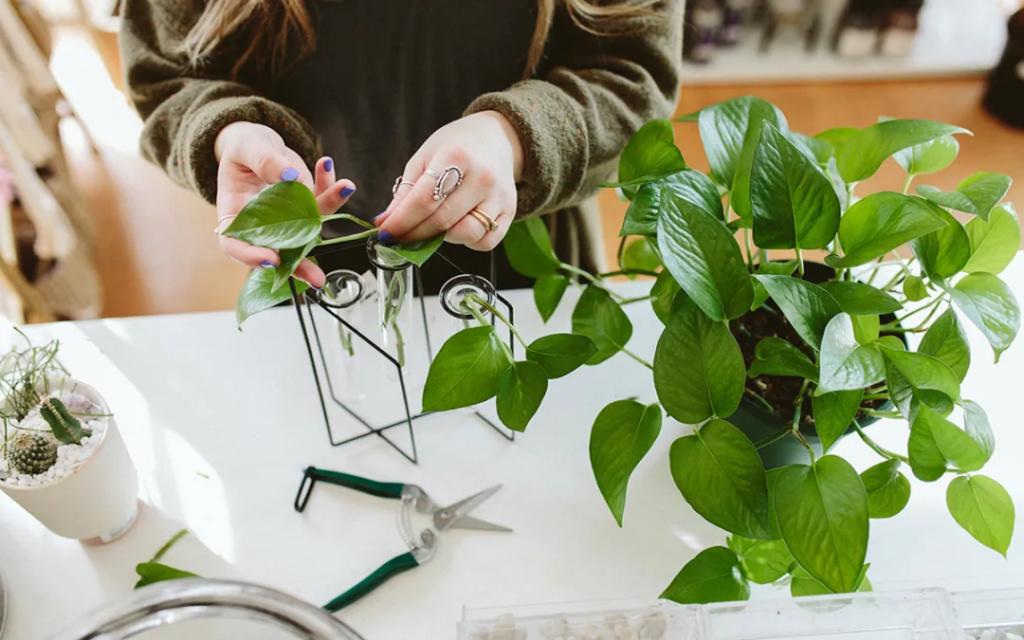
Many houseplants can be propagated simply in water—a method that’s especially popular because it allows you to observe root development.

Steps for Water Propagation:
- Take your cutting following the same guidelines as above, ensuring you have at least one node below the water line.
- Place in water in a clear glass or jar. Use room temperature, chlorine-free water (let tap water sit out overnight to allow chlorine to dissipate).
- Position in indirect light and change the water every 5-7 days to prevent algae growth and maintain oxygen levels.
- Wait for roots to develop, which typically takes 2-6 weeks depending on the plant and conditions.
- Transfer to soil once roots are 1-2 inches long. Note that the transition from water to soil can be stressful for the plant, so keep the soil very moist initially and gradually reduce watering.
The National Park Service’s Plant Conservation Alliance notes that while water propagation is popular for its simplicity and visibility, soil-rooted cuttings often develop stronger, more resilient root systems in the long run.
Specialized Propagation Techniques
Air Layering
For woody plants that are difficult to root from standard cuttings, air layering provides an alternative approach:
- Select a section of stem and make a small upward cut about halfway through.
- Keep the cut open with a toothpick or small pebble.
- Surround the area with moistened sphagnum moss and wrap with plastic.
- Secure both ends with twist ties or plant tape.
- Wait for roots to develop inside the moss (visible through the plastic).
- Once well-rooted, cut below the rooted section and pot up your new plant.
Leaf-Petiole Cuttings
For plants like African violets and some begonias:
- Select a healthy leaf with its stem (petiole) attached.
- Cut the petiole to about 1-2 inches long.
- Insert the cut end into propagation medium at a slight angle.
- Cover to maintain humidity and place in bright, indirect light.
- Eventually, tiny plantlets will form at the base of the leaf.
Leaf Segment Cuttings
For succulents and some tropical plants:
- Remove a healthy leaf and lay it flat on barely moist propagation medium.
- For some plants like Sansevieria, cut the leaf into 2-3 inch segments.
- Place cut sections upright in the medium, maintaining the original orientation (top pointing up).
- Keep lightly moist until new growth appears from the base.
Troubleshooting Common Propagation Problems
Even experienced gardeners encounter challenges with plant propagation. Here are solutions to common issues:
Rotting Cuttings:
- Cause: Excessive moisture, poor drainage
- Solution: Reduce watering, ensure good air circulation, consider a fungicide application
Slow or No Root Development:
- Cause: Incorrect timing, wrong cutting type, or poor environmental conditions
- Solution: Verify you’re using the right propagation technique for the plant, check temperature and humidity levels, consider using rooting hormone
Leaf Drop:
- Cause: Water stress, temperature shock, or insufficient humidity
- Solution: Maintain consistent moisture, use a humidity dome, remove some leaves to reduce transpiration stress
Mold Growth:
- Cause: Excessive humidity with poor air circulation
- Solution: Increase ventilation, reduce misting, consider a fungicide application
According to research published by the USDA Agricultural Research Service, success rates for plant propagation can be significantly improved by addressing these common issues proactively.
Seasonal Considerations for Outdoor Plants
The timing of taking cuttings can significantly impact your success rate:
Spring (Early to Mid):
- Ideal for softwood cuttings of deciduous shrubs
- Good time for herbaceous perennials
- Fast rooting due to natural growth hormones present during active growth
Summer (Late):
- Perfect for semi-hardwood cuttings of many shrubs
- Good for tropical plants and many houseplants
- May require more attention to humidity and moisture
Fall:
- Take hardwood cuttings of deciduous plants after leaf drop
- Root cuttings of many perennials
- Slower rooting but often very reliable
Winter:
- Dormant hardwood cuttings of many trees and shrubs
- Indoor propagation of houseplants
- Requires patience as rooting is slower in cooler temperatures
Beyond the Basics: Advanced Propagation Tips
Once you’ve mastered the fundamentals, these advanced techniques can help improve your success rates:
Create a DIY Propagation Station: Set up a dedicated area with controlled lighting, consistent temperatures, and proper humidity levels. A simple setup can include a heat mat, grow lights on timers, and a humidity dome.
Understand Plant Hormones: Different plants respond to different types and concentrations of rooting hormones. For woody plants, IBA (indole-3-butyric acid) is often most effective, while herbaceous plants may respond better to NAA (naphthaleneacetic acid).
Practice Wounding: For difficult-to-root woody plants, making additional small cuts at the base of the cutting can expose more cambium tissue and stimulate root development.
Maintain Propagation Records: Keep detailed notes on which methods work best for different plants, including timing, hormone concentrations, and environmental conditions.
Ethical and Sustainable Propagation
While propagation is a wonderful way to expand your plant collection, it’s important to practice it responsibly:
Respect Plant Patents: Many newer plant varieties are protected by patents, making it illegal to propagate them without permission. These plants are typically labeled with “PPAF” (Plant Patent Applied For) or “PP” followed by a number.
Avoid Taking Cuttings from Public Gardens or Parks: Unless specifically permitted, taking cuttings from botanical gardens, parks, or other public spaces is generally prohibited and unethical.
Practice Biosecurity: When exchanging cuttings with other gardeners, ensure plants are disease-free to prevent spreading pests or pathogens. The USDA’s Animal and Plant Health Inspection Service provides guidelines for preventing the spread of plant diseases.
Conclusion: Grow Your Garden and Your Skills
Propagating plants from cuttings is both a science and an art—one that rewards patience, observation, and persistence. As you gain experience, you’ll develop an intuitive understanding of what different plants need to thrive from cuttings.
Remember that occasional failures are part of the learning process. Even experienced propagators don’t achieve 100% success rates. Each attempt, whether successful or not, provides valuable insights that will improve your future results.
By mastering the skill of propagation, you’re not just growing your garden—you’re participating in a tradition that connects you to generations of gardeners who have passed plants from hand to hand, preserving botanical diversity and sharing the joy of growing.
So select that healthy stem, make your cut, and watch as nature performs its remarkable transformation under your careful guidance. Your garden—and your gardening skills—will flourish as a result.
