The Basics of Starting Seeds Indoors: A Complete Guide for US Gardeners
Starting seeds indoors is one of the most rewarding gardening practices you can master. Not only does it extend your growing season, but it also saves money, expands your variety options, and gives you full control over how your plants are raised from day one. Whether you’re a novice gardener or looking to refine your seed-starting techniques, this comprehensive guide will walk you through everything you need to know about successfully starting seeds indoors.
Why Start Seeds Indoors?
Before diving into the how-to, let’s understand why so many gardeners choose to start their seeds indoors:
- Extended growing season – In many parts of the US, the outdoor growing season is too short for certain plants to fully mature. Starting seeds indoors gives your plants a head start.
- Cost-effectiveness – A packet of seeds typically costs less than purchasing established plants. For the price of one or two nursery transplants, you can grow dozens of plants from seed.
- Greater variety – Seed catalogs offer hundreds of varieties that you’ll never find as transplants at local garden centers.
- Quality control – By growing your own seedlings, you control every aspect of their early development, ensuring they’re raised organically and hardened off properly.
- Disease prevention – Starting with clean materials in a controlled environment reduces the risk of soilborne diseases.
According to the USDA National Agricultural Library, home gardeners can significantly increase their gardening success by mastering proper seed-starting techniques.
When to Start Seeds Indoors
Timing is critical when starting seeds indoors. Start too early and your plants may become leggy and weak before outdoor planting time; start too late and you’ll miss valuable growing time.
Calculating Your Seed-Starting Timeline
Most seed packets provide information about when to start seeds indoors, typically expressed as “X weeks before last frost.” To determine your specific seed-starting dates, you need to know your region’s average last frost date.

The following table shows approximate last frost dates for major US climate zones:
| USDA Hardiness Zone | Approximate Last Frost Date | Regions |
|---|---|---|
| Zone 3 | May 15 – June 1 | Northern Minnesota, North Dakota |
| Zone 4 | May 1 – May 15 | Northern New England, Northern Michigan |
| Zone 5 | April 15 – April 30 | Southern New England, Great Lakes |
| Zone 6 | April 1 – April 15 | Ohio Valley, Mid-Atlantic |
| Zone 7 | March 15 – March 30 | Upper South, Northern Texas |
| Zone 8 | March 1 – March 15 | Lower South, Central Texas |
| Zone 9 | February 1 – February 15 | Southern Texas, Central Florida |
| Zone 10 | January 15 – January 30 | Southern Florida, Southern California |
You can find your specific hardiness zone by visiting the USDA Plant Hardiness Zone Map.
Common Vegetables and Their Indoor Starting Times
Different crops have different timelines for indoor starting. Here’s a quick reference guide:
| Vegetable | Weeks Before Last Frost | Indoor Growing Period | Transplant Outdoors |
|---|---|---|---|
| Tomatoes | 6-8 weeks | 7-9 weeks | After last frost |
| Peppers | 8-10 weeks | 8-10 weeks | 2 weeks after last frost |
| Eggplant | 8-10 weeks | 8-10 weeks | 2-3 weeks after last frost |
| Broccoli | 4-6 weeks | 5-7 weeks | 2-3 weeks before last frost |
| Cabbage | 4-6 weeks | 5-7 weeks | 2-3 weeks before last frost |
| Lettuce | 3-4 weeks | 3-4 weeks | 2-4 weeks before last frost |
| Cucumbers | 3-4 weeks | 3-4 weeks | After last frost |
| Squash | 3-4 weeks | 3-4 weeks | After last frost |
| Melons | 3-4 weeks | 3-4 weeks | After soil warms to 65°F |
| Herbs (most) | 6-8 weeks | 6-8 weeks | After last frost |
Essential Supplies for Starting Seeds Indoors
Setting up your seed-starting station doesn’t have to be complicated or expensive. Here’s what you’ll need:
Containers
You have several options for seed-starting containers:
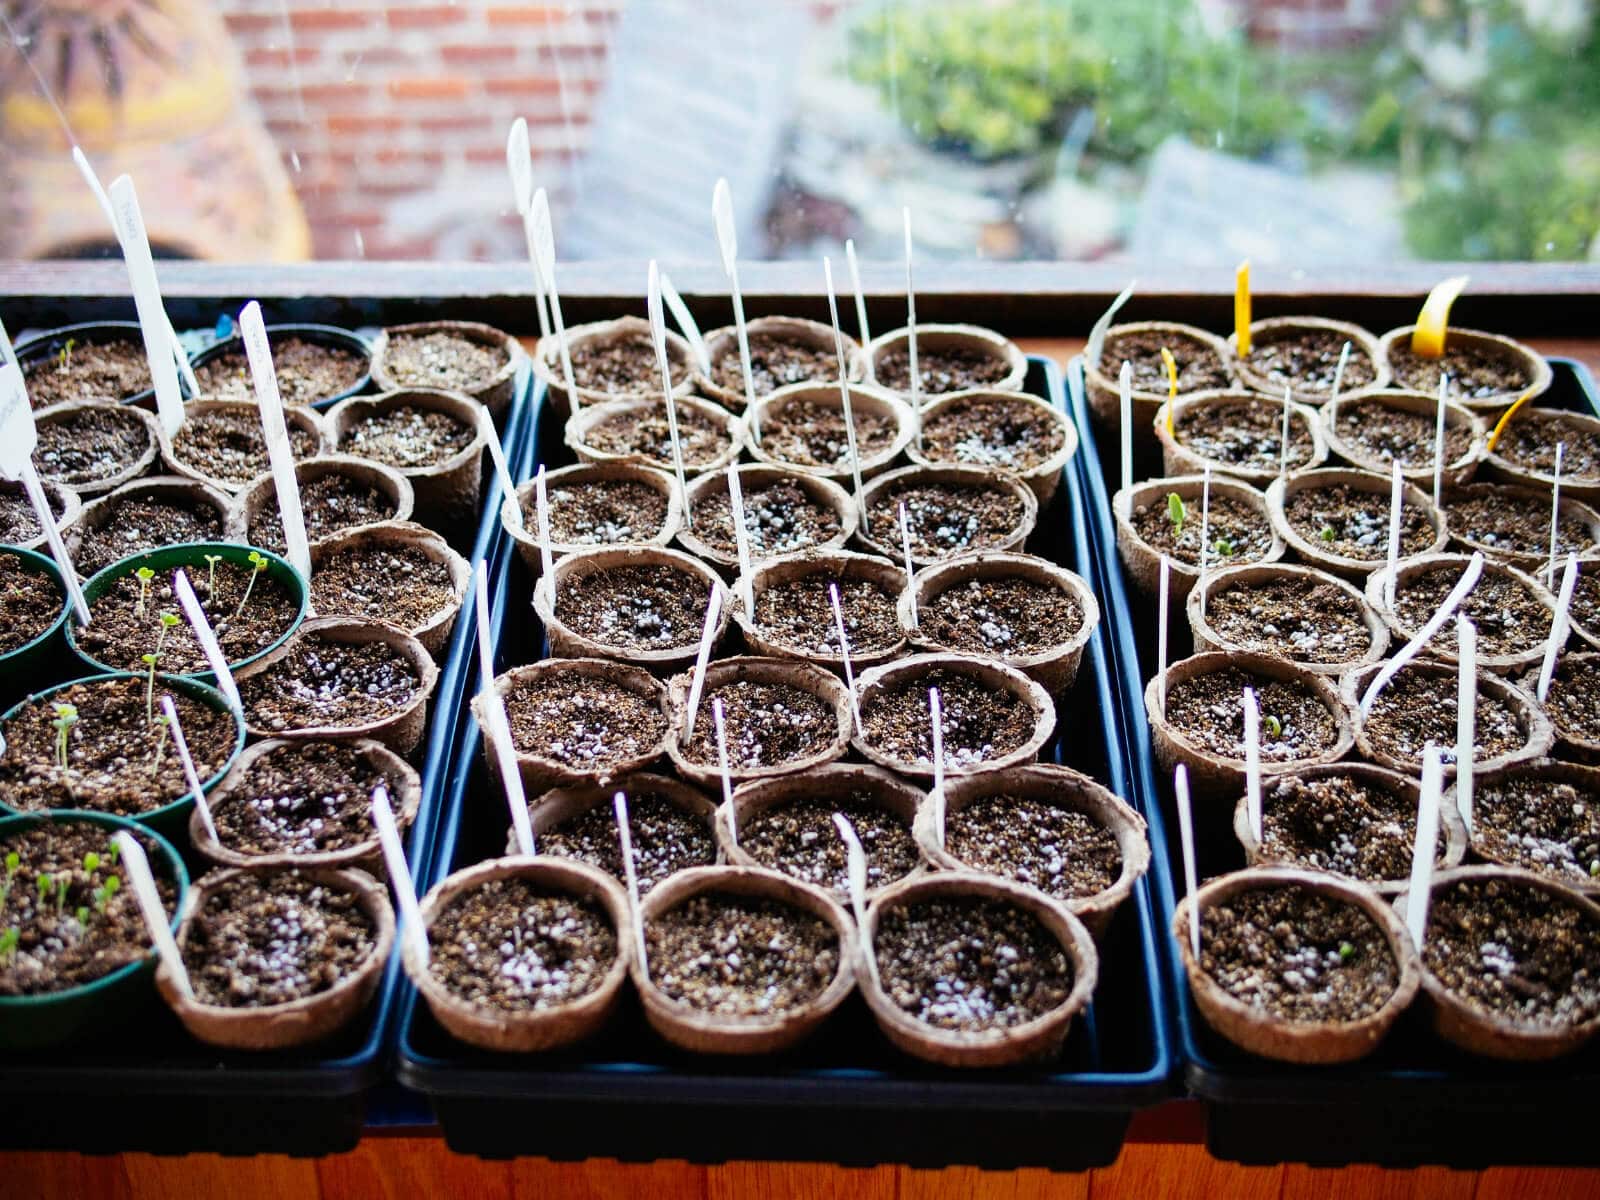
- Seed-starting trays: Plastic trays with individual cells, usually sold in garden centers
- Peat pots: Biodegradable pots that can be planted directly in the garden
- DIY containers: Repurposed yogurt cups, egg cartons, or toilet paper rolls with drainage holes
- Soil blocks: Compressed blocks of soil medium that eliminate the need for containers
Growing Medium
Regular garden soil is too heavy for starting seeds. Instead, use:
- Seed-starting mix (sterile, lightweight, and designed specifically for germination)
- Coconut coir (a sustainable alternative to peat moss)
- Vermiculite or perlite (for improving drainage and aeration)
Lighting
Inadequate light is the number one reason for leggy, weak seedlings. You’ll need:
- South-facing window: May work for some plants but often insufficient
- Fluorescent lights: Inexpensive and effective when placed 2-3 inches above seedlings
- LED grow lights: More energy-efficient and longer-lasting than fluorescents
- Light timer: To automate your lighting schedule (14-16 hours of light daily)
Additional Supplies
- Heat mats: To provide bottom heat for faster germination
- Dome covers: To maintain humidity during germination
- Fans: For air circulation to prevent damping off disease
- Labels: To identify your seedlings
- Watering can or mister: For gentle watering
- Thermometer: To monitor temperature
- Plant food: Diluted organic fertilizer for when true leaves appear
Step-by-Step Guide to Starting Seeds Indoors
Now that you understand the when and what, let’s dive into the how of seed starting:
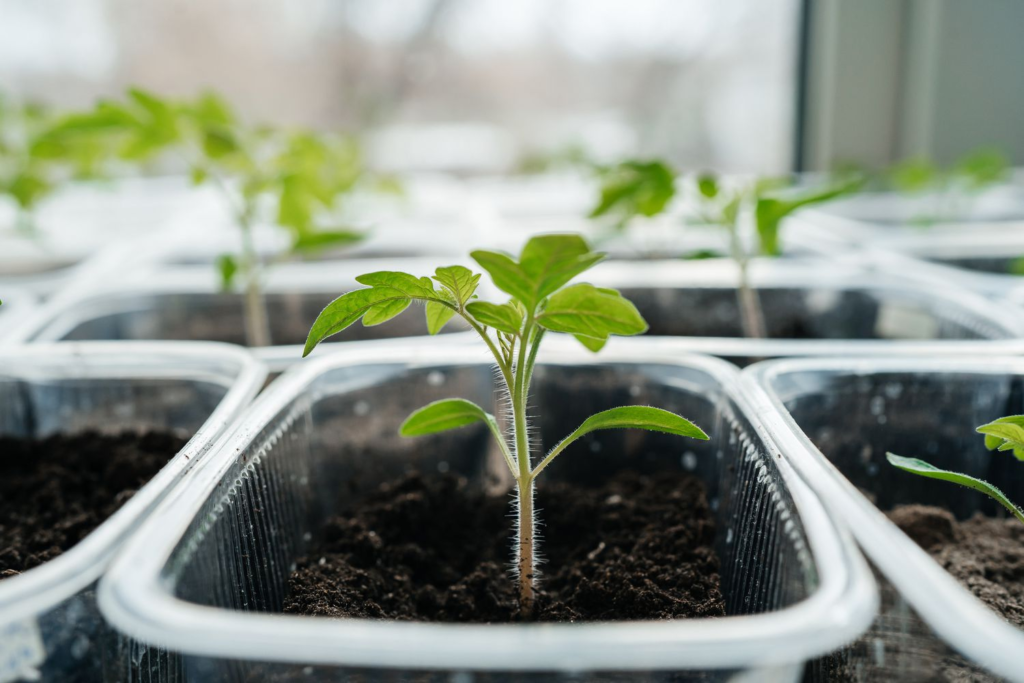
1. Prepare Your Containers
- Clean used containers with a 10% bleach solution to sterilize them.
- Ensure all containers have drainage holes.
- Fill containers with moistened seed-starting mix to about ¼ inch from the top.
- Gently firm the surface but don’t compact the soil.
2. Planting the Seeds
- Check your seed packet for specific planting depth instructions. The general rule is to plant seeds at a depth 2-3 times their diameter.
- For fine seeds (like lettuce or petunias), simply press them into the surface of the soil.
- For medium and large seeds, make an indentation with your finger or a pencil and place the seed in the hole.
- Cover with soil according to seed packet instructions.
- Label each container with the plant name and date planted.
3. Watering and Humidity
- Water newly planted seeds gently from below by placing containers in a shallow tray of water until the soil surface appears moist.
- Alternatively, use a spray bottle to mist the soil surface.
- Cover containers with plastic dome lids or plastic wrap to maintain humidity.
- Check moisture levels daily. The soil should feel damp but not waterlogged.
4. Providing Heat and Light
- Place seed trays in a warm location (65-75°F for most seeds).
- For heat-loving seeds like peppers and tomatoes, use a heat mat to maintain soil temperature around 80°F.
- Once seeds germinate, remove any humidity domes and move seedlings under lights.
- Position lights 2-3 inches above the seedlings and raise them as plants grow.
- Provide 14-16 hours of light daily with a timer.
5. Seedling Care
- Once seedlings emerge, provide good air circulation with a small fan on low setting.
- When seedlings develop their first true leaves (not the initial seed leaves), begin feeding with a diluted organic fertilizer at half the recommended strength.
- As seedlings grow, thin them if necessary to prevent overcrowding.
6. Transplanting Seedlings
- When seedlings outgrow their initial containers, transplant them to larger pots.
- Always handle seedlings by their leaves, not their fragile stems.
- Water thoroughly after transplanting.
7. Hardening Off
- Two weeks before outdoor planting time, begin hardening off your seedlings.
- Start by placing them outdoors in a sheltered location for 1-2 hours.
- Gradually increase outdoor time over 7-10 days.
- Avoid direct sunlight, wind, and temperatures below 45°F initially.
- By the end of the hardening-off period, seedlings should tolerate full sun and overnight temperatures.
The Cooperative Extension System offers detailed resources on hardening off seedlings specific to your region.
Common Problems and Solutions
Even experienced gardeners encounter challenges when starting seeds. Here are some common issues and how to address them:
Damping Off Disease
Symptoms: Seedlings suddenly collapse at the soil line and die.
Solutions:
- Use sterile seed-starting mix and clean containers.
- Improve air circulation with a small fan.
- Avoid overwatering.
- Apply a thin layer of sand or fine vermiculite to the soil surface after planting.
Leggy Seedlings
Symptoms: Tall, thin, weak stems with large spaces between leaves.
Solutions:
- Provide more light.
- Lower your light source closer to the plants.
- Maintain cooler temperatures after germination (60-65°F).
- Gently brush your hand over seedlings daily to strengthen stems.
Slow or No Germination
Symptoms: Seeds take longer than expected to sprout or don’t sprout at all.
Solutions:
- Check seed viability (older seeds may have lower germination rates).
- Verify temperature requirements for specific seeds.
- Some seeds need light to germinate (don’t cover them with soil).
- Some seeds require pre-treatment like scarification or stratification.
- Maintain consistent moisture until germination occurs.
Mold on Soil Surface
Symptoms: White or green fuzzy growth on the soil.
Solutions:
- Improve air circulation.
- Reduce watering frequency.
- Remove affected areas.
- Sprinkle cinnamon (a natural fungicide) on soil surface.
Advanced Seed-Starting Techniques
Once you’ve mastered the basics, you might want to try these advanced techniques:
Seed Treatments
- Scarification: Nicking or sanding hard seed coats to improve water absorption
- Stratification: Exposing seeds to cold, moist conditions to simulate winter
- Soaking: Pre-soaking large or hard seeds to speed germination
- Inoculation: Adding beneficial bacteria to legume seeds
Succession Planting
Start small batches of seeds every 2-3 weeks for continuous harvests throughout the season.
Winter Sowing
A low-tech method of starting seeds outdoors in mini-greenhouses made from recycled containers during winter months.
Bottom Watering Techniques
Setting up self-watering systems using capillary mats or wicking systems to provide consistent moisture.

The Economics of Starting Seeds Indoors
Starting your own seeds isn’t just a rewarding hobby—it makes financial sense too. Let’s break down the cost comparison:
Cost Analysis: Seeds vs. Nursery Transplants
For this example, let’s consider tomatoes, one of America’s most popular garden plants:
| Item | Initial Cost | Plants Produced | Cost Per Plant |
|---|---|---|---|
| Packet of 30 tomato seeds | $3-4 | ~25 plants (83% germination) | $0.12-0.16 |
| Nursery transplants | $3-5 each | 1 plant per purchase | $3-5 |
Even accounting for the cost of supplies (most of which are reusable for years), the savings are substantial, especially for gardeners who grow multiple varieties or larger quantities.
Eco-Friendly Seed Starting
As environmental consciousness grows among US gardeners, sustainable seed-starting practices are becoming increasingly important:
Sustainable Materials
- Use biodegradable pots made from peat, coconut coir, or newspaper
- Repurpose household items like egg cartons or toilet paper tubes
- Choose organic seed-starting mixes or make your own from compost
Energy Efficiency
- Use LED grow lights which consume less electricity
- Position seed-starting stations to take advantage of natural light when possible
- Group plants with similar light needs together
Seed Saving
Come full circle by learning to save seeds from your garden plants for next season’s indoor seed starting. The USDA Seed Saving Resources provides excellent information on preservation techniques.
Conclusion
Starting seeds indoors is both an art and a science. While it requires some initial investment in time and supplies, the rewards far outweigh the costs. You’ll enjoy a longer growing season, save money, access greater plant diversity, and experience the profound satisfaction of nurturing plants from their earliest beginnings.
As you develop your seed-starting skills, remember that even the most experienced gardeners face challenges. Keep records of what works and what doesn’t, and don’t be afraid to experiment with different techniques. With practice and patience, you’ll soon be producing healthy, vibrant seedlings ready to thrive in your garden.
Whether you’re growing vegetables for food security, herbs for your kitchen, or flowers for beauty, the journey from seed to garden begins with these fundamental indoor seed-starting techniques. The skills you develop will serve you throughout your gardening lifetime and connect you to the timeless cycle of plant growth that humans have been participating in for thousands of years.
Get your hands dirty, be patient with the process, and soon you’ll be watching your garden thrive with plants you’ve nurtured from their very beginning.
