Dethatching vs. Aerating: The Ultimate Guide to Revitalizing Your Lawn
Your lawn tells a story through its appearance. When that story includes yellow patches, poor growth, and water pooling on the surface, it’s trying to tell you something important: the soil beneath needs attention. Two of the most common lawn care procedures to address these issues are dethatching and aerating. While often confused with one another, these distinct treatments serve different purposes in maintaining a healthy, vibrant lawn. Understanding when and why to perform each can make the difference between a lawn that merely survives and one that truly thrives.
As a homeowner, you’ve likely heard these terms thrown around by lawn care professionals or neighbors with enviable green spaces. Perhaps you’ve wondered which treatment your lawn needs, or if you need both. This comprehensive guide will walk you through everything you need to know about dethatching and aerating—what they are, how they differ, when to use each method, and how to perform them correctly for optimal results.
Understanding Thatch: The Hidden Layer in Your Lawn
Before diving into dethatching, it’s essential to understand what thatch actually is. Thatch is a layer of dead and living organic matter that accumulates between the soil surface and the green vegetation of your lawn. This layer consists primarily of stems, roots, crowns, and blades that haven’t decomposed. While a thin layer of thatch (about ¼ to ½ inch) can be beneficial, providing insulation against temperature extremes and helping retain moisture, excessive thatch becomes problematic.
When thatch builds up to more than half an inch thick, it creates a barrier that prevents water, nutrients, and air from reaching the soil and root systems. According to research from the University of Maryland Extension, excessive thatch can harbor insects and disease pathogens while making your lawn less resilient to drought and temperature fluctuations. Additionally, lawn care products like fertilizers and pesticides become less effective as they get trapped in the thatch layer rather than reaching the soil where they’re needed.
The composition of your soil and your lawn care practices significantly influence thatch accumulation. Heavy clay soils tend to have more thatch problems than sandy soils because they have fewer microorganisms to break down organic matter. Excessive fertilization, particularly with high nitrogen formulations, promotes rapid growth that can outpace natural decomposition, leading to thatch buildup.
How to Identify Thatch Problems
You can easily check for thatch by removing a small, wedge-shaped sample of your lawn about 3 inches deep. Examine the profile between the green grass and the soil surface. If the thatch layer exceeds ½ inch, your lawn would benefit from dethatching. Other signs of excessive thatch include:
- Spongy feeling when walking on your lawn
- Difficulty pushing a screwdriver or garden trowel into the soil
- Drought stress despite regular watering
- Increased insect and disease problems
- Scalping (brown patches) when mowing
The United States Department of Agriculture (USDA) Natural Resources Conservation Service notes that maintaining proper soil biology is crucial for natural thatch control. Their research indicates that healthy soil with adequate microbial activity can significantly reduce thatch accumulation. You can learn more about soil health principles on their official website.
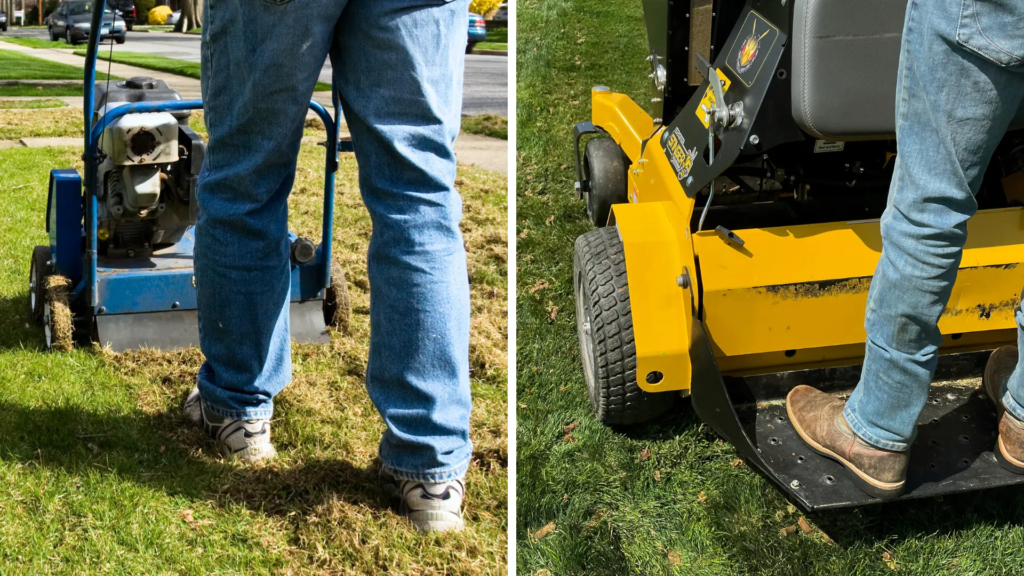
What is Dethatching: Removing the Barrier
Dethatching is the process of mechanically removing this accumulated layer of dead organic material from your lawn. The goal is to reduce the thatch to a healthy level (¼ inch or less) without damaging the living grass. This procedure promotes better air circulation, water penetration, and nutrient absorption—essentially giving your lawn room to breathe again.
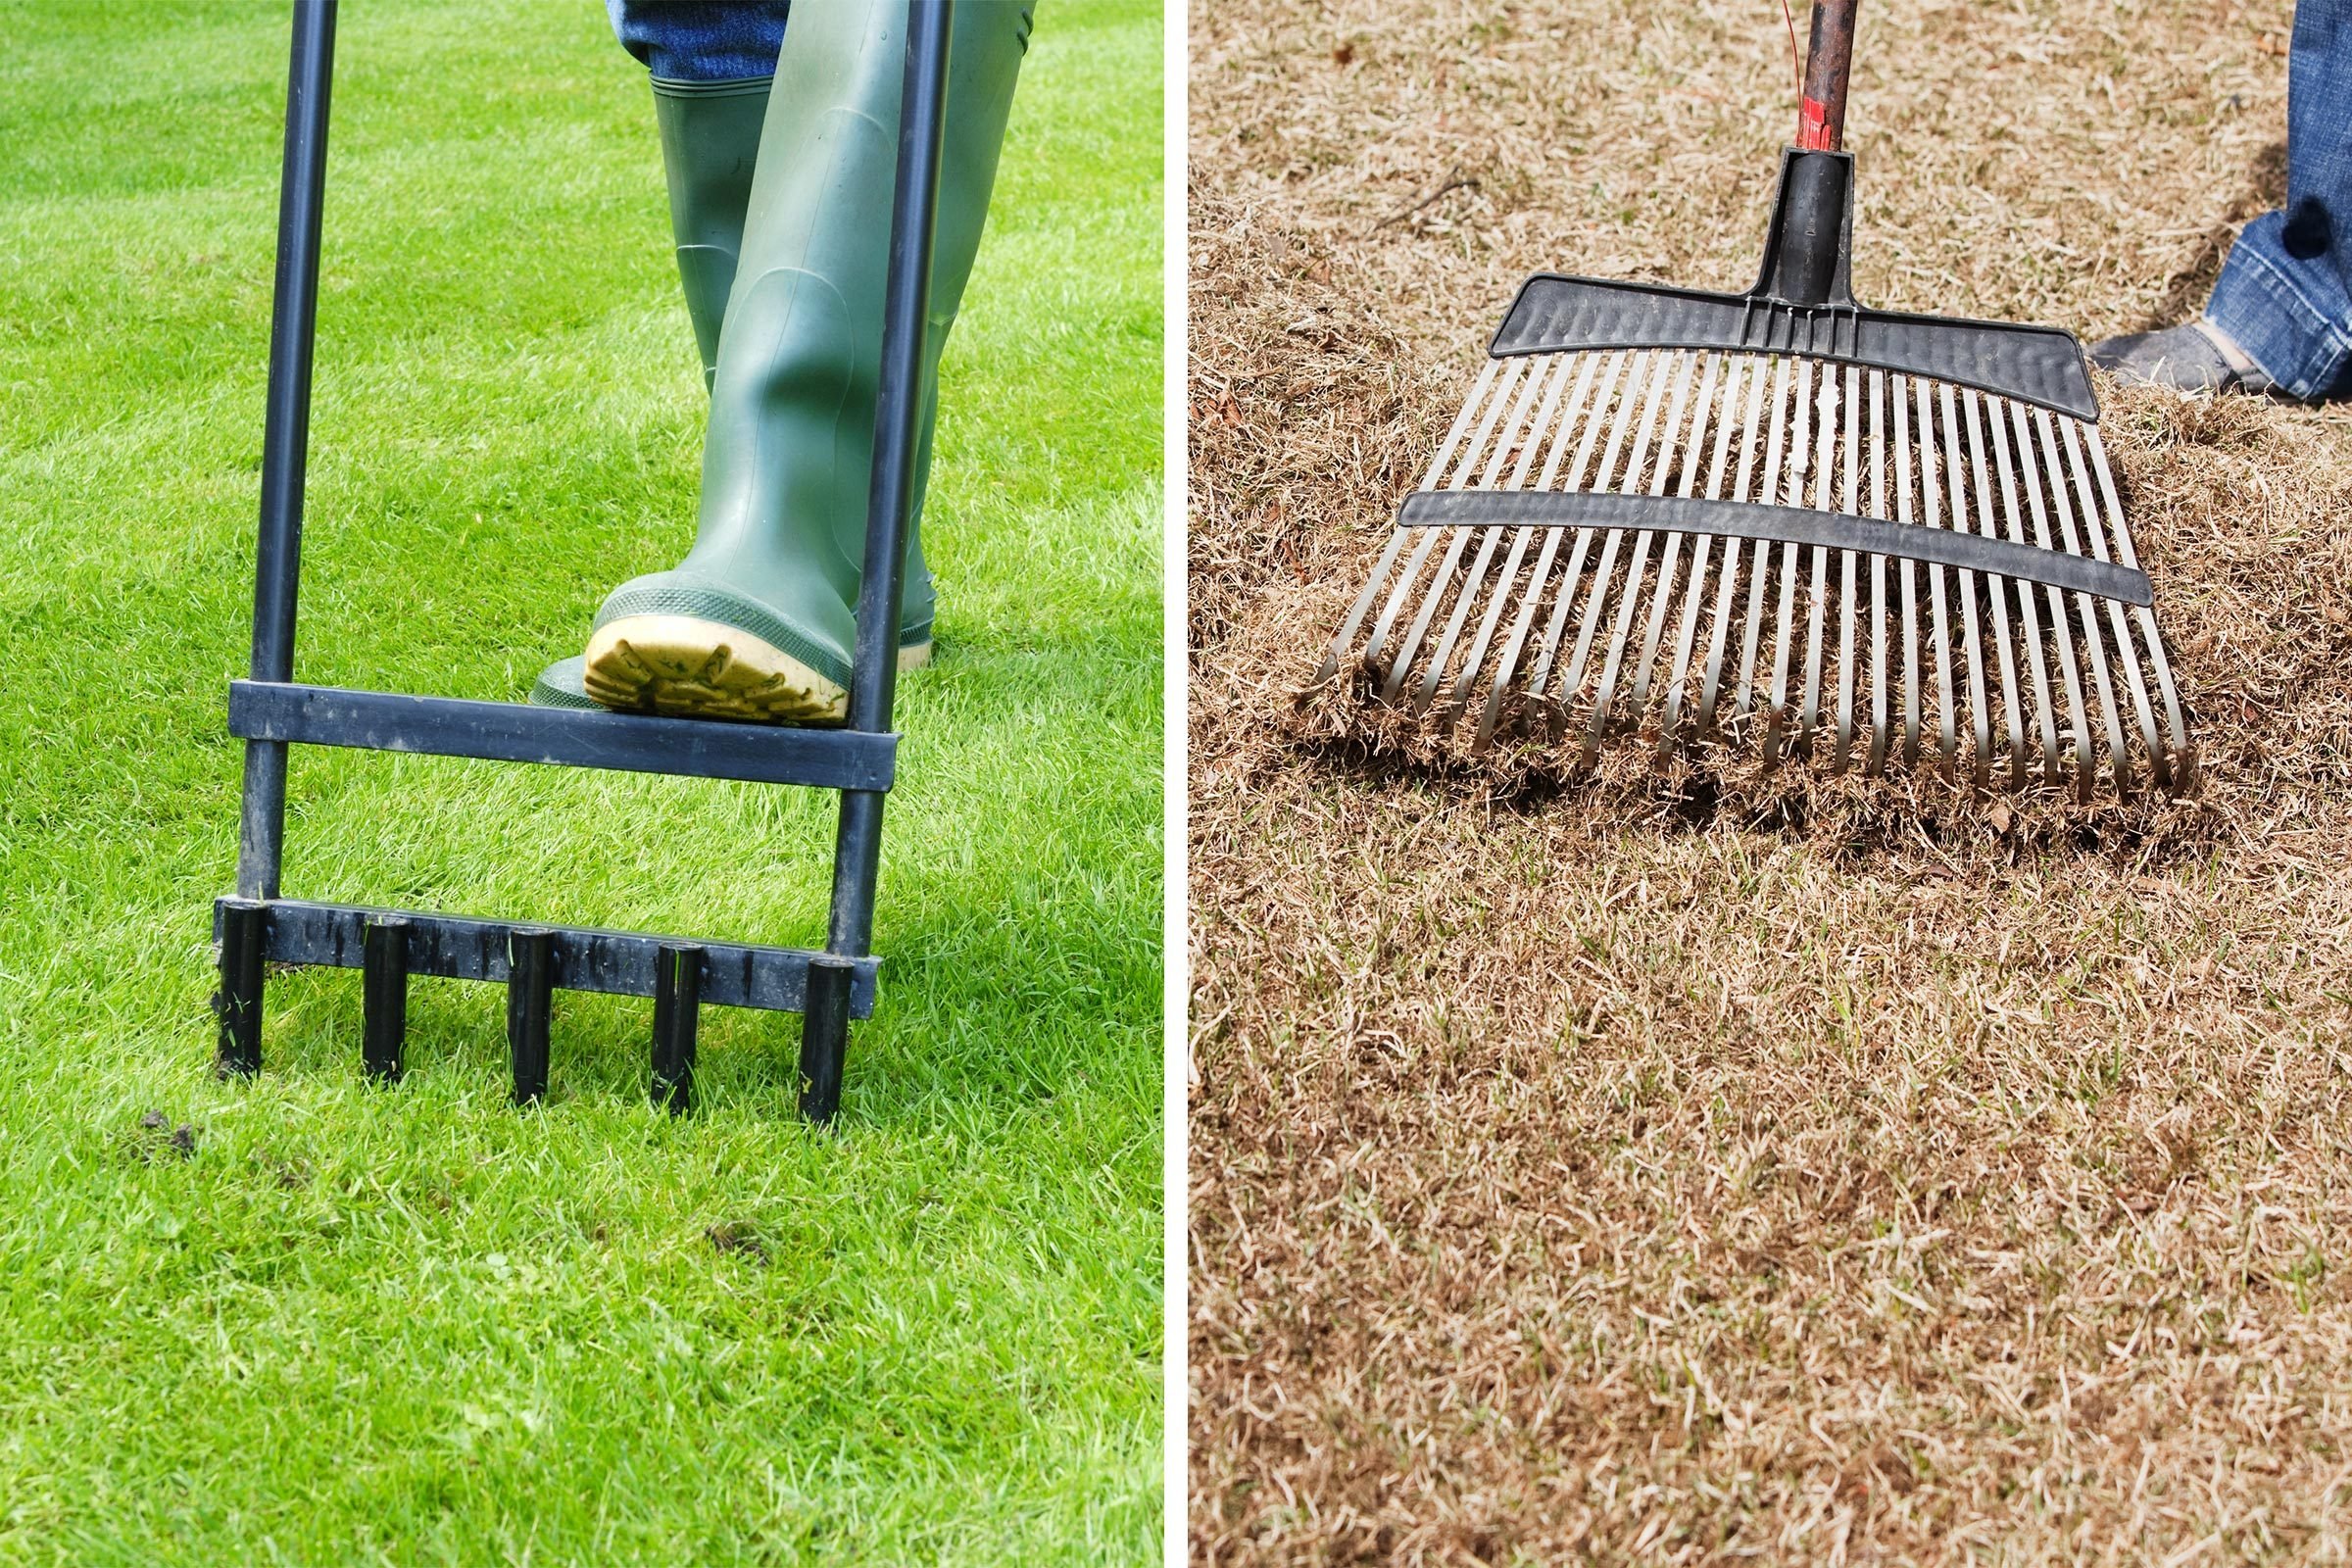
Various tools are available for dethatching, ranging from manual dethatching rakes to power dethatchers (also called vertical mowers or verticutters). These tools use tines, blades, or flails that cut through and lift the thatch layer, allowing it to be raked away and removed from the lawn surface.
When to Dethatch Your Lawn
Timing is crucial for successful dethatching. You want to perform this procedure when your grass is in its active growing phase so it can recover quickly from the stress. For cool-season grasses like Kentucky bluegrass, perennial ryegrass, and fescues, the ideal time is early fall or early spring. For warm-season grasses such as Bermuda grass, Zoysia, and St. Augustine, late spring to early summer is optimal.
Avoid dethatching during drought conditions, periods of heat stress, or when weeds are actively germinating. Dethatching creates ideal conditions for weed seeds to establish, so consider applying a pre-emergent herbicide afterward if you’re dethatching in spring.
What is Aeration: Creating Pathways for Life
While dethatching addresses issues above the soil line, aeration tackles problems below it. Soil compaction occurs when soil particles are pressed together, reducing the space between them where air, water, and nutrients typically flow. This compaction is common in high-traffic areas, lawns built on heavy clay soils, and areas where construction activity has occurred.
Aeration is the process of creating holes or channels in the soil to alleviate this compaction. These openings allow air, water, and nutrients to penetrate deeper into the soil profile, reaching the root zone where they’re most needed. The process encourages stronger, deeper root growth, enhances microbial activity, and improves the overall health and resilience of your lawn.
The most effective type of aeration is core aeration (sometimes called plug aeration), which removes small cores or plugs of soil from the lawn. These cores, typically 2-3 inches long and ¼-¾ inches in diameter, are deposited on the surface where they break down naturally, recycling nutrients and introducing beneficial microorganisms to the thatch layer to accelerate decomposition.
Signs Your Lawn Needs Aeration
Unlike thatch, which is visible upon close inspection, soil compaction isn’t always obvious. Here are some indicators that your lawn might benefit from aeration:
- Water pools on the surface after rain or irrigation
- Lawn feels hard underfoot
- Difficulty pushing a screwdriver into the soil
- Stunted growth despite adequate fertilization
- Thinning grass in high-traffic areas
- Excessive runoff and poor water absorption
When to Aerate Your Lawn
Like dethatching, aeration should be performed during your grass type’s active growing season. For cool-season grasses, early fall is ideal, with early spring as a second option. Warm-season grasses respond best to aeration in late spring through early summer. The EPA’s WaterSense program recommends aeration as a water-efficient lawn care practice, as it allows irrigation water to soak into the soil rather than running off, reducing waste and promoting conservation.

Dethatching vs. Aerating: Key Differences and When to Use Each
While both dethatching and aerating improve the health of your lawn, they address different issues and shouldn’t be used interchangeably. The table below highlights the key differences between these two lawn care practices:
| Feature | Dethatching | Aerating |
|---|---|---|
| Primary Function | Removes excess thatch layer above soil | Alleviates soil compaction below surface |
| Target Problem | Thatch buildup exceeding ½ inch | Compacted soil preventing air/water circulation |
| Tools Used | Dethatching rake, power dethatcher, vertical mower | Manual core aerator, power core aerator, liquid aerator |
| Typical Frequency | Every 1-2 years for most lawns | Annually for heavily used lawns; every 2-3 years for others |
| Recovery Time | 3-4 weeks | 2-4 weeks |
| Best For | Lawns with excessive thatch but minimal compaction | High-traffic lawns, heavy clay soils, newly constructed lawns |
| Material Removed | Dead grass, stems, roots above soil line | Soil cores/plugs |
| Follow-up Care | Raking and removal of thatch material | Leave soil cores to decompose naturally |
Do You Need Both Treatments?
In some cases, your lawn may benefit from both dethatching and aerating. When excessive thatch combines with soil compaction, tackling both problems can produce dramatic improvements in lawn health. If you determine that both treatments are necessary, it’s generally best to dethatch first, then aerate a few days later. This sequence allows the aerator better access to the soil and ensures that the cores pulled during aeration contain mostly soil rather than thatch.
However, for lawns with severe thatch problems (more than 1 inch), core aeration alone may not be sufficient. In these cases, aggressive dethatching followed by core aeration provides the most effective rehabilitation strategy.
How to Dethatch Your Lawn: Step-by-Step Guide
Whether you decide to tackle the job yourself or hire a professional, understanding the proper dethatching procedure ensures better results. Here’s a comprehensive approach to dethatching your lawn:
Preparation
- Mow your lawn slightly lower than normal, but not so low that you risk scalping it. About 1.5 to 2 inches is typically appropriate.
- Mark sprinkler heads, shallow utility lines, and other obstacles to avoid damaging them during the process.
- Water your lawn lightly 2-3 days before dethatching to ensure the soil is moist but not soggy. This makes thatch removal easier and reduces stress on grass plants.
The Dethatching Process
For small lawns, a dethatching rake may suffice. These specialized rakes have sharp tines that dig into the thatch layer and pull it up. For larger areas, renting a power dethatcher saves significant time and effort. These machines typically offer adjustable depth settings—start with the shallowest setting and adjust as needed.
When using a power dethatcher:
- Make two passes over your lawn, the second perpendicular to the first, to ensure thorough thatch removal.
- Work in straight lines, overlapping slightly with each pass.
- Be especially careful when turning the machine to avoid damaging the grass.
After dethatching:
- Rake up and remove all the loose thatch material. This debris can be composted if it doesn’t contain weed seeds or disease pathogens.
- Apply fertilizer according to soil test recommendations to support recovery.
- Water thoroughly to help your lawn recover from the stress of dethatching.
Post-Dethatching Care
Your lawn will look rough immediately after dethatching—this is normal. With proper care, it should recover within a few weeks. During this recovery period:
- Water more frequently but avoid saturation
- Stay off the lawn as much as possible
- Avoid applying herbicides until the grass has recovered
- Consider overseeding, especially in thin areas

How to Aerate Your Lawn: Professional Techniques
Core aeration is more technically demanding than dethatching but follows a similar process:
Preparation
- Water your lawn deeply 1-2 days before aeration. The soil should be moist but not waterlogged. Overly dry soil prevents the aerator from penetrating deeply, while soggy soil leads to further compaction.
- Mark irrigation heads and other obstacles just as you would before dethatching.
- Identify areas with the most compaction that need extra attention.
The Aeration Process
Core aerators come in manual and power versions. Manual aerators work for small areas but require considerable physical effort. Power aerators are more efficient for average to large lawns.
When using a core aerator:
- Make multiple passes over the most compacted areas.
- For average lawns, aim for 8-10 holes per square foot.
- Leave the soil plugs on the lawn rather than raking them up. They contain valuable microorganisms and will break down naturally, returning nutrients to the soil.
Post-Aeration Lawn Care
After aeration, your lawn is ideally positioned to receive additional treatments:
- It’s an excellent time to overseed, as the aeration holes provide perfect germination sites with good soil contact.
- Apply compost as a top dressing to introduce beneficial microorganisms and organic matter.
- If soil tests indicate deficiencies, apply lime or other amendments now for maximum effectiveness.
- Water thoroughly but avoid creating runoff.
Common Mistakes to Avoid in Lawn Maintenance
Even with the best intentions, homeowners often make mistakes that undermine their lawn care efforts. Here are some pitfalls to avoid when dethatching and aerating:
Dethatching Mistakes
- Removing too much thatch at once: If your thatch layer exceeds 1 inch, consider removing it gradually over several sessions to avoid stressing the lawn.
- Improper timing: Dethatching during dormant periods or extreme weather conditions can kill grass rather than help it.
- Confusing thatch with other issues: Sometimes what looks like thatch could actually be shallow roots due to frequent light watering. Adjust your watering practices before dethatching.
- Over-dethatching: Annual dethatching isn’t necessary for most lawns and can damage healthy grass. Only dethatch when the thatch layer exceeds ½ inch.
Aeration Mistakes
- Insufficient coverage: A single pass with an aerator usually doesn’t provide adequate decompaction. Aim for approximately 20-40 holes per square yard.
- Using spike aerators: These push soil aside rather than removing cores, potentially increasing compaction around the holes. Core aerators are more effective.
- Aerating wet soil: While soil should be moist, overly wet conditions lead to muddy plugs that seal quickly rather than maintaining open channels.
- Removing the soil cores: Let them decompose naturally to recycle nutrients and introduce microorganisms that help break down thatch.

Seasonal Lawn Care: Creating an Annual Maintenance Schedule
Incorporating dethatching and aeration into a comprehensive lawn care calendar ensures your grass receives appropriate attention throughout the year. While specific timing depends on your grass type and local climate, here’s a general framework for a complete lawn care program:
Early Spring (March-April)
- Apply pre-emergent herbicide to prevent crabgrass and other weeds
- Light fertilization for cool-season grasses
- Dethatching for cool-season grasses if needed
- Soil testing to guide fertilization throughout the year
Late Spring (May-June)
- Core aeration for warm-season grasses
- Dethatching for warm-season grasses if needed
- Grub control if you’ve had previous infestations
- Spot treatment for broadleaf weeds
Summer (July-August)
- Minimal intervention—focus on proper watering during hot periods
- Raise mowing height to reduce stress
- Monitor for insect activity and treat as needed
Early Fall (September-October)
- Core aeration for cool-season grasses
- Overseeding to thicken the lawn and introduce improved grass varieties
- Primary fertilization for cool-season grasses
- Broadleaf weed control
Late Fall (November-December)
- Final mowing at reduced height
- Last fertilization for cool-season grasses (winterizer)
- Leaf removal to prevent smothering the grass
Professional vs. DIY: Making the Right Choice for Your Lawn
Both dethatching and aerating can be approached as DIY projects or hired out to professionals. Your decision should consider several factors:
Cost Considerations
Professional dethatching typically costs $100-$300 for an average lawn, while professional aeration ranges from $75-$225. DIY equipment rental averages $60-$120 per day for either a power dethatcher or core aerator.
For infrequent use, renting equipment is more cost-effective than purchasing. However, if you plan to maintain multiple properties or have extensive lawn areas, investing in equipment might make financial sense long-term.
Time and Effort
Both procedures require physical exertion and time commitment:
- Dethatching a 5,000 sq. ft. lawn takes approximately 2-3 hours, plus cleanup time.
- Core aeration for the same area requires 1-2 hours.
- Add time for preparation, equipment pickup/return, and post-procedure care.
Quality Considerations
Professional lawn care services offer several advantages:
- Commercial-grade equipment that may be more effective than rental units
- Experience in adjusting depth and intensity to your specific lawn conditions
- Knowledge of proper timing for your grass species and local climate
- Bundled services that may include overseeding, fertilization, and other treatments
However, a knowledgeable homeowner with proper equipment can achieve comparable results while gaining valuable experience in lawn care practices.
