DIY Garden Furniture: Transform Your Outdoor Space with Handcrafted Solutions
Creating your own garden furniture is not just an economical way to furnish your outdoor space—it’s an opportunity to craft pieces that perfectly match your style, needs, and garden layout. With the right materials and techniques, you can build durable, beautiful pieces that rival store-bought alternatives at a fraction of the cost. This guide will walk you through everything you need to know about designing and building your own outdoor furniture, from material selection to finishing techniques that ensure your creations withstand the elements.
Why Building Your Own Outdoor Furniture Makes Sense
Whether you’re looking to outfit a compact city balcony or a sprawling backyard retreat, DIY furniture projects offer several compelling advantages:
- Cost Savings: Quality outdoor furniture often comes with hefty price tags. Building your own can reduce costs by 50-70% compared to retail options.
- Customization: Create pieces that perfectly fit your specific space and aesthetic preferences.
- Sustainability: Repurpose existing materials and reduce manufacturing and shipping impacts.
- Personal Satisfaction: Few things match the pride of relaxing on furniture you’ve built with your own hands.
- Quality Control: Choose materials and construction methods that ensure durability in your specific climate.
Materials Guide: Choosing the Right Foundations
The materials you select will determine your furniture’s appearance, durability, and maintenance requirements. Here’s a breakdown of popular options:
Wood Options
Cedar: Naturally resistant to rot and insects, cedar offers excellent durability with minimal maintenance. Its warm, reddish tones age beautifully to a silver-gray patina if left untreated.
Pressure-Treated Pine: An economical choice that resists rot and insects. Requires proper sealing but offers good durability for the price point.
Redwood: Premium choice with natural oils that resist decay. Beautiful rich color and straight grain make it ideal for showcase pieces.
Oak: Extremely durable hardwood that’s heavy and long-lasting. Requires proper sealing for outdoor use but creates heirloom-quality furniture.
Reclaimed Wood: Pallets, old fence boards, and barn wood offer character and sustainability. Ensure these haven’t been treated with toxic chemicals before use.
Alternative Materials
Cinder Blocks: Combined with wood, these create modern, industrial-style seating and tables at minimal cost.
PVC Pipe: Lightweight, waterproof, and inexpensive. Perfect for creating frames for cushioned furniture.
Metal: Rebar, metal piping, and old bed frames can provide strong structural elements.
Concrete: For table tops, benches, and decorative elements that offer industrial appeal and extreme durability.
Essential Tools for DIY Outdoor Furniture Projects
While the specific tools needed will vary by project, having these basics will prepare you for most garden furniture builds:
- Circular saw or miter saw
- Drill/driver with various bits
- Measuring tape and speed square
- Sanding materials (sandpaper and/or orbital sander)
- Weather-resistant screws and hardware
- Outdoor-rated wood glue
- Paintbrushes and rollers for finishes
- Clamps for securing pieces during construction
- Safety equipment (eye protection, gloves, ear protection)
Inexpensive DIY Patio Furniture Projects
1. Pallet Lounge Sofa
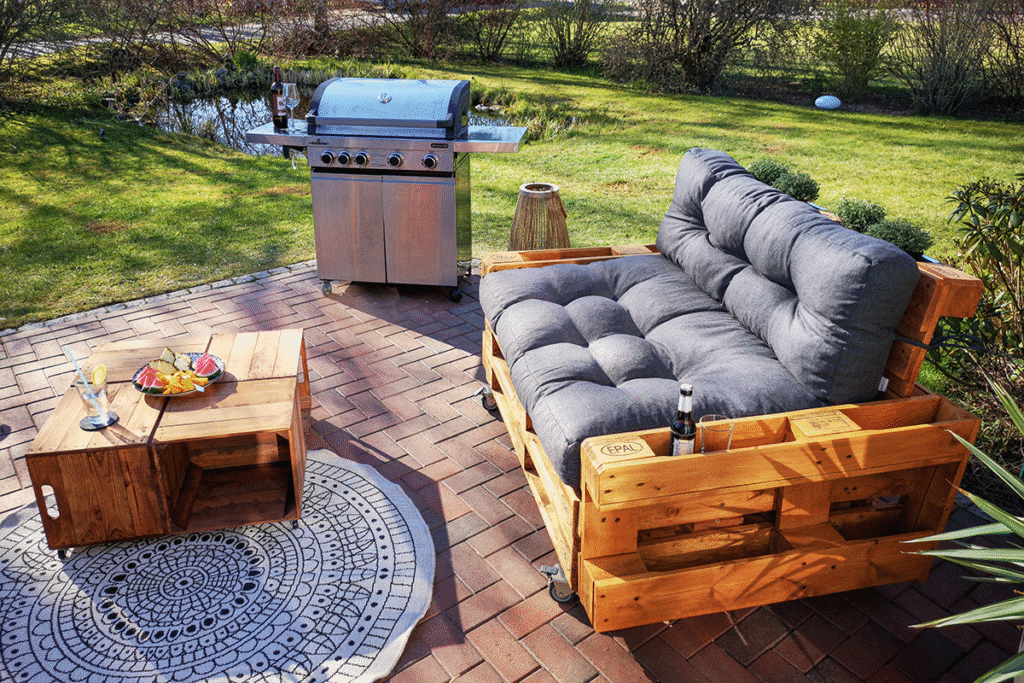
Materials Needed:
- 4-6 wooden pallets (heat-treated, not chemically treated)
- Sandpaper (medium and fine grit)
- Outdoor wood sealer or paint
- Outdoor cushions and pillows
- 8 heavy-duty casters (optional for mobility)
- Screws and drill
Step-by-Step Instructions:
- Prepare the pallets: Inspect each pallet for splinters, nails, or damaged sections. Sand thoroughly to create a smooth surface, working from medium to fine grit.
- Create the base: Arrange 2-3 pallets side by side for the sofa base. Secure them together using screws at multiple connection points.
- Add the backrest: Stand 1-2 pallets vertically behind the base and attach securely with screws or metal brackets.
- Install casters (optional): For larger setups, attach heavy-duty casters to the bottom for easy movement.
- Finish the wood: Apply 2-3 coats of outdoor wood sealer, stain, or paint, allowing proper drying time between coats.
- Add cushions: Measure and purchase or create cushions for comfort. Outdoor-specific fabric will resist fading and water damage.
Expert Tip: For extra durability, add a layer of water-resistant wood preserver before your final finish. This significantly extends the life of pallet wood, which isn’t naturally suited for prolonged outdoor exposure.
2. Concrete Block and Timber Bench

Materials Needed:
- 8-12 standard cinder blocks
- 4 pressure-treated 4×4 timbers (cut to desired length)
- Outdoor fabric or cushions
- Construction adhesive (optional)
Step-by-Step Instructions:
- Plan your layout: Determine the desired height and length of your bench. Standard cinder blocks are 8″×8″×16″, which will determine your spacing.
- Prepare the site: Create a level surface where the bench will stand, using gravel or pavers if on soft ground.
- Arrange blocks: Place cinder blocks on their sides in pairs, with openings facing outward for a decorative effect. Space them evenly to support your timbers.
- Add timber seats: Position 4×4 timbers across the blocks to create the seating surface. For permanent installation, secure with construction adhesive.
- Add cushions: Measure the timber surface and add cushions or create a padded cover with outdoor fabric for comfort.
Common Mistake: Failing to ensure the ground beneath is completely level can create a wobbly bench. Take time to create a solid, level foundation.
Best DIY Backyard Furniture Ideas
1. Convertible Picnic Table/Bench
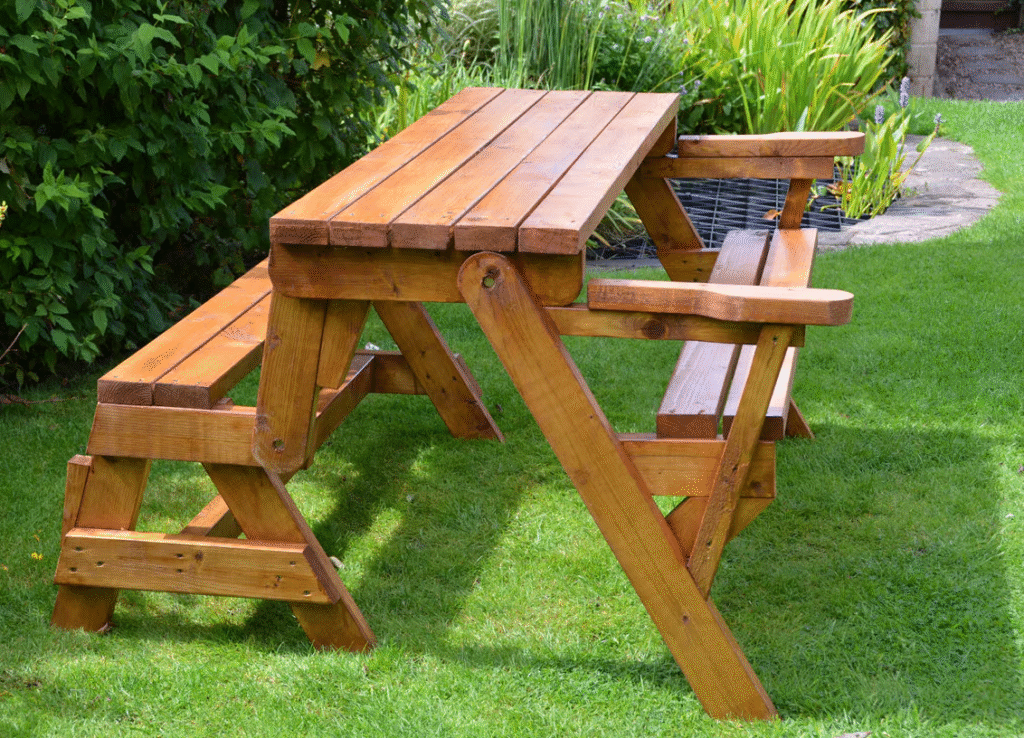
This clever design transforms from a standard bench to a picnic table with seating for 4-6 people.
Materials Needed:
- 12 – 2×4 boards (8 ft length)
- 2 – 2×6 boards (8 ft length)
- Weather-resistant screws
- Hinges (8 heavy-duty outdoor rated)
- Outdoor wood finish
- Measuring tape, saw, drill
Step-by-Step Instructions:
- Create the seat/tabletop boards: Cut 2×6 boards to desired bench length (typically 5-6 ft).
- Build the bench supports: Construct two H-shaped support frames using 2×4s.
- Create the conversion mechanisms: Build four identical rectangular frames that will serve as both the bench back and table supports.
- Attach with hinges: Use heavy-duty hinges to connect the conversion frames to both the bench seat and supports.
- Test operation: Ensure the bench converts smoothly between positions before final tightening.
- Sand and finish: Smooth all surfaces and apply 2-3 coats of outdoor wood finish.
Expert Tip: Add locking mechanisms or brackets to secure the table in both positions, preventing unexpected folding when in use.
2. Outdoor Storage Bench
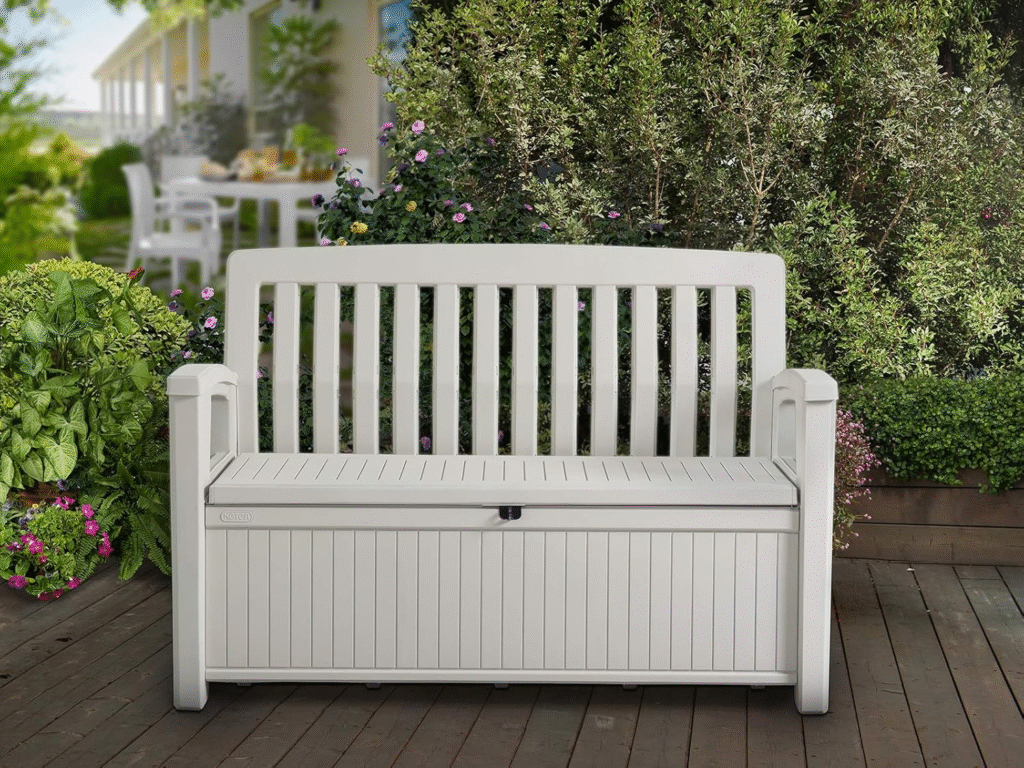
Combine seating with storage for a practical garden solution.
Materials Needed:
- 4 – 2×4 boards (8 ft length)
- 2 – 4×8 sheets of ¾” exterior-grade plywood
- 1 – 2×8 board (8 ft length)
- Weather-resistant screws
- 2 outdoor-rated hinges
- Outdoor paint or sealer
- Cushion for seating
Step-by-Step Instructions:
- Build the frame: Create a rectangular frame using 2×4s for the base, measuring approximately 4 ft long × 18 inches wide.
- Add corner supports: Install vertical 2×4s at each corner, determining your desired bench height (typically 18″).
- Cut plywood panels: Cut plywood for the sides, bottom, and lid according to your frame dimensions.
- Assemble the box: Attach plywood sides to the frame, then secure the bottom panel.
- Create and attach the lid: Reinforce the plywood lid with 2×4s underneath for strength. Attach with hinges to the back of the bench.
- Add finishing touches: Install a handle on the front and potentially a hydraulic hinge to prevent slamming.
- Sand, prime, and paint: Finish with outdoor-rated paint or sealer in multiple coats.
- Add cushioning: Create or purchase a cushion sized to your bench dimensions.
Common Mistake: Inadequate water drainage can lead to mildew and rot. Drill small drainage holes in the bottom or design with a slight gap to prevent water accumulation.
Build Your Own Outdoor Furniture: Advanced Projects
1. Adirondack Chair
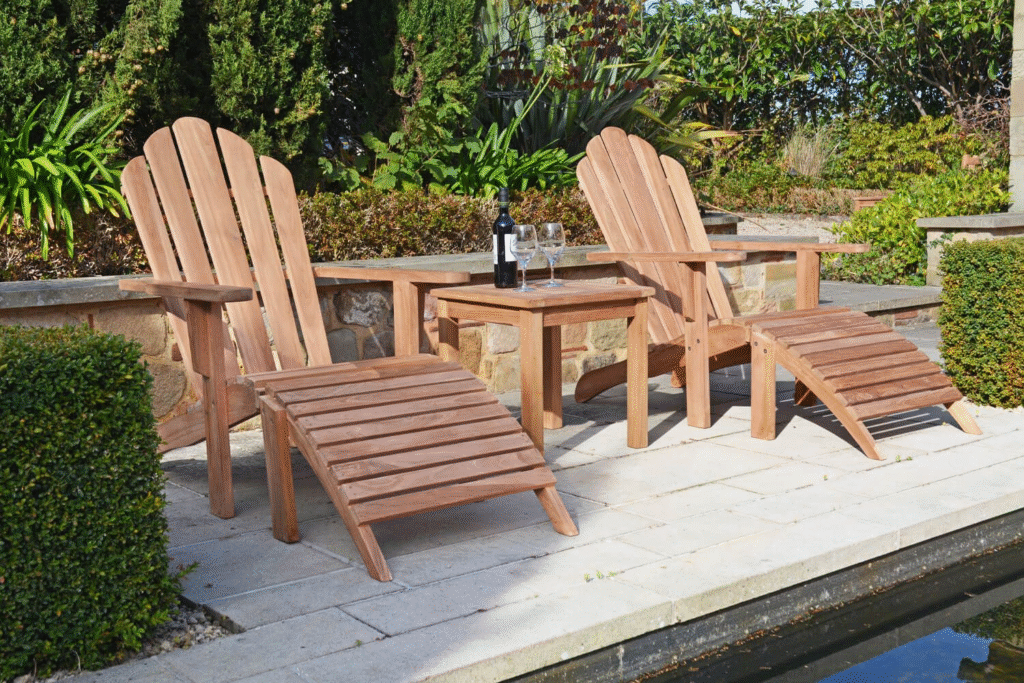
The classic Adirondack chair offers comfortable lounging and timeless style.
Materials Needed:
- 6 – 1×6 boards (8 ft length)
- 1 – 1×4 board (8 ft length)
- 1 – 2×4 board (8 ft length)
- Weather-resistant screws
- Outdoor wood finish
- Paper template (available online) or purchased plans
- Jigsaw for curved cuts
Step-by-Step Instructions:
- Transfer templates: Using plans, trace the components onto your boards—typically 2 side pieces, 5-7 back slats, 5 seat slats, 2 arms, and front/back leg supports.
- Cut all pieces: Carefully cut out each component, with special attention to the curved parts.
- Sand thoroughly: Round all edges and smooth surfaces completely before assembly.
- Assemble the frame: Begin by attaching the side rails to the back crosspiece.
- Add seat slats: Attach with proper spacing (approximately ¼” between boards).
- Install back slats: Work from the center outward, maintaining even spacing.
- Attach arms: Position and secure the arms to the front legs and back support.
- Apply finish: Use 3 coats of quality outdoor sealer, following manufacturer drying times.
Expert Tip: Make templates from inexpensive hardboard before cutting your good lumber. This allows you to test the fit and make adjustments before committing to your quality materials.
2. Outdoor Sectional Sofa
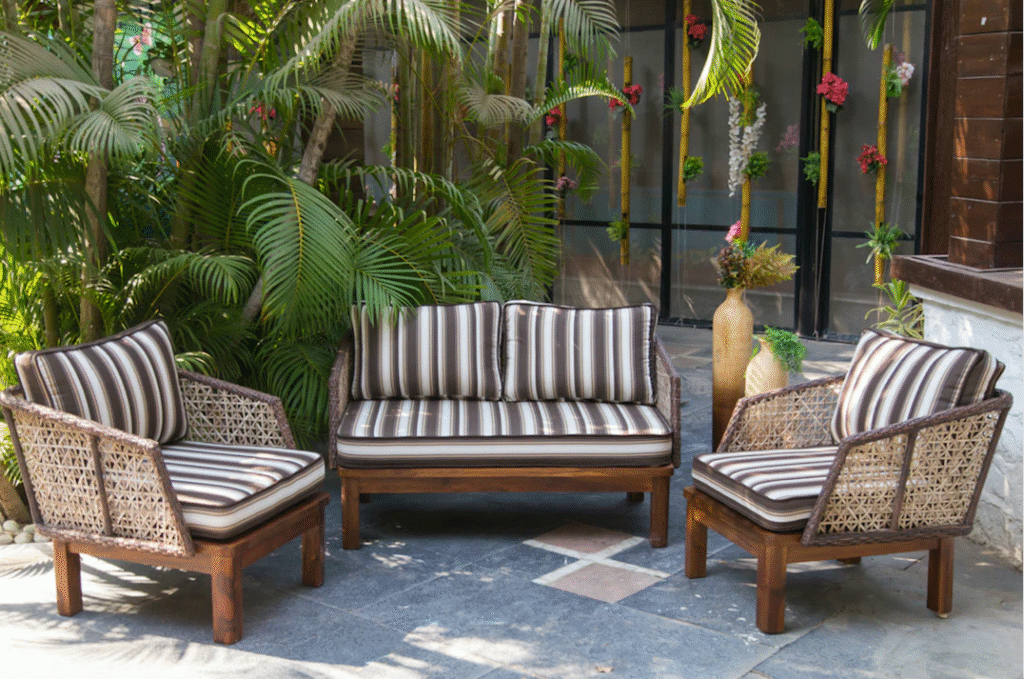
Create a modular outdoor sectional that can be rearranged to suit your needs.
Materials Needed:
- 15 – 2×4 boards (8 ft length)
- 5 – 2×6 boards (8 ft length)
- Weather-resistant screws
- Outdoor wood finish
- Outdoor cushions or custom cushions
- Measuring tape, saw, drill, Kreg jig (optional)
Step-by-Step Instructions:
- Plan your modules: Design individual sections (typically 30″ × 30″ for seat modules) that can be arranged in different configurations.
- Build frames: Create box frames with 2×4s for each module, reinforcing corners for stability.
- Add support slats: Attach 2×4 supports across each frame at 4″ intervals.
- Create seat surfaces: Attach 2×6 boards across the top of each module with ½” spacing between boards.
- Build back sections: Create vertical frames for back supports at desired height (typically 12-18″ above seat).
- Connect modules: Add brackets or design with interlocking elements to prevent shifting when arranged together.
- Sand and finish: Apply multiple coats of outdoor finish, allowing proper drying time.
- Add cushions: Create or purchase cushions specific to your dimensions.
Common Mistake: Underestimating the weight of the finished modules can make rearrangement difficult. Consider adding handles or designing smaller sections for easier movement.
Finishing and Maintaining Your DIY Garden Furniture
The finish you apply will significantly impact both the appearance and longevity of your outdoor furniture.
Finishing Options
Transparent Sealers: Preserve the natural wood appearance while providing UV and moisture protection. Reapply annually.
Semi-Transparent Stains: Add color while allowing wood grain to show through. Typically last 2-3 years.
Solid Stains and Paints: Provide the most protection and color options. Can last 3-5 years with proper application.
Oils (Teak, Linseed): Enhance natural wood beauty but require more frequent reapplication (2-3 times per year).
Maintenance Tips
- Regular Cleaning: Brush off debris and wash with mild soap solution seasonally.
- Annual Inspection: Check for loose screws, splinters, or finish wear each spring.
- Touch-Ups: Address small damaged areas before they spread.
- Protective Covers: Use breathable covers during extended bad weather or off-seasons.
- Elevation: Keep wood furniture from direct contact with ground using small feet or pads.
Design Considerations for DIY Outdoor Furniture
Scale and Proportion
Measure your outdoor space carefully before designing furniture. Oversized pieces can overwhelm small patios, while undersized furniture looks insubstantial in large spaces.
Comfort Factors
- Seat Height: 16-18 inches is standard for comfortable adult seating.
- Seat Depth: 18-22 inches for chairs, 24-30 inches for lounging furniture.
- Back Angle: 100-110 degrees provides relaxed posture without slouching.
- Armrest Height: 7-9 inches above the seat for optimal comfort.
Weather Considerations
- Wind Exposure: Heavier furniture or anchoring solutions for windy locations.
- Sun Exposure: UV-resistant finishes for furniture in direct sunlight.
- Moisture Levels: Enhanced water protection for humid climates or near pools/water features.
Inspiring DIY Backyard Furniture Ideas
Repurposed Materials Projects
- Cable Spool Tables: Large wooden spools from electrical companies make excellent tables with minimal modification.
- Tire Ottomans: Wrap old tires in rope or fabric for unique, weather-resistant seating.
- Wine Barrel Furniture: Split barrels make charming chairs, while intact ones create distinctive tables.
Kid-Friendly Options
- Sandbox Picnic Table: Combine a central sandbox with surrounding bench seating.
- Play Table with Storage: Outdoor activity table with built-in compartments for toys.
- Stepping Stump Seats: Secured tree rounds of varying heights create playful seating that doubles as a balance course.
Final Thoughts on Building Your Own Outdoor Furniture
Creating your own garden furniture connects you more deeply with your outdoor space while developing valuable woodworking skills. Start with simpler projects to build confidence, then progress to more complex designs as your expertise grows. By investing time in proper material selection, careful construction, and appropriate finishing, your DIY outdoor furniture can provide years of enjoyment and significant savings over commercial alternatives.
Remember that outdoor furniture requires different construction approaches than indoor pieces. Focus on water drainage, material expansion, and securing against wind. With these considerations in mind, your handcrafted garden furniture will become a source of pride and function in your outdoor living space.
What specific type of DIY garden furniture project are you most interested in tackling first? I’d be happy to provide more detailed plans or suggestions tailored to your particular outdoor space and skill level.
