How to Grow and Use Culinary Artichokes: A Complete Guide
Are you looking to add a gourmet touch to your home garden? Artichokes (Cynara scolymus) are not only delicious culinary treasures but also striking ornamental plants that can elevate both your garden aesthetics and your dining experience. Native to the Mediterranean region, these perennial thistles have been cultivated for centuries for their edible flower buds. With proper care and attention, you can successfully grow these nutritious delicacies right in your backyard, in containers, or even indoors.
Understanding Artichokes
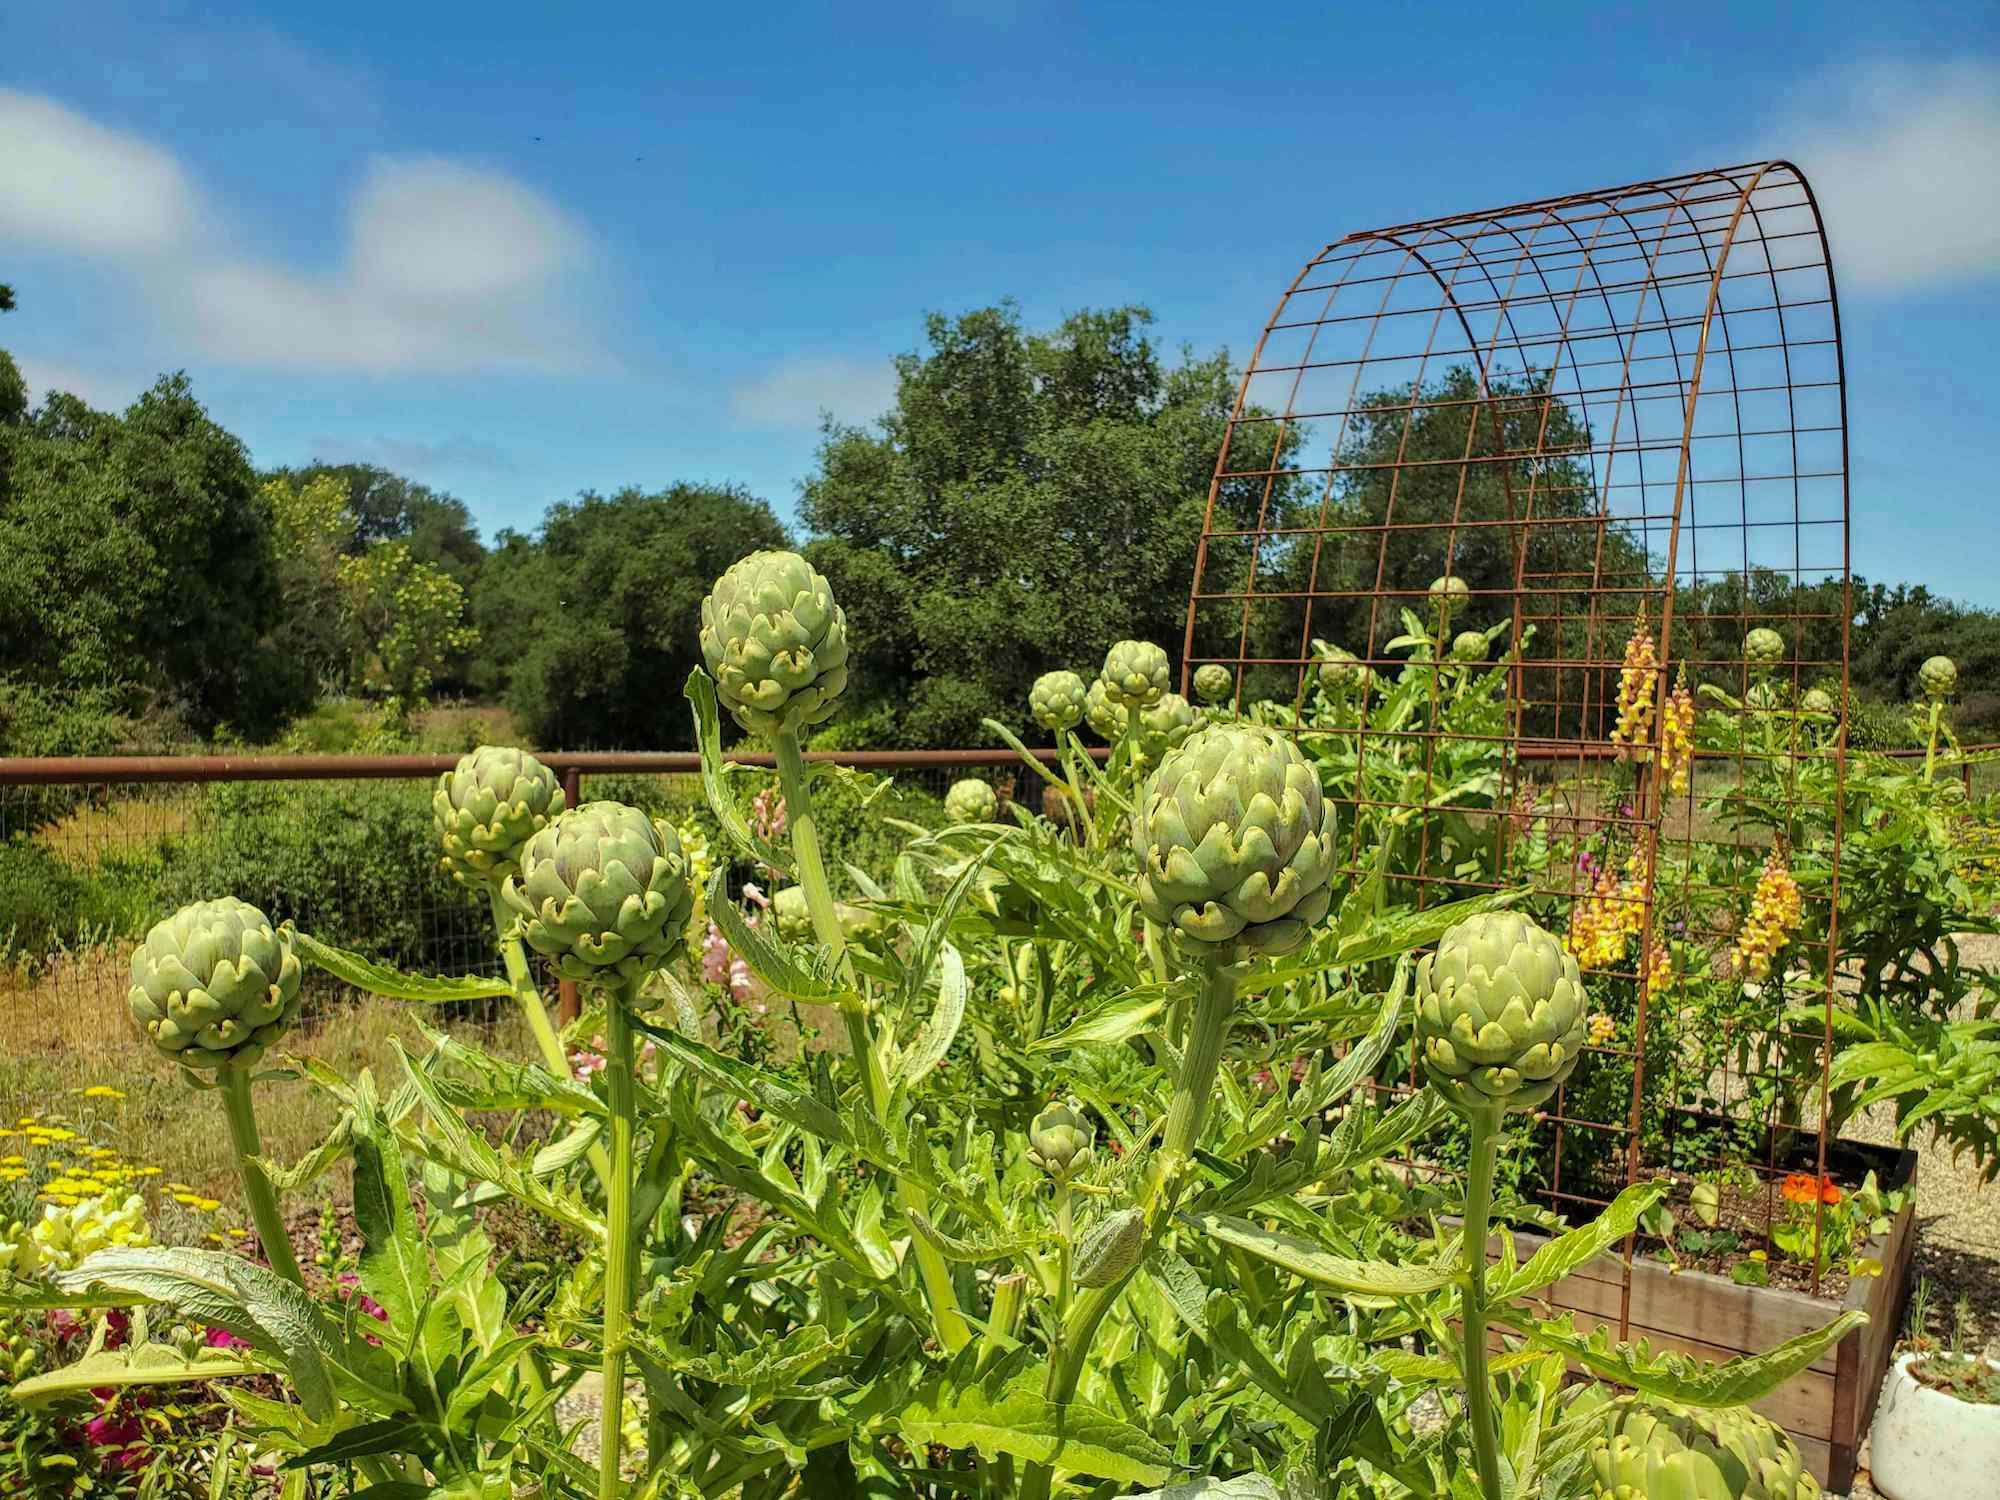
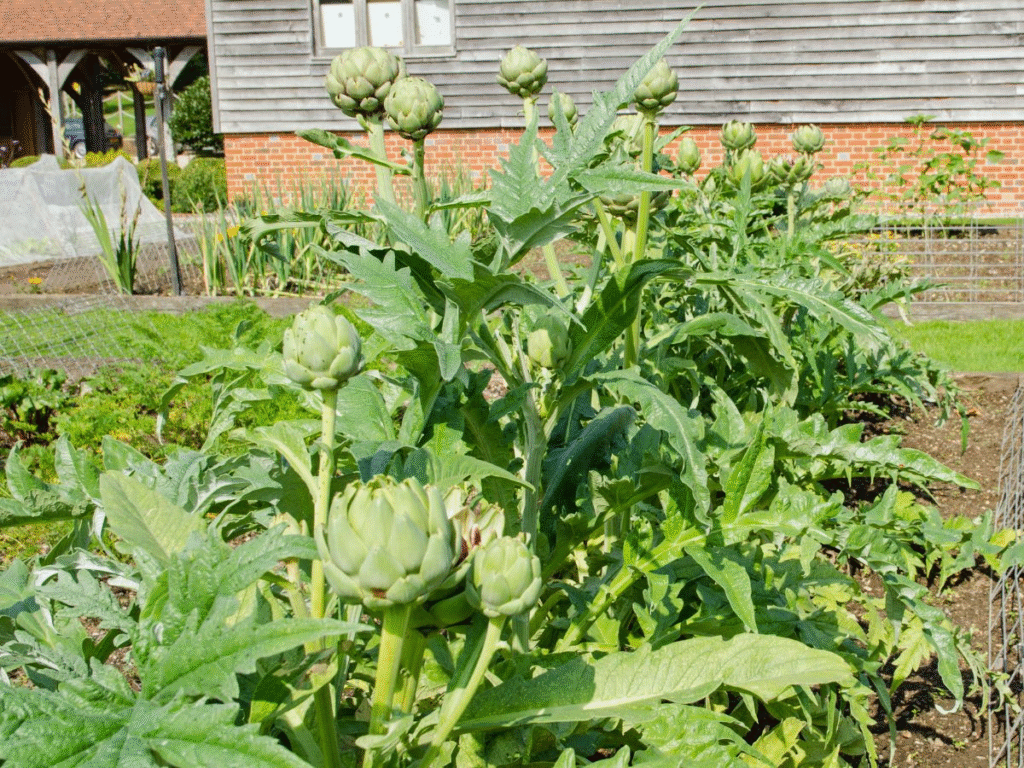
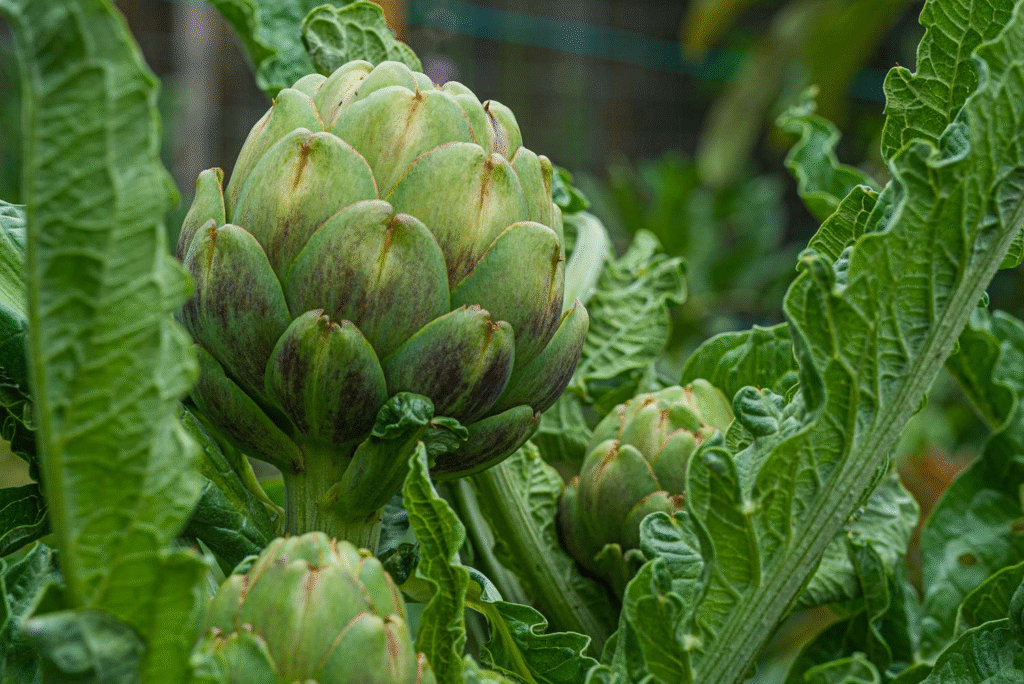
Before diving into cultivation methods, it’s important to understand what you’re working with. Artichokes are perennial plants in USDA hardiness zones 7-11 but can be grown as annuals in colder regions. They produce large, silvery-green foliage and tall stems topped with the edible flower buds we know and love.
According to the USDA Agricultural Research Service, artichokes are excellent sources of antioxidants, fiber, vitamins, and minerals. The US market for artichokes has been steadily growing as more Americans discover this versatile vegetable.
Types of Artichokes for Home Cultivation
When selecting varieties for your garden, consider your climate and available space:
- Green Globe: The most common variety in the US market, known for its large buds and excellent flavor
- Imperial Star: Developed specifically for annual production, ideal for colder regions
- Purple of Romagna: Italian heirloom variety with purple-tinged buds
- Violetto: Early-producing Italian variety with purple buds
Growing Artichokes from Seed
Starting artichokes from seed offers variety and cost savings, though it requires patience. Here’s how you can successfully grow artichokes from seed:
Seed Starting Timeline and Conditions
For best results, start your artichoke seeds indoors 8-10 weeks before your last spring frost date. This gives them ample time to develop before transplanting outdoors.
- Seed preparation: Soak seeds in warm water for 12 hours before planting to improve germination rates.
- Planting medium: Use a well-draining seed starting mix in 4-inch pots or seed trays with drainage holes.
- Planting depth: Sow seeds ¼ inch deep and cover lightly with soil.
- Temperature: Maintain soil temperature between 70-80°F (21-27°C) for optimal germination. Use a heat mat if necessary.
- Light requirements: Once sprouted, provide 14-16 hours of bright light daily using grow lights or a sunny south-facing window.
- Moisture level: Keep soil consistently moist but not waterlogged during germination and early growth.
- Germination timeline: Expect germination within 10-14 days under optimal conditions.
Seedling Care and Transplanting
Your seedlings require attentive care to develop into healthy plants:
- Thinning: Once seedlings develop their first true leaves, thin to the strongest plant per cell or pot.
- Hardening off: Two weeks before transplanting outdoors, begin gradually exposing seedlings to outdoor conditions, starting with 1-2 hours of filtered sunlight and increasing daily.
- Transplanting timing: Transplant outdoors after all danger of frost has passed and soil temperatures reach at least 50°F (10°C).
- Spacing: Plant seedlings 4-6 feet apart in rows 6-8 feet apart. Yes, they need this much space!
Growing Artichokes in Garden Beds
Artichokes make impressive additions to garden beds, growing up to 4-5 feet tall and wide with their architectural foliage. Follow these guidelines for successful garden bed cultivation:
Site Selection and Soil Preparation
Selecting the right location and preparing proper soil are crucial first steps:
- Sun exposure: Choose a location that receives full sun (6+ hours daily) in cooler climates or partial afternoon shade in hot regions.
- Wind protection: Select a spot protected from strong winds that could damage tall stalks.
- Soil type: Artichokes prefer rich, well-draining soil with high organic matter content.
- Soil pH: Maintain a slightly acidic to neutral pH between 6.0-7.0. Test your soil before planting and amend if necessary.
- Soil preparation: Work in 4-6 inches of compost or well-rotted manure to a depth of 12 inches before planting.
Planting and Maintenance
Once your garden bed is prepared, follow these steps for planting and caring for your artichokes:
- Planting depth: Set transplants at the same depth they were growing in their containers.
- Initial watering: Water thoroughly after planting to eliminate air pockets around roots.
- Mulching: Apply 3-4 inches of organic mulch around plants, keeping it away from stems, to conserve moisture and suppress weeds.
- Watering schedule: Provide 1-2 inches of water weekly, more during hot weather or if grown in sandy soil.
- Fertilization: Feed monthly with balanced organic fertilizer or compost tea during the growing season.
Growing Artichokes in Containers
Limited space? No problem! Artichokes can thrive in containers with proper care:
Container Selection and Setup
- Container size: Choose a container at least 24 inches in diameter and 24 inches deep per plant.
- Container material: Terra cotta, fabric, or plastic containers all work well; ensure adequate drainage holes.
- Growing medium: Use a high-quality potting mix blended with compost at a ratio of 3:1.
- Drainage layer: Add a 2-inch layer of gravel at the bottom of the container for improved drainage.
Container Care Specifics
Container-grown artichokes need extra attention:
- Watering frequency: Check moisture levels daily; container plants dry out faster than those in the ground.
- Fertilization: Apply liquid fertilizer every 2-3 weeks during the growing season at half the recommended strength.
- Winter protection: In zones 6 and below, move containers to a protected area like an unheated garage during winter, keeping soil barely moist.
- Repotting: Refresh soil annually in spring before new growth appears.
Growing Artichokes Indoors
Yes, you can grow artichokes indoors with the right setup, though they won’t reach the same size as outdoor plants:
Indoor Growing Requirements
- Light conditions: Provide at least 8 hours of bright, direct sunlight daily or 14-16 hours under grow lights.
- Temperature: Maintain daytime temperatures between 70-80°F (21-27°C) and nighttime temperatures at least 10°F cooler.
- Humidity: Use a humidity tray or room humidifier to maintain 50-60% humidity around plants.
- Air circulation: Set up a small fan for gentle air movement to prevent fungal issues.
Indoor Artichoke Varieties
Some varieties are better suited for indoor growing:
- Imperial Star: Compact growth habit makes it suitable for indoor cultivation.
- Violetto: Early production means faster harvests for indoor growers.
Seasonal Care for Artichokes
Spring Care
- Mulch removal: Remove winter mulch gradually as temperatures warm.
- Division: Divide established plants every 3-4 years in early spring.
- Fertilization: Apply balanced organic fertilizer when new growth appears.
Summer Care
- Heat protection: Provide afternoon shade in regions where temperatures regularly exceed 85°F (29°C).
- Water management: Never allow soil to dry completely; maintain consistent moisture.
- Pest monitoring: Watch for aphids, artichoke plume moths, and slugs; treat promptly with organic controls.
Fall Care
- Harvest completion: Finish harvesting all buds before frost in annual growing regions.
- Pruning: Cut plants back to 8-10 inches after harvest in perennial growing regions.
- Mulching: In zones 7-8, apply 8-12 inches of mulch around plant bases for winter protection.
Winter Care
- Protection: In marginal zones (6-7), construct protection using frost blankets or straw bales around plants.
- Watering: Reduce watering but don’t allow roots to dry completely during dormancy.
Artichoke Growth Timeline and Expectations
Understanding the growth timeline helps manage expectations:
| Growth Stage | Timeline | Plant Height | Care Notes | Expected Outcome |
|---|---|---|---|---|
| Germination | 10-14 days | 0-1 inch | Keep soil warm (70-80°F) and moist | Emergence of cotyledons |
| Seedling | 2-6 weeks | 2-6 inches | Provide 14-16 hours of light daily | Development of true leaves |
| Early Growth | 2-3 months | 1-2 feet | Begin hardening off before transplanting | Established root system |
| Vegetative Growth | 3-5 months | 3-5 feet | Regular feeding and watering | Full leaf development |
| Bud Formation | 5-6 months (year 1) or spring (year 2+) | 4-6 feet | Increased watering during bud formation | Small buds becoming visible |
| Harvest Period | 6-8 months from seed (year 1) or 3-4 months after growth resumes (year 2+) | 5-6 feet | Harvest when buds are tight and firm | Edible flower buds |
Harvesting and Using Artichokes
All your hard work culminates in harvest time. Here’s how to make the most of your artichoke crop:
When and How to Harvest
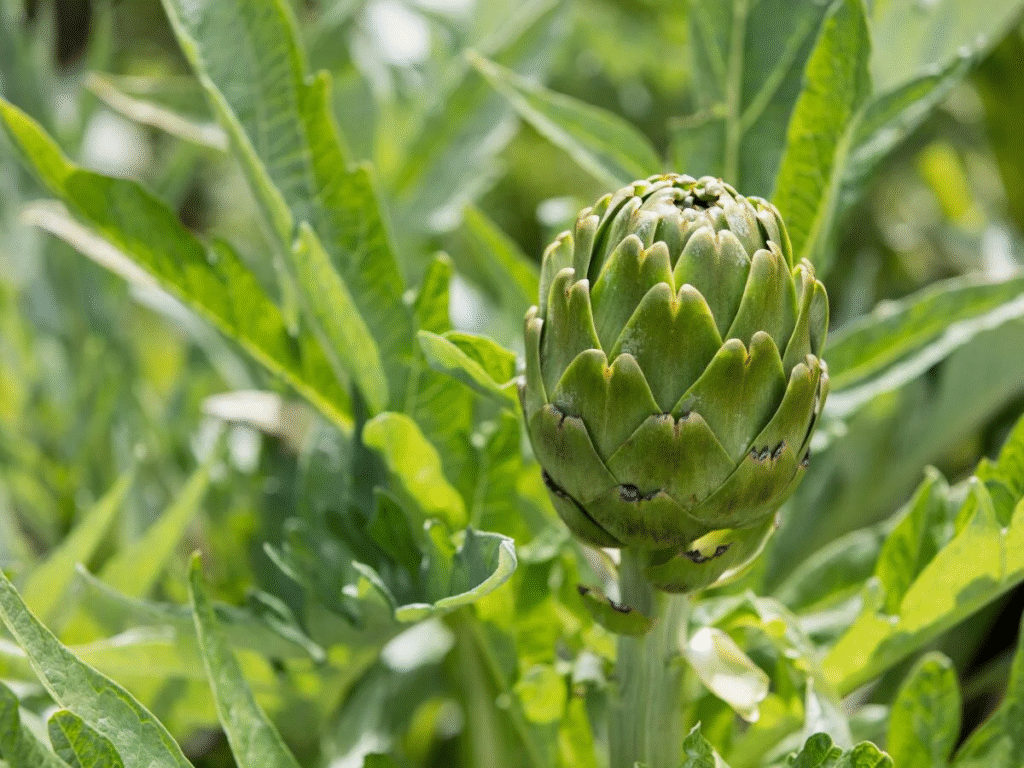
- Timing: Harvest buds when they’re firm and tight, before bracts begin to separate.
- Size guide: Primary buds (on the main stem) should be harvested when they reach 3-5 inches in diameter.
- Cutting technique: Use sharp pruning shears to cut the stem 1-2 inches below the bud.
- Secondary buds: After harvesting the main bud, smaller side buds will develop; harvest these when they reach 2-3 inches in diameter.
Post-Harvest Handling
- Immediate use: For best flavor, use freshly harvested artichokes within 24 hours.
- Short-term storage: Store unwashed artichokes in a plastic bag in the refrigerator for up to one week.
- Washing: Rinse just before preparation, not before storage.
Culinary Uses
Artichokes are versatile in the kitchen:
- Steaming: The classic preparation method, steam for 25-45 minutes depending on size.
- Grilling: Parboil first, then slice in half and grill for a smoky flavor.
- Stuffing: Fill with breadcrumb mixtures and bake for an impressive presentation.
- Baby artichokes: When harvesting smaller side buds, prepare them whole—trim tops and outer leaves, and they can be sautéed or roasted whole.
Common Problems and Solutions
Even with proper care, you may encounter these common issues:
Pests
- Aphids: Control with strong water spray or insecticidal soap applications.
- Artichoke plume moth: Remove affected leaves and use Bacillus thuringiensis (Bt) as a biological control.
- Slugs and snails: Set up beer traps or apply diatomaceous earth around plants.
Diseases
- Powdery mildew: Improve air circulation and apply neem oil or potassium bicarbonate sprays.
- Botrytis (gray mold): Remove affected parts and avoid overhead watering.
- Root rot: Ensure proper drainage and avoid overwatering.
Environmental Issues
- Bolting: If plants flower too quickly (especially in hot regions), provide afternoon shade and consistent moisture.
- Freeze damage: Apply proper winter protection in colder zones.
Conclusion
Growing artichokes requires some effort and patience, but the rewards—both culinary and ornamental—are well worth it. Whether you have acres of land or just a sunny windowsill, you can enjoy these Mediterranean treasures fresh from your own garden. Start with quality seeds or plants, provide the right growing conditions, and soon you’ll be harvesting your own gourmet artichokes that rival anything you can find at the market.
Remember that artichokes are perennials by nature, and while they can be grown as annuals, they reach their productive peak in their second and third years. With proper care, a single plant can produce for up to 5 years in favorable climates, making them a valuable addition to your sustainable home garden.
For additional information on artichoke varieties and cultivation techniques specific to your region, visit the USDA Plant Hardiness Zone Map to determine your growing zone and tailor your artichoke growing strategy accordingly.
